Installing your CPU is an important step in the PC building process. The processor sits at the heart of your system. It handles all the complex tasks on your PC and is vital for gaming, creative work, or even just browsing the internet. Welcome to the Overclockers UK Academy lesson: How to reseat or install an AMD or Intel CPU.
As we know, there are two brands of processors to choose from: AMD and Intel. Before starting the installation process, you need to ensure you have compatible hardware. Your motherboard needs a compatible CPU socket, and each processor utilises a specific chipset on top of this. If you are at all unsure, you can check the motherboard manufacturer’s website where they will fully list compatible processors.
In the case of some motherboard and processor combos, you will need to do a quick BIOS update before they will work together. This can, again, be checked on the manufacturer’s website. It is best to check this before starting – you don’t want to find out that your PC won’t boot later on.
Watch how to install a Processor:
Step by Step guide:
Prepare the Motherboard
1. The first step is to prepare the motherboard. Carefully unbox it, remove the static bag, and place it on a non-conductive surface. The motherboard box works perfectly fine for this purpose.
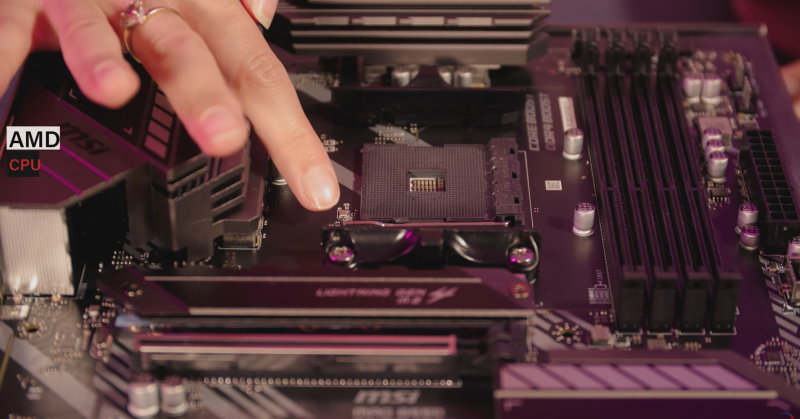
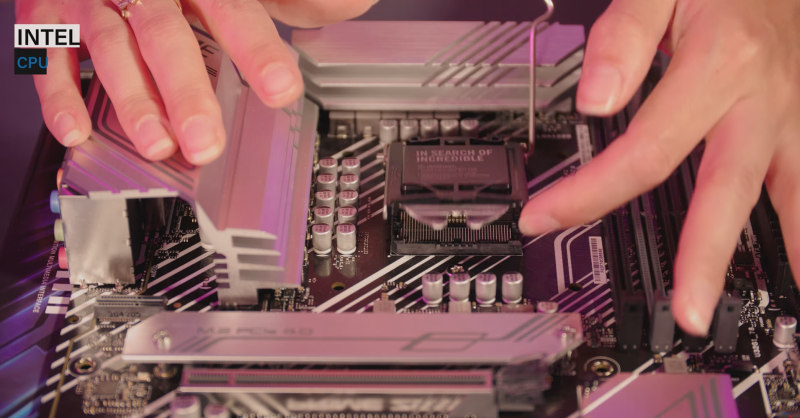
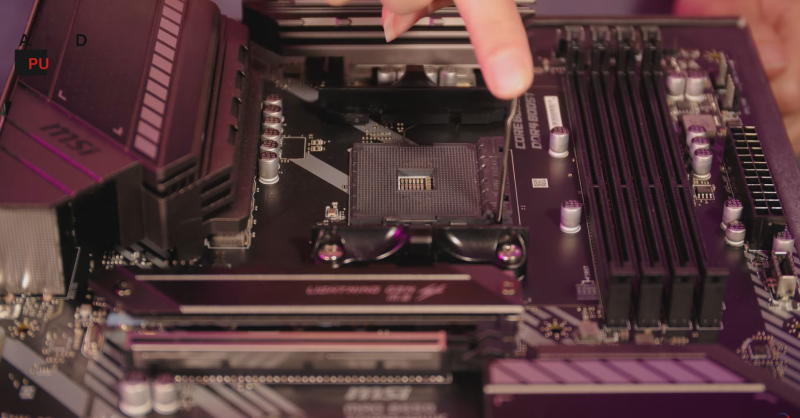
2. Next, locate the CPU socket. It will be in the centre of the board, but take some time to familiarise yourself with the layout for later hardware installations. Intel motherboards will keep the CPU inside a bracket which can be accessed via the retaining arm. On AMD motherboards, the CPU will sit on a moveable top plate that is controlled via the retaining arm, as well. On most motherboards, the retaining arm will hold the processor in place once it’s been installed.
New for Ryzen 7000 Series. The AMD AM5 socket and platform was introduced with AMD Ryzen 7000 Series CPUs. Moving away from the PGA (Pin Grid Array) model, this socket utilises LGA (Land Grid Array) like Intel does. This means that with AM5 motherboards, you will need to follow the Intel instructions. If anything is unclear during the installation process, check the manufacturer’s website.
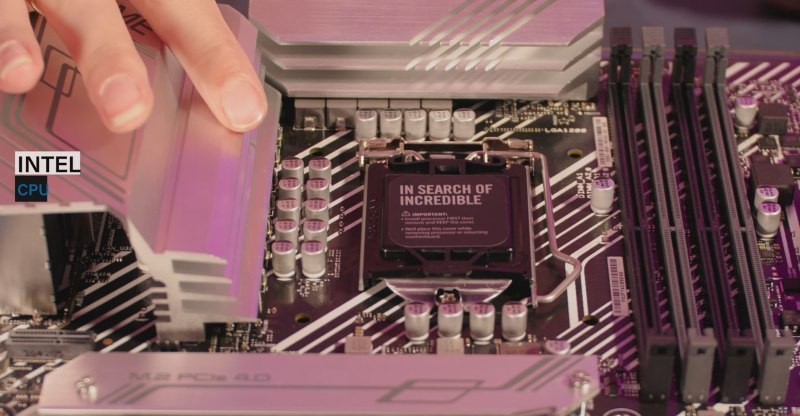
3. Now, lift the retaining arm or bracket. Remove any plastic that could be protecting the CPU socket. Some Intel motherboards might have a piece of plastic covering the metal bracket that should stay in place during installation. If this is the case, it will be labelled accordingly and pop off once your CPU is installed.
Place the CPU
4. Now, carefully unbox the processor, making sure to hold it by the edges. This is vitally important because you could damage the CPU otherwise. On an LGA (Intel or AM5) processor, you could contaminate the contacts. Alternatively, you risk bending the pins on a PGA (pre-7000 Series AMD) processor if it is held incorrectly.
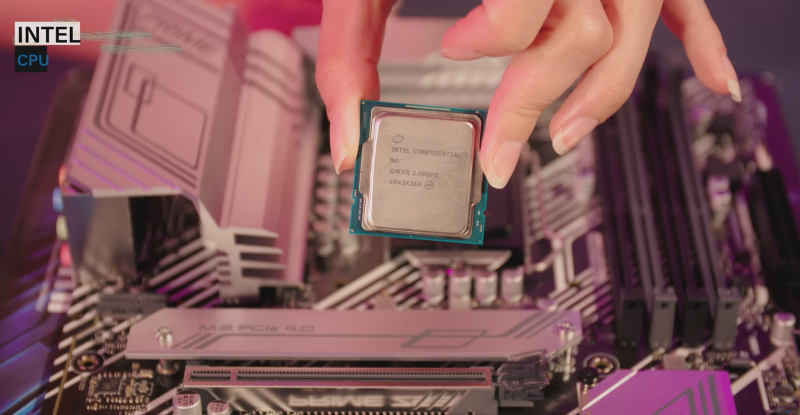
5. Next, work out the correct orientation. A processor can only be installed into the socket in one orientation. This is indicated by a small triangle on or near the motherboard socket and a gold triangle on the processor. Look for this indicator and match them up. If you don’t see an indicator, make sure to check your motherboard’s manual for installation instructions.
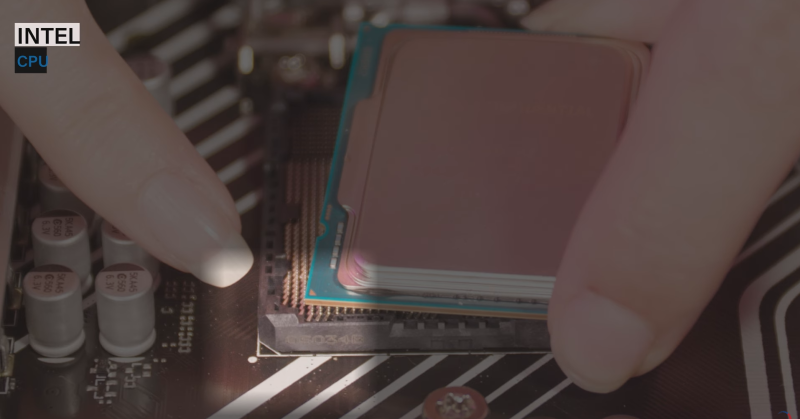
6. Moving on, you can now seat the CPU safely in its socket. Place it gently until it drops neatly into place. An AMD processor can be slightly more difficult to seat because of the pins. Just take your time and be gentle.
7. Finally, you should be able to close the retention arm. On an Intel CPU, you will need to lower the bracket first. If it feels like you’re really forcing it double-check that the processor is correctly seated, you don’t want to risk bending contacts. If your Intel motherboard had a plastic cover on the bracket, this is when it will pop off – simply remove when it does.
Thermal Paste and CPU Coolers
After installing your processor it’s important to remember to apply thermal paste and then install a CPU cooler. Installing a cooler is imperative, for it keeps your processor operating at optimum temperatures whilst preventing heat damage. Certain coolers come with either pre-applied or pre-portioned thermal paste – sometimes both! – to take the guesswork out of how much you really need. It’s less than you would think, a small pea-sized blob is enough to cover the CPU bracket once the cooler is installed.
Make sure you’re in the know when it comes to applying thermal paste. We’ve got a handy guide that takes you through this process step by step.
It’s important you match the right cooler with your CPU, from ability to manage thermals to its physical fit. We have another helpful guide to ensure you make no wrong turns.

Reseating Your Processor
When it comes to reseating your CPU, many of these steps will be similar. Unboxing your motherboard won’t be necessary, as it is already out of the box and in your gaming PC – hopefully! But taking care to hold the processor by the edges, aligning the triangles, and being gentle remains imperative.
If you are still experiencing issues, check our dedicated pages for information on how to contact us or set up a return with us.
Fancy an Upgrade?
If you are in the market for an upgrade, the Overclockers UK website is chock full of powerful processors and the motherboards to match. You can explore our extensive ranges or take a look at our highlights below.
AMD Ryzen 7 7700X CPU
- 8 cores and 16 threads
- Up to 5.40GHz boost clock
- Compatible with DDR5 RAM
- 32MB L3 cache
- 5nm process and Zen 4 architecture

ASUS ROG Strix X670E-E Gaming WIFI (Socket AM5) DDR5 ATX Motherboard
- AM5 sock motherboard with X670 chipset
- Supports Ryzen 7000 Series CPUs
- Includes DDR5 and PCIe 5.0 technology
- Extensive connectivity options, including M.2 ports
- Features WiFi 6E
Intel Core i7-14700KF (Raptor Lake-S) Socket LGA1700 Processor
- 20 cores and 28 threads with 5.6GHz single core max turbo
- Advanced hybrid architecture – 8P and 12E cores
- Dual channel DDR4/DDR5 controller
- Extensive compatibility with Windows 11
- Features such as Intel Smart Cache, Intel Deep Learning, and Intel Optane Memory
ASUS ROG Maximus Z790 Apex Encore LGA 1700 Motherboard
- LGA Socket 1700 with Z790 chipset
- Compatible with 12th, 13th, and 14th Gen Intel CPUs
- Next-gen tech such as DDR5 and PCIe 5.0
- Extensive connectivity for internal and external hardware
- ATX form factor
Building your own gaming PC can be a daunting task. That’s why we’ve put together the Overclockers UK Ultimate PC Building Guide.
The Overclockers UK Academy
Dedicated to helping you troubleshoot simple PC issues, check out our range of OcUK Academy articles and videos for more!
- 6 min read
Emily Haylock
Author
Emily is a board and cosy gamer, keyboard obsessive, and content copywriter for Overclockers UK. She has been with Overclockers UK for two years, writing about everything from noblechairs to 8Pack PCs. She writes from within her desk nest with a foster pup at her feet. (What, a desk duvet is a totally normal thing!) In her downtime, she likes to play board games, farming sims, and old-school Final Fantasy. IX to be specific. It is the best, and that is a hill she will die on.
Read More >>