[Project] Out of Reach

Soldato
Joined
18 Apr 2007
Posts
3,736
Location
Probably in a river somewhere
That is unlucky, though "cable tidying device" does sound a bit mysterious. Are you allowed to tell us what it is, or is it top secret? :p

I'm always paranoid about getting deliveries made to the office. I'm checking the tracking website every few minutes and looking over my shoulder out the window for the van. Yesterday I saw the update that it had been signed for seconds before the receptionist walked in with my box!

PK!
 
Soldato
OP
Joined
31 May 2006
Posts
7,564
Location
West London
That is unlucky, though "cable tidying device" does sound a bit mysterious.
Are you allowed to tell us what it is, or is it top secret? :p

PK!

It's a high quality version of what most offices have round the walls - it's just I'm not using
it as strictly intended :D Don't want my bedroom looking to 'office' so I'm using it in it's
most minimal format. Seen to many rooms in my job that had been ruined buy electrical
contractors peppering walls with their mini-trunking guns :rolleyes:

Parts of it, will also be applied to the desk - but I've told you to much already.
A build log has to have a few to be revealed secrets :D
 
Last edited:
Soldato
OP
Joined
31 May 2006
Posts
7,564
Location
West London
Some temp info for you all - and a reminder of my starting point.

[email protected]@100%@42c - Thermalright xp120 and Amber at 7v’s (plus 2 case fans)
[email protected]@100%@52c - Zalman Reserator2 (7300 SE iil)*
[email protected]@100%@43c - Zalman Reserator2 (7300 SE iil)
[email protected]@ 75%@70c - Zalman Reserator2 (B3 stepping)
[email protected]@100%@42c - Zalman Reserator2 (7300 SE iil)
[email protected]@100%@54c - Zalman Reserator2 (7800GT OC iil)

[email protected]@100%@44c - Zalman Reserator2 (x975 [email protected] iil) new blocks
[email protected]@100%@42c - Zalman Reserator2 (x975 [email protected] iil) correct orientation
[email protected]@100%@43c - Zalman Reserator2 (P35 [email protected] iil) open case on wall
[email protected]@100%@47c - Zalman Reserator2 (P35 [email protected] iil) closed case on wall

* ill = inclued in loop

Some more work on optermal voltages and clocks to do - and maybe a complete drain and clean to remove
all the plant life but it's a start.
 
Last edited:
Soldato
OP
Joined
31 May 2006
Posts
7,564
Location
West London
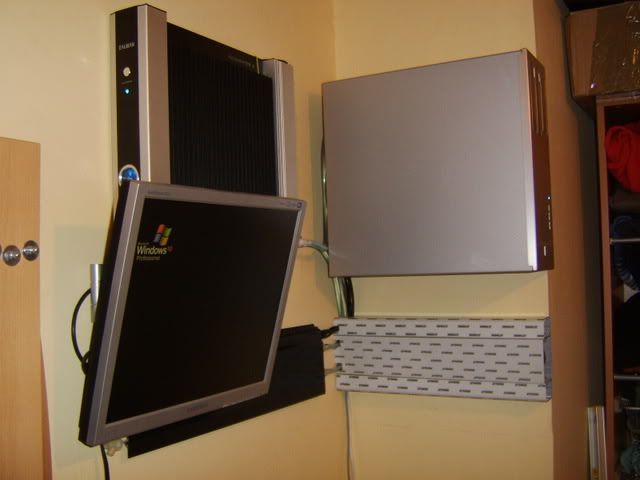
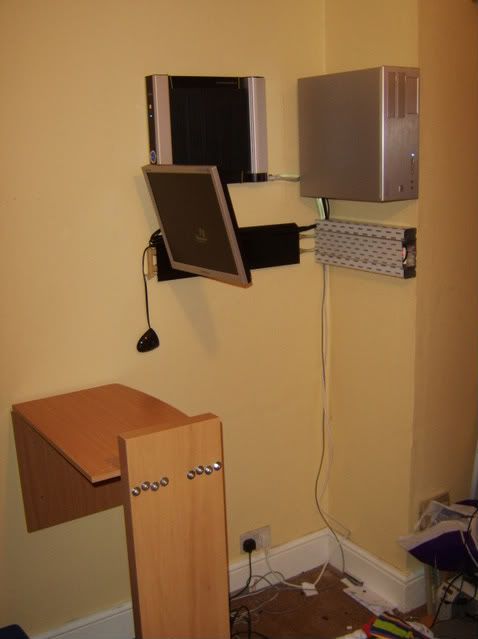
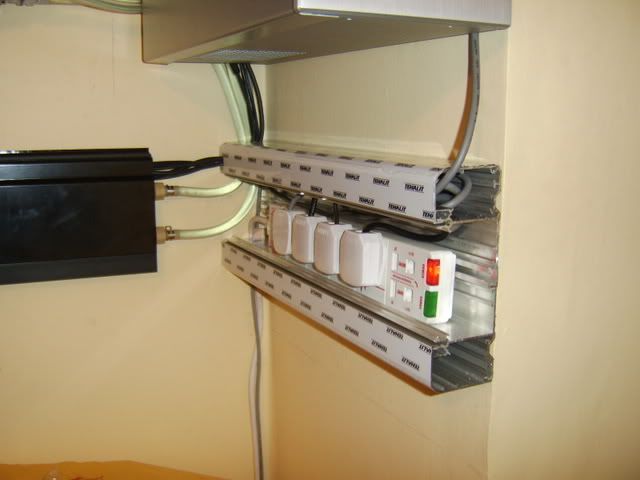
looks pretty cool, look a whole lot better once you get the cables tidied up like

Thanks - new kit arriving this week so should be tidy soon :cool:

But in the mean time

Phase 7: Bungee mod
well almost as I used elastic

I’ve been meaning to do this for some time as it was so successful in my last case.
In essence it’s a cheap alternative to the rubber mountings or cradles that house a HHD in a 5.25
drive bay. But I’ve only one spare bay and two hard drives…but I do have a plan :D

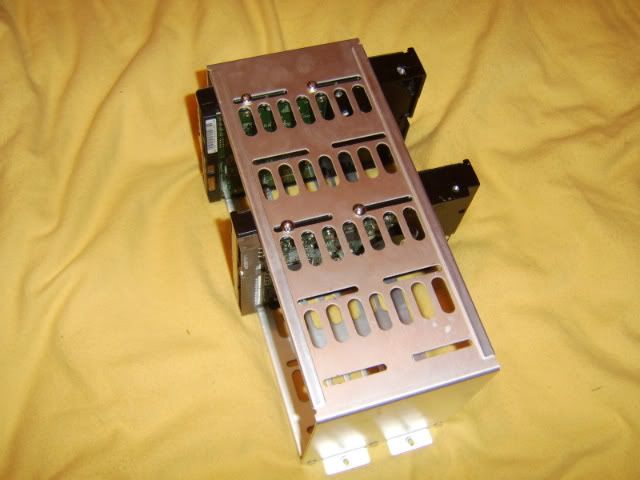
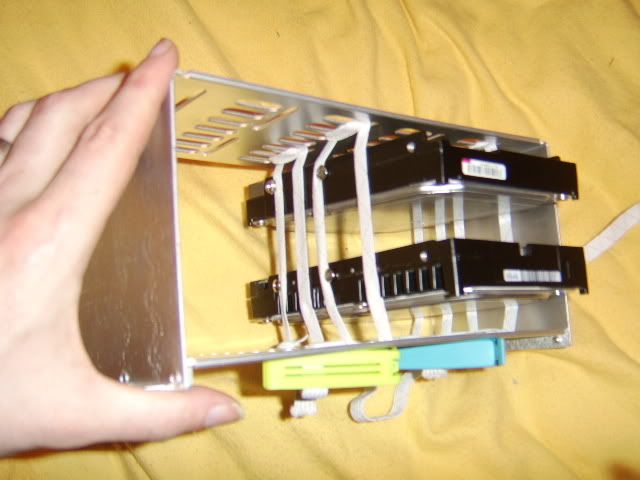
Firstly here the CW01 drive cage – room for 5 HHD
STA72666.jpg

Raptor and barracuda installed.

The drives fix very snugly within the cage so the only way to isolate them is by rotation.
This generates a problem and an opportunity – the drives fixing holes are now redundant and
there’s scores of unused cage fixing slots that can be utilized.

STA72667.jpg

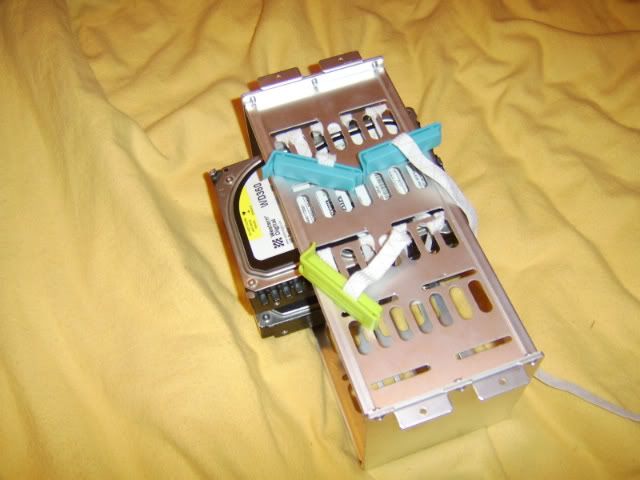
Clip-it’s make good temp knots

A shot of the case half threaded with the drives in position to check position. I used 10mm
flat elastic that works really well with the slots of the aluminum drive cage. When folded back
on it’s self the edges of the metal keep the elastic taught.

STA72668.jpg

Four lines of elastic

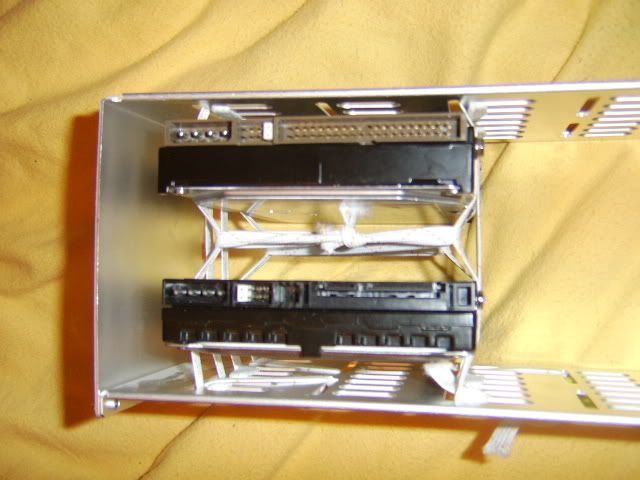
I was going to use some drive bay rails from my old Silverstone but in the end I just re-used
the four mounting screws that I had removed earlier. These could even be tighten up to grip
two of the elastic threads on each side.

STA72669.jpg

Tightening cross

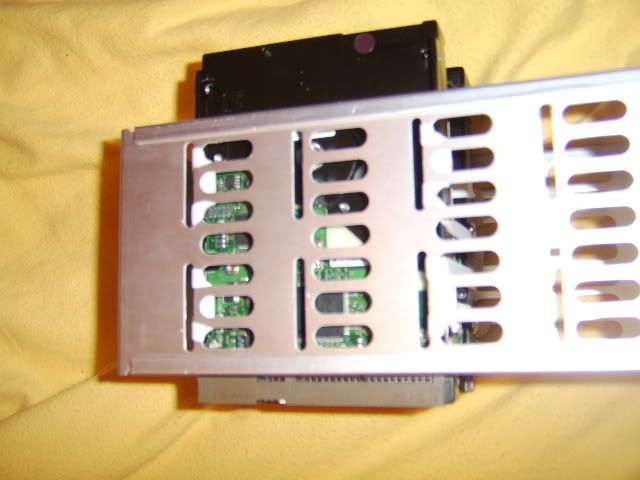
The drives were snug, suspended, but still able to move around a little too much for my liking.
So I added a simple twisted loop linking the first threads on either side with the last ones, which
stopping any rotational movement and tighten up the whole cradle.

STA72670.jpg

Curved stitching

Finished cage with the neat end of elastic bungee mod showing. You can also see how the
elastic come up through the slot and over into the first oval, along behind the second
and back up through the third oval and back down the slot again.

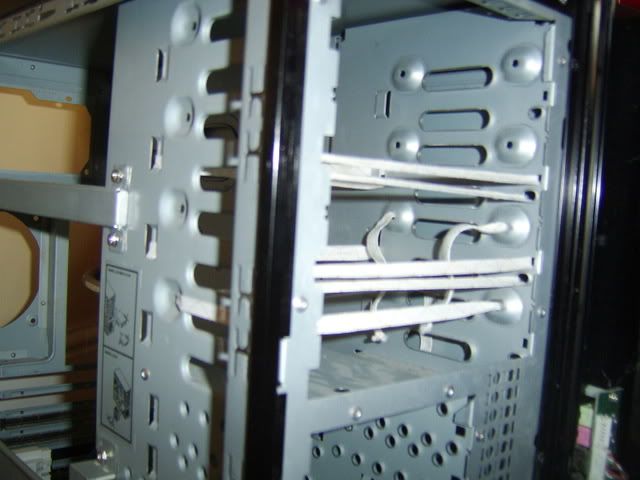
Result with the case lid on – near dead of night silence – even the raptors seek noise is now
a whisper, instead of an angry clicking of an hour ago.

Next job isolate the PSU – the fan whoosh at 900rpm is minimal but the resonance it creates
is now the loudest part even if it does have a soothing white noise profile.
 
Soldato
OP
Joined
31 May 2006
Posts
7,564
Location
West London
Don't see any reason why you can use an elastic cradle in a zen - much easier to install in a
bay with the same orintation as the drive. Here's what's left of the array in my TJ05 - had
two HHD and my DVD-rw in it at the time all with their own cradles :)

STA72672.jpg

TJ05 with elastic array

STA72673.jpg

How drives are mounted (note bottom cord over top and vise-versa)

Wembley is well stocked with habadasheries - will cost you £3 max and a hour of your time.
From memory you might need to drill a few holes in the plastic drive retaining flaps as the zen
5.25 bays are not littered with holes like most.
 
Last edited:
Soldato
OP
Joined
31 May 2006
Posts
7,564
Location
West London
There's only the psu fan in my case and my raptor doesn't overheat :D
Start a thread in OC/cooling if you get stuck and you'll be surprised at
whats possable with cardboard baffels and elastic cradles.
 
Last edited:
Soldato
Joined
18 Apr 2007
Posts
3,736
Location
Probably in a river somewhere
Wow, you seem to have been working forever on this thing. :p

I'm surprised you haven't looped the elastic round the drives at all, I'd be worried that they'd slowly slip over time in the setup pictured above.

I tried my my first bungee mod yesterday, but after raiding my fancy dress cupboard I didn't have as much elastic as I thought. It's now on the shopping list for next weekend.

PK!
 
Soldato
OP
Joined
31 May 2006
Posts
7,564
Location
West London
Feels like forever - but is really just three burst of work over a few months :o

No need to loop the elastic as the fixing screws 'grip' the threads (with a true bungee mod
you screw the fixing through the bungee cord and into the drive) and it's not as if it's being
moved around or kicked when wall mounted ;)

Another small part arrived today - giveing me firewire again (was on my Abit but not the new
Gigabyte board) plus freeing up some cpu cycles for F@H

More on that and it's modification later. Might even get this build finished this week.

Thanks for the comments and hope all your own mods go well.
 
Last edited:
Soldato
OP
Joined
31 May 2006
Posts
7,564
Location
West London
Phase 6: The return (Cable tidy)

Just a quick update (and a step backwards to a previous phase) as the parcel from TEHALIT
arrived yesterday and I’ve just returned from the metal workshop next door. So I’m now in
the possession of a precision cut aluminium extrusion at the required length and at no extra cost :D
Now if only they could send me the correct end caps :rolleyes:

P1010001.jpg

TEHALIT with protective film still applied
 
Soldato
OP
Joined
31 May 2006
Posts
7,564
Location
West London
Phase 6c: The final push (Cable tidy)

Never underestimate the amount of time cable tidying takes – especially when all hidden.
To that end he’s where I started from.

wiremess.jpg

A mess

I’ve been hinting at the use of electrical dado trunking for a while now and here it is. Complete
with a host of cuts and bends to allow access for wires. It’s three duct trunking with filleted
(not chamfered) top and bottom edge profile. Made of 2mm minimum aluminium extrusion
its both easy to work and very robust.

cutsandbends.jpg

Four piece construction

profilerev.jpg

End shot when assembled

Usually with this stuff you mound DSSO (double switch socket outlets) covers on the middle
panel, but I wanted to keep the surface clean so I’ve installed my plastic 4 way inside the
middle duct, with only the WC tubing and wires breaking free at the end.

fourway.jpg

Covers off to show cables

It not completely finished, which is why the protection is still on. Annoyingly one of the
plugs is 3mm higher that the others, so I either shave of some plastic or rewire it to get
the middle cover to fit flush.

Little more to do on the inside too, but the outside is nearly finished

fourboxes.jpg

Screen and desk parked

workstation.jpg

Workstation ready for action :D
 
Last edited:
Soldato
OP
Joined
31 May 2006
Posts
7,564
Location
West London


Well done


Thanks guys, not quite finished yet as some finishing touches still to do.

But it's bank holiday Monday so he's a quick update.

Phase 6d: Neat and tidy (Cable tidy conc)

Not really had a chance to do anything, and with the PC working and much of what I was
trying to achieve done, the finishing touches has been left.

coverout.jpg

Anti-fit trunking

unevenplugs.jpg

Reason – four different plug sizes

This has been the biggest one – and also the most annoying. After all the measuring and
research some of the sealed plugs were to tall, (the two I measured fit btw, the two I didn’t,
didn’t) Anyway a trip to my local hardware store and a few quid got me 3 blank (and flat)
plugs. I could have just changed two – but call me a budget perfectionist, I wanted them
the same.

newplugs.jpg

Four white plugs all in a row.

Making sure I swapped out the 3A and 5A fuses into the 13A blanks and a quick check
which colours go where, I was ready to reassemble the trucking.

Still hadn’t received the rounded end cover, so I cut four slots in the chamfered one with
my hacksaw, and sloted it in.

slick.jpg

Extra ventilation and cable route.

That’s all for now, as someone’s just woken up
 
Back
Top Bottom