Soldato
You are using an out of date browser. It may not display this or other websites correctly.
You should upgrade or use an alternative browser.
You should upgrade or use an alternative browser.
What "man jobs" have you done today?
- Thread starter jaybee
- Start date
More options
Thread starter's postsAssociate
- Joined
- 6 Feb 2008
- Posts
- 1,750
You read all of my post ? Yes -- The dip stick is in the LOG splitter !!!!!!! and I bought hydraulic oil for the ram
I have been using chainsaws for 40 yrs
Ok sorry buddy, I see what you're saying now. I really wasn't trying to take the mickey.
I'm fairly new to chainsawing. Interesting that you have an Aldi electric chainsaw.
Soldato
Ok sorry buddy, I see what you're saying now. I really wasn't trying to take the mickey.
I'm fairly new to chainsawing. Interesting that you have an Aldi electric chainsaw.
No offence taken.

I am too old to use real chainsaws and this is for the odd times I need one.

I just bought a 10” 18v makita chainsaw, it will cut through a 10” trunk which is more than enough and means I can use it without pooping myself! I’ve used a lot of dangerous equipment from a young age but there’s something about a chain saw that demands my respect.No offence taken.
I am too old to use real chainsaws and this is for the odd times I need one.
Man of Honour
- Joined
- 21 Nov 2004
- Posts
- 45,038
New hot tub installation and a new corner of the patio that is awaiting a gravel delivery.


upload phot


upload phot
Last edited:
Soldato
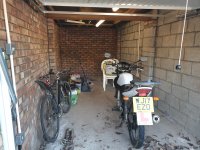
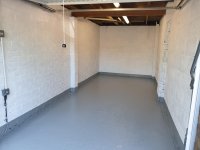
It's far from perfect, but quite pleased with this. Only bought 5L of white masonary paint which I thought would cover it twice over, but didn't realise how much paint those breeze blocks suck up!
At some point I might buy some cheap emulsion paint to go over it properly, but it'll do for now. Much better than it was before.
And no, I didn't miss a bit at the bottom. I had to double check the garage, but it's just the light shining off the floor.
At some point I might buy some cheap emulsion paint to go over it properly, but it'll do for now. Much better than it was before.
And no, I didn't miss a bit at the bottom. I had to double check the garage, but it's just the light shining off the floor.

Soldato
Good job on the painting Razor, bet it has made such a difference when you are in there. I painted mine white when I first moved in a few years ago, I used red floor paint though.
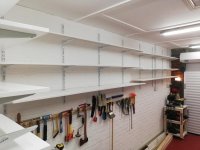
I've been in mine painting my shelving as I wanted to protect the plywood from chemicals/oils etc. Finished the smaller ones on Sunday, fitted them today. Cleared the larger ones and sanded them a bit before undercoating with 2 coats.
Before:
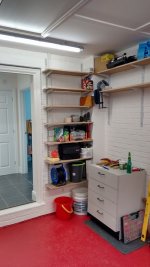
After:
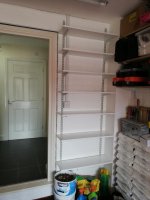
Before:
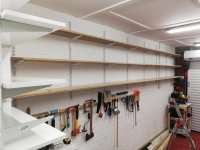
After:
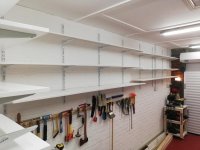
Just need to finish off tomorrow with some gloss.
I've been in mine painting my shelving as I wanted to protect the plywood from chemicals/oils etc. Finished the smaller ones on Sunday, fitted them today. Cleared the larger ones and sanded them a bit before undercoating with 2 coats.
Before:

After:

Before:

After:

Just need to finish off tomorrow with some gloss.
Not sure if I'm more impressed with the hanging of tools and the straightness of the nails!
Soldato
Haha, thanks. They are all slightly on the p**s, but in the same direction. I don't have a pillar drill yet so I had to use my cordless drill (pilot hole first). It was only meant to be temporary as I was fed up with all my stuff in a box on the floor. 2 years later..
Soldato
Soldato
A new shelving unit for wife's greenhouse - not bad for 20 quid delivered - I tried to talk her out of having top shelf so high - she now agrees but I am certainly not going through the hassle of taking it off and dropping it - If all the bolts were 5mm longer it would be easy.
She has some big boxes and things under left side which is why it's to the right and I can also cable strap it to the other shelving and rear frame bars.
I spent most of yesterday fixing it together. - looks simple but my hands don't work too good.

She has some big boxes and things under left side which is why it's to the right and I can also cable strap it to the other shelving and rear frame bars.
I spent most of yesterday fixing it together. - looks simple but my hands don't work too good.

Soldato
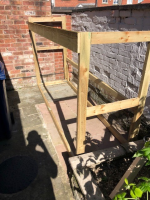
Started making a small shed for down the side of the house. I use my main shed as a bit of a workshop, so wanted somewhere to store things like the pressure washer and garden tools, compost etc.
Made a bit of an error buying wood as was limited to where i could buy from with so many places still closed and others having huge queues. It was a little more expensive than i'd have liked anyway and then they added VAT on top of the prices i'd been looking at.
Still, it was something i wanted to do over the weekend so i went for it. Plus as it's odd dimensions (2800x1700x80) i couldn't really buy anything off the shelf.
Initial Frame mostly built (i added a lot more supports afterwards)
For added weatherproofing, i covered it in tarpaulin. Tried to do this Saturday when it was like being in a hurricane so quickly gave up and left it till yesterday
Stapled down and then covered the staples in cloth tape. Not sure if that'll do much but we'll see!
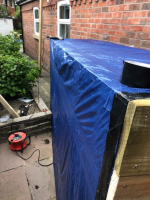
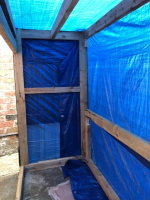
My only hesitation is i've not used T&G or anything on the roof due to limited availability, Will see how things go, but i might have to cover it in felt, although i was hoping to avoid doing that.
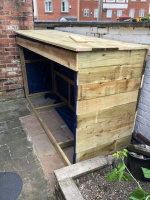
Just need to make the doors now. Although we've been talking about adding an outside sink to wash the dogs in rather than carrying them upstairs and hurting our backs hunches over the bath. I might extend it out at the far end around waist height as a support for that. Need to decide before i do any more though.
I also now need a more wood! Given where it is, i probably didn't need to use around £50 worth of wood on the back and far side given they're against walls!
Made a bit of an error buying wood as was limited to where i could buy from with so many places still closed and others having huge queues. It was a little more expensive than i'd have liked anyway and then they added VAT on top of the prices i'd been looking at.
Still, it was something i wanted to do over the weekend so i went for it. Plus as it's odd dimensions (2800x1700x80) i couldn't really buy anything off the shelf.
Initial Frame mostly built (i added a lot more supports afterwards)

For added weatherproofing, i covered it in tarpaulin. Tried to do this Saturday when it was like being in a hurricane so quickly gave up and left it till yesterday

Stapled down and then covered the staples in cloth tape. Not sure if that'll do much but we'll see!


My only hesitation is i've not used T&G or anything on the roof due to limited availability, Will see how things go, but i might have to cover it in felt, although i was hoping to avoid doing that.

Just need to make the doors now. Although we've been talking about adding an outside sink to wash the dogs in rather than carrying them upstairs and hurting our backs hunches over the bath. I might extend it out at the far end around waist height as a support for that. Need to decide before i do any more though.
I also now need a more wood! Given where it is, i probably didn't need to use around £50 worth of wood on the back and far side given they're against walls!
Soldato
Been painting the outside of our house recently with sandtex ultra smooth brilliant white (it was pink), a standoff support for the ladder (aluminium extending pole type) makes it feel a lot more stable.
Been living here a couple of years, not sure why we didn't do this sooner.
Been living here a couple of years, not sure why we didn't do this sooner.
Pulling down an old (It would be interesting to find out exactly how old) Lath and plaster ceiling with the intention of replacing in a manner that reveals the underlying main oak timbers (near enough 12" x 12" )
So far, interesting, It would appear that originally there was no celling and the main timbers, side joists and, presumably, the underside of the original floor boards had simply been whitewashed.
There has also clearly been movement of the building over time since the side joists have partially pulled out of their sockets in the main timbers. However, it looks as if this movement has not been significant since the ceiling was applied and mostly must have occurred shortly (Like within the first century or so!) after the building was constructed.
When I re-lay everything I will get some cheap Vernier callipers from Amazon/whatever and drill and fit them in a way that allows any further movement to be monitored mm by mm.
It is a thoroughly messy job mind! If I can be bothered to set up a photo-whatever account I might post some piccies. Shame you cant just post pics direct to forum (I am sure I was on one forum that allowed this, how they managed to do so I do not know. I am guessing there was a sort of silent link to a photo hosting site)
Having some pull out on old timbers is not unusual but you do want to check there is no on-going movement, and also that there is still sufficient connection left that everything is safe and not at risk of failure etc. The current time is an opportune moment to ping some photos to an engineer (use findanengineer.com). Lockdown means people are more willing to guide you by phone call to take the pictures and measurements they want to see. You will get a better feel for the process, and save on the engineer's travel fees. With that and some monitoring (if the engineer feels it necessary) you will get an answer of what to do.
I've stuck plastic discs to some cracks on my walls and ceiling. I can use a Vernier caliper to measure the inside and outside spacing of these, and note it down every month or so. You could do similar with nails or screws, saving you buying a load of verniers.
You can buy visual gauges that are easier to read provided you don't mind seeing them. If you think movement is ongoing you can then just give the weekly/monthly photos to your engineer who can be confident in your data much more than trusting your hand measurements of DIY tell-tales.
If anyone wants to buy the proper kit then look for Avonguard telltales (both metal studs and the plastic movement monitoring grids). For long range monitoring there are also moire guages but those are niche and overkill for the lay person. Very good for churches and cathedrals etc.
If you do use the cheap studs then go for the metal disc ones and fit them onto the structure, not finishes (ie break off the plaster and glue them to the brick etc). Set them at least 100mm apart in a triangular pattern, two one side of the crack, one on the other. Ideally this will have the pair aligned either vertically or horizontally, and the single stud aligned in between them rather than offset to one side (though that can be dealt with if needs be). The nipple goes into the wall or whatever so you have a dimple to insert the calliper prongs to measure from. Take each measurement three times, fully closing and resetting the callipers each time. Number each location 1, 2, 3, etc and each disc ABC and log each measurement as 1AB, 1BC etc. Trust me it's the sort of methodical logging that saves you hundreds in engineer's fees (as well as helping close-off wriggle-room for hard-nosed loss-adjustors). Start measuring weekly. Log the temperature, time and weather, ideally with a photo of that too. Note weather ground is dry and wet, etc. Time of last rainfall if you know it. If movements are looking significant start logging daily and call an engineer asap. If movements are barely noticeable/within margins of error monitor monthly, then after a year bimonthly/6 monthly then stop. Ideally you need at least a year to detect seasonal movements, but if it's a very hot+dry year, or very wet year you might need to monitor for a longer period to differentiate between normal case vs freak case. Obviously if in doubt, consult an engineer.
Associate
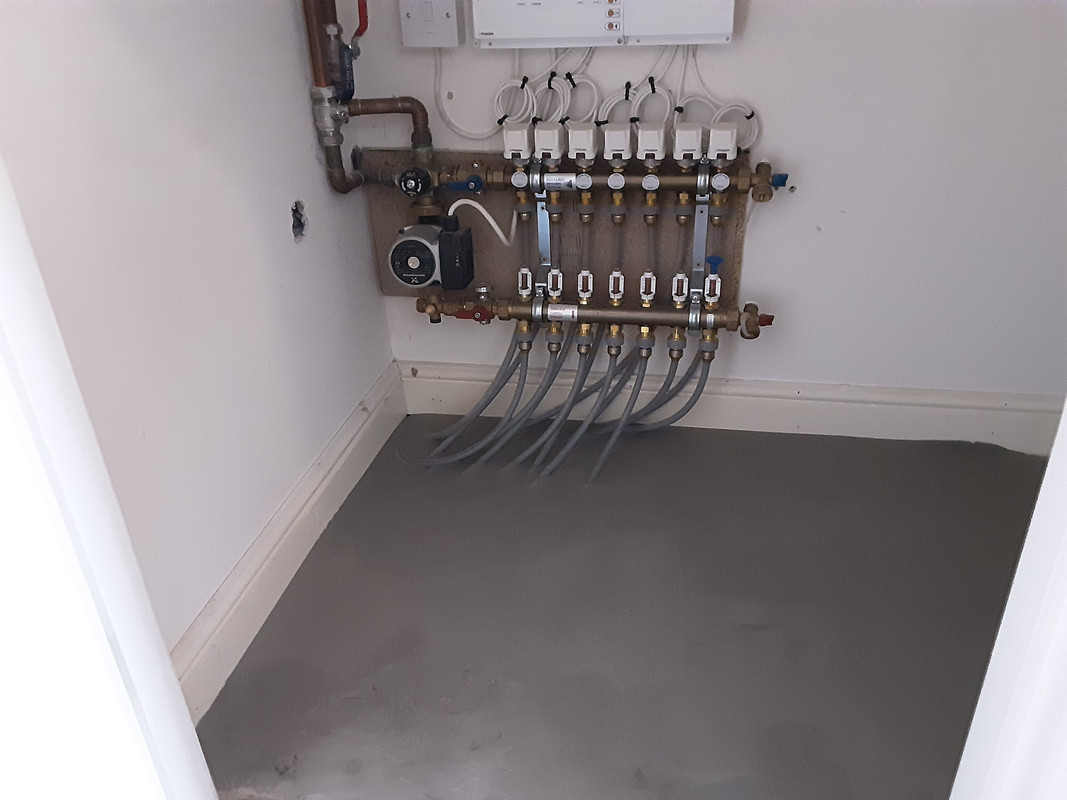
Job I've been putting off for ages but furlough has killed all my excuses!
Self levelling screed under stairs to make floor usable after running all pipes through for UFCH.
Retro fit under floor so screed is about 20mm thick, enough to cover pipework and give a smooth finish.
On to next job!
Soldato
- Joined
- 27 Mar 2013
- Posts
- 9,149
Would underfloor heating be that hot?20mm over a hot pipe risks cracking in my experience. Be interested to hear how it goes.
Yesterday was dirty and hard (oo-err). I had to "adjust" the stud work for the new concealed valve shower, cutting plasterboard with a saw to keep the level of dust down then cutting through the tiles in situ with a diamond blade, a drain down of the hot&cold water and cutting through the old copper work with the angle grinder and then install full bore 22mm service valves which they didn't do originally.. I still can't get the end-feed 3/4" tap connectors off so that looks like it's going to have a date with the angle grinder.
Today's tasks:
* fitting the valve in situ with the stainless steel metal stud plate.
* finishing the hot and cold water piping to the new isolation valves.
* securing the rain shower mounting
* fitting the secondary shower mounting
* fitting and sealing the front facia
* cutting the tap connectors for the bath - if this works then I may be able to finish the work in one go rather than have to revisit later and re-solder.
.... coffee first!


