Random 3D printing chatter

Soldato
OP
Joined
4 Jun 2007
Posts
2,618
Location
Watford, UK
The heathen (for this forum) in me is saying just drill two holes in a spare one. You may want a smidge more clearance than 0.2mm purely as things will move and expand and you don't really want it dragging on your tubing and either damaging it or pulling it out.

Progress on mine involved cutting a 92mm fan hole. Panel too big to swing on the lathe, too big to spin on a rotary table (would hit the column) and too big for my boring head on the mill. So the vintage adjustable hole cutter it was. Worked but its kind of terrifying spinning round that wide and my mill doesn't have the torque to run it any slower. Looks good though....for the bottom where it'll never be seen!
 
Soldato
OP
Joined
4 Jun 2007
Posts
2,618
Location
Watford, UK
Progress so far (click for larger image). I'll be shortening the wires from the buck convertors to the PSU, they were left long until I'd decided where to place everything. The Creality control board is going to be shunted further up towards the top left corner. That'll allow the display connector to clear (hopefully!) the fan blades....but it's going to be down to a mm. I'll probably have to mill down the last factory mounting post you can see there so it doesn't risk shorting out the board. Might be able to mask it off, not sure yet. The other three have custom 3mm thick washers made up so they can be used to screw the base plate into the box. Had I thought about this beforehand, I'd have left a tab on the far right of the base plate so I could screw that end down with one of the PSU screws. I think that some form of double-sided tape may fix this oversight without needing additional holes in the top of the case though. Sometimes the call of the path of least resistance is too strong!

The base plate is from an old Cooler Master case - it's 1mm aluminium plate. Just means that I've not had to drill holes in the top (once mounted in the printer upside down) of the case so I can change my mind at worst. All the boards are up on standoffs. The Pi is on 6mm M2.5 standoffs (Pi mounting holes are M2.5 rather than the more common M3), the Buck convertors are on 10mm M2.5 standoffs because there were a limited number of the 6mm's in the kit and I didn't want to buy a bag of 100! The Creality control board will be on 6mm standoffs but I'm going to have to mill them down to 4mm (like the original factory ones) or find out which wins of plastic fan blade vs ribbon cable connector!

I'll have to blank off the extra fan hole - I'll be honest, I'm thinking that duct tape will do the job here. I'll also blank off the vent on the left edge so the air should then be forced to travel over things and exit on the far right and the top vent - otherwise it'll mostly just leave via the nearest exit without cooling anything. I plan to leave the lid off the PSU too - I don't think there's an EMI issue as there's still a metal wall between it and the control boards and there's still grounded metal surrounding it and preventing finger ingress.

I also have a small LED-illuminated tactile switch that I'm going to mount on the front edge of the case. That will light up when OctoPrint is ready to go and shut down the Pi when pressed. That's this GPIO Shutdown plugin. I just need a fragment of PCB (or something rigid and heatproof) to mount the switch in and clamp it to the front panel.

USB header is going to go in the bottom right corner to plug in the obligatory webcam. No doubt an ethernet header will have to join it when I find out that putting a Pi in a grounded metal box results in no wifi reception! We shall see though.

 
Man of Honour
Joined
30 Oct 2003
Posts
13,255
Location
Essex
That would be absolutely fantastic, thank you.

Would it be possible to do it in white?

I'll cover your costs :D

I have some white petg and also I think I have some white pla as well so yea I could do that. Am away until Tuesday next week but post the stl etc in here and ill take a look when I am back.
 
Soldato
OP
Joined
4 Jun 2007
Posts
2,618
Location
Watford, UK
Afternoon all. Some progress, some to go and some issues.

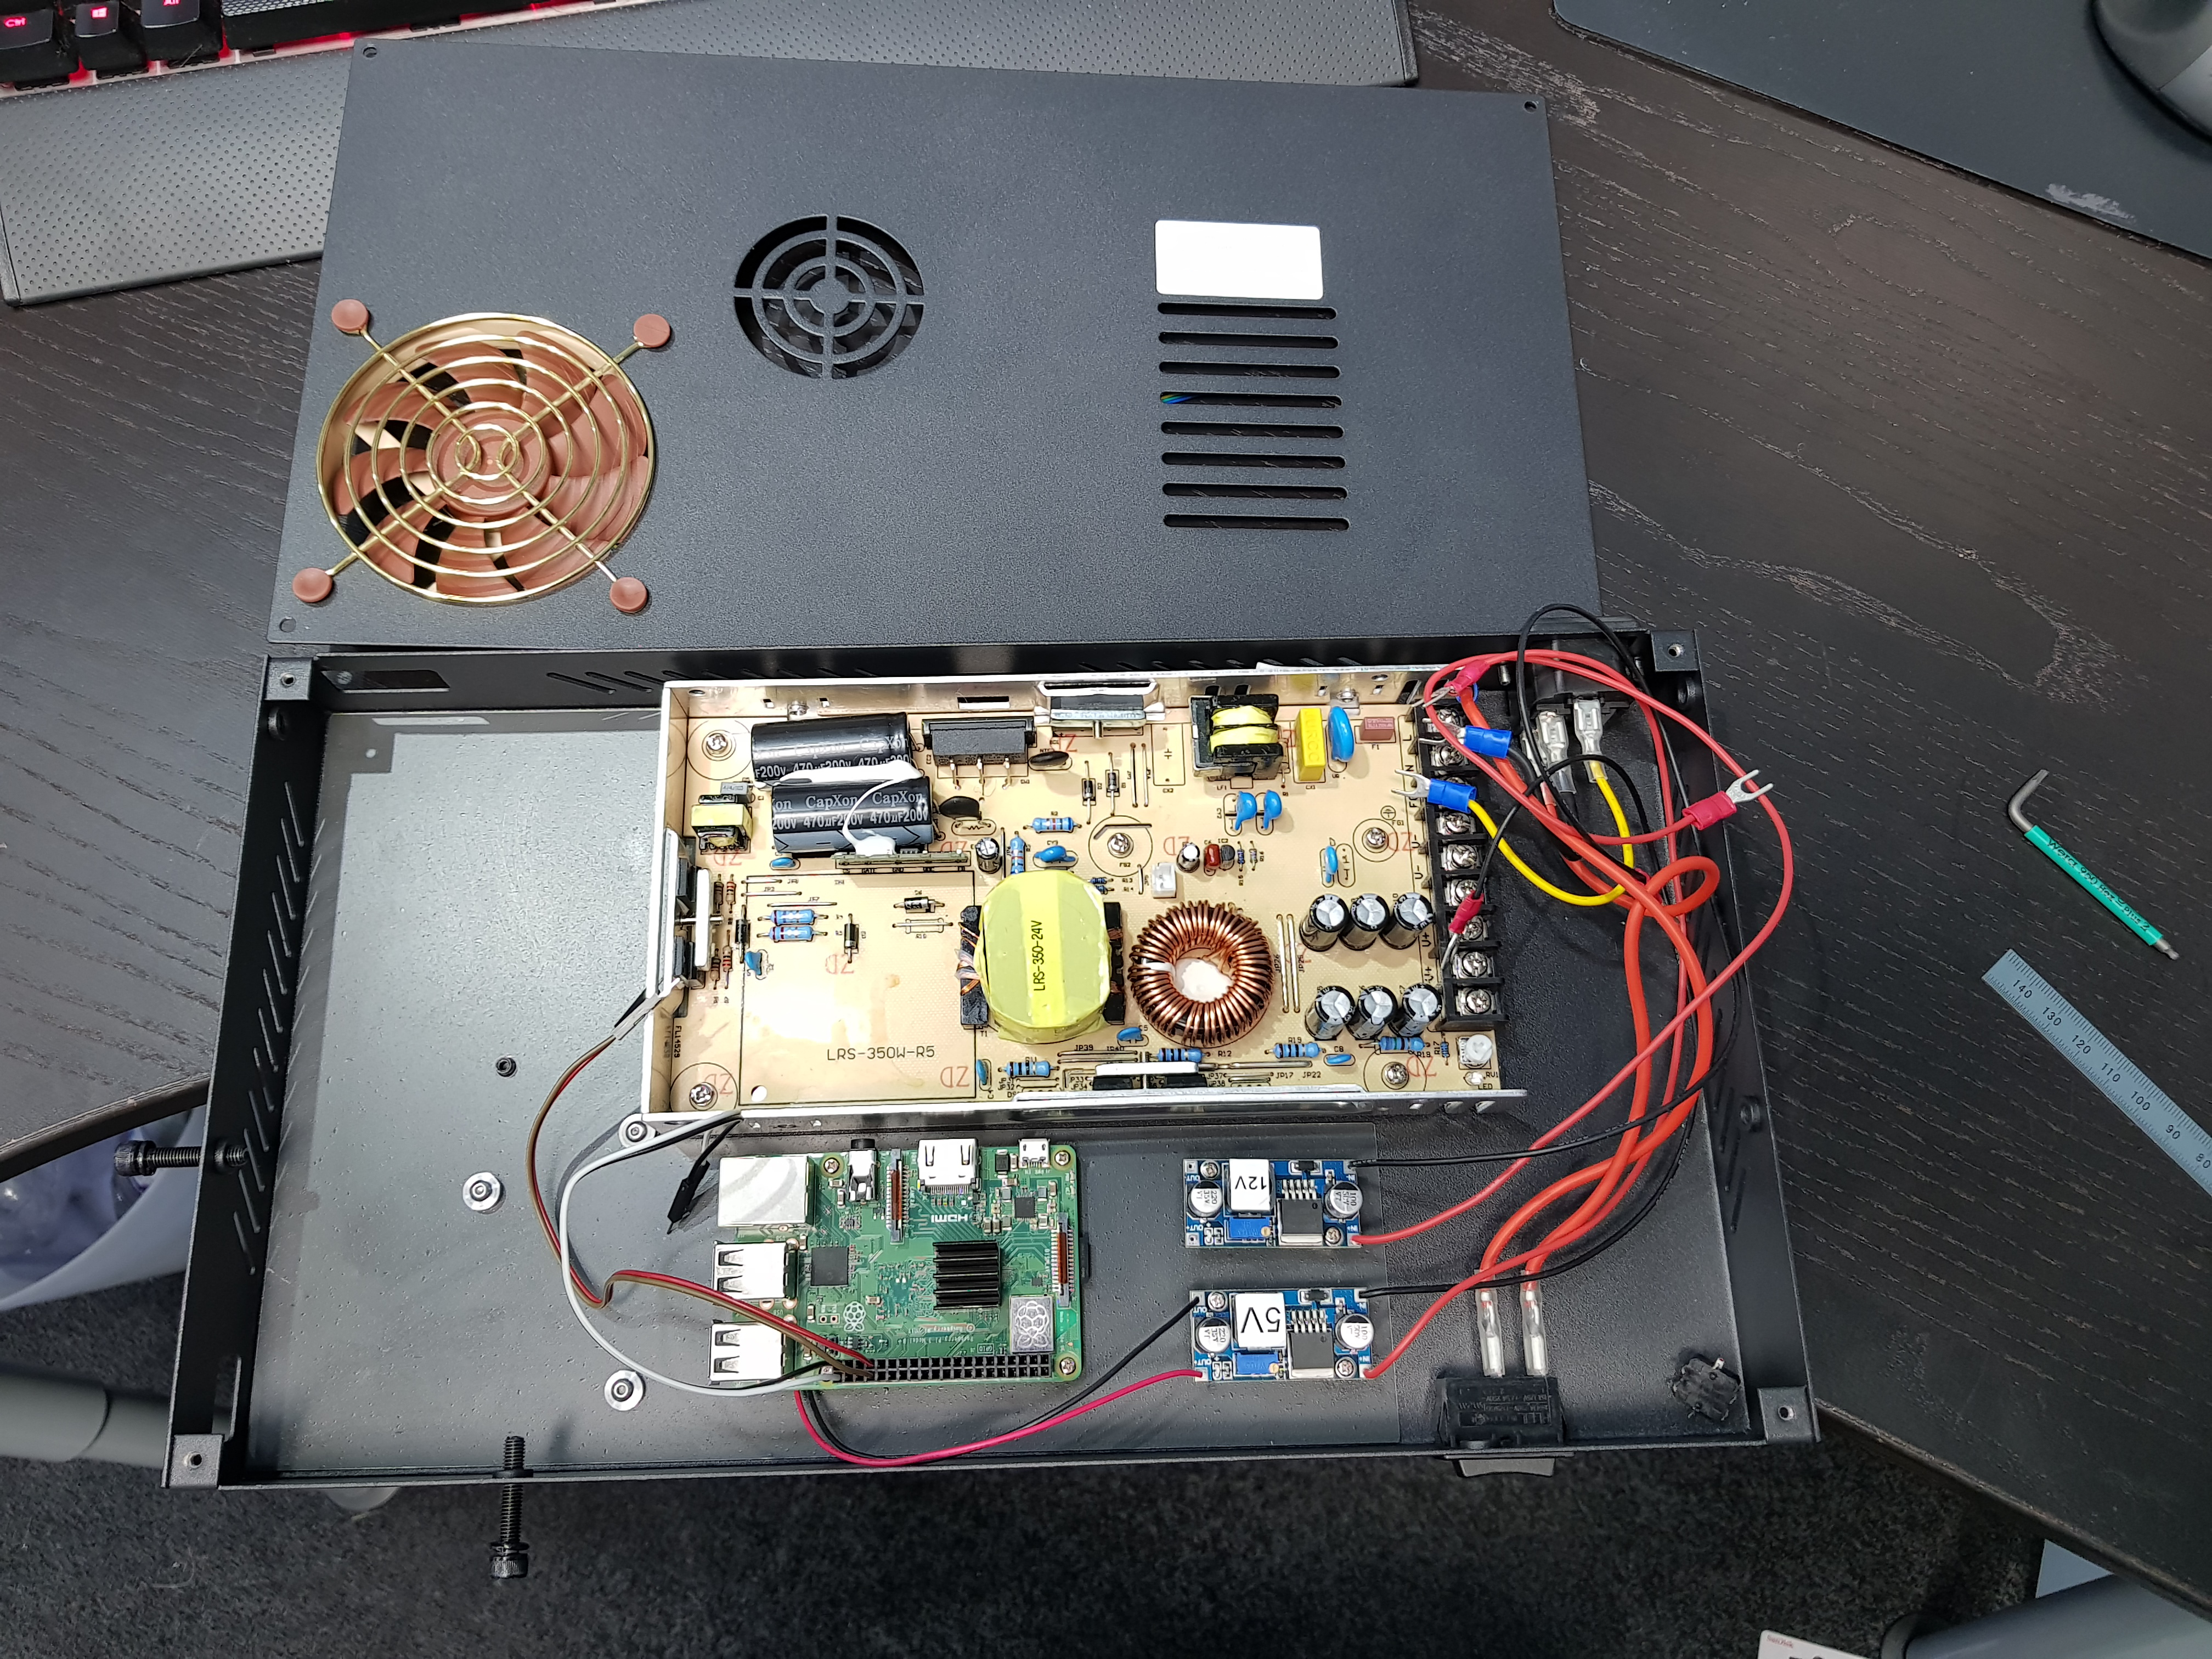
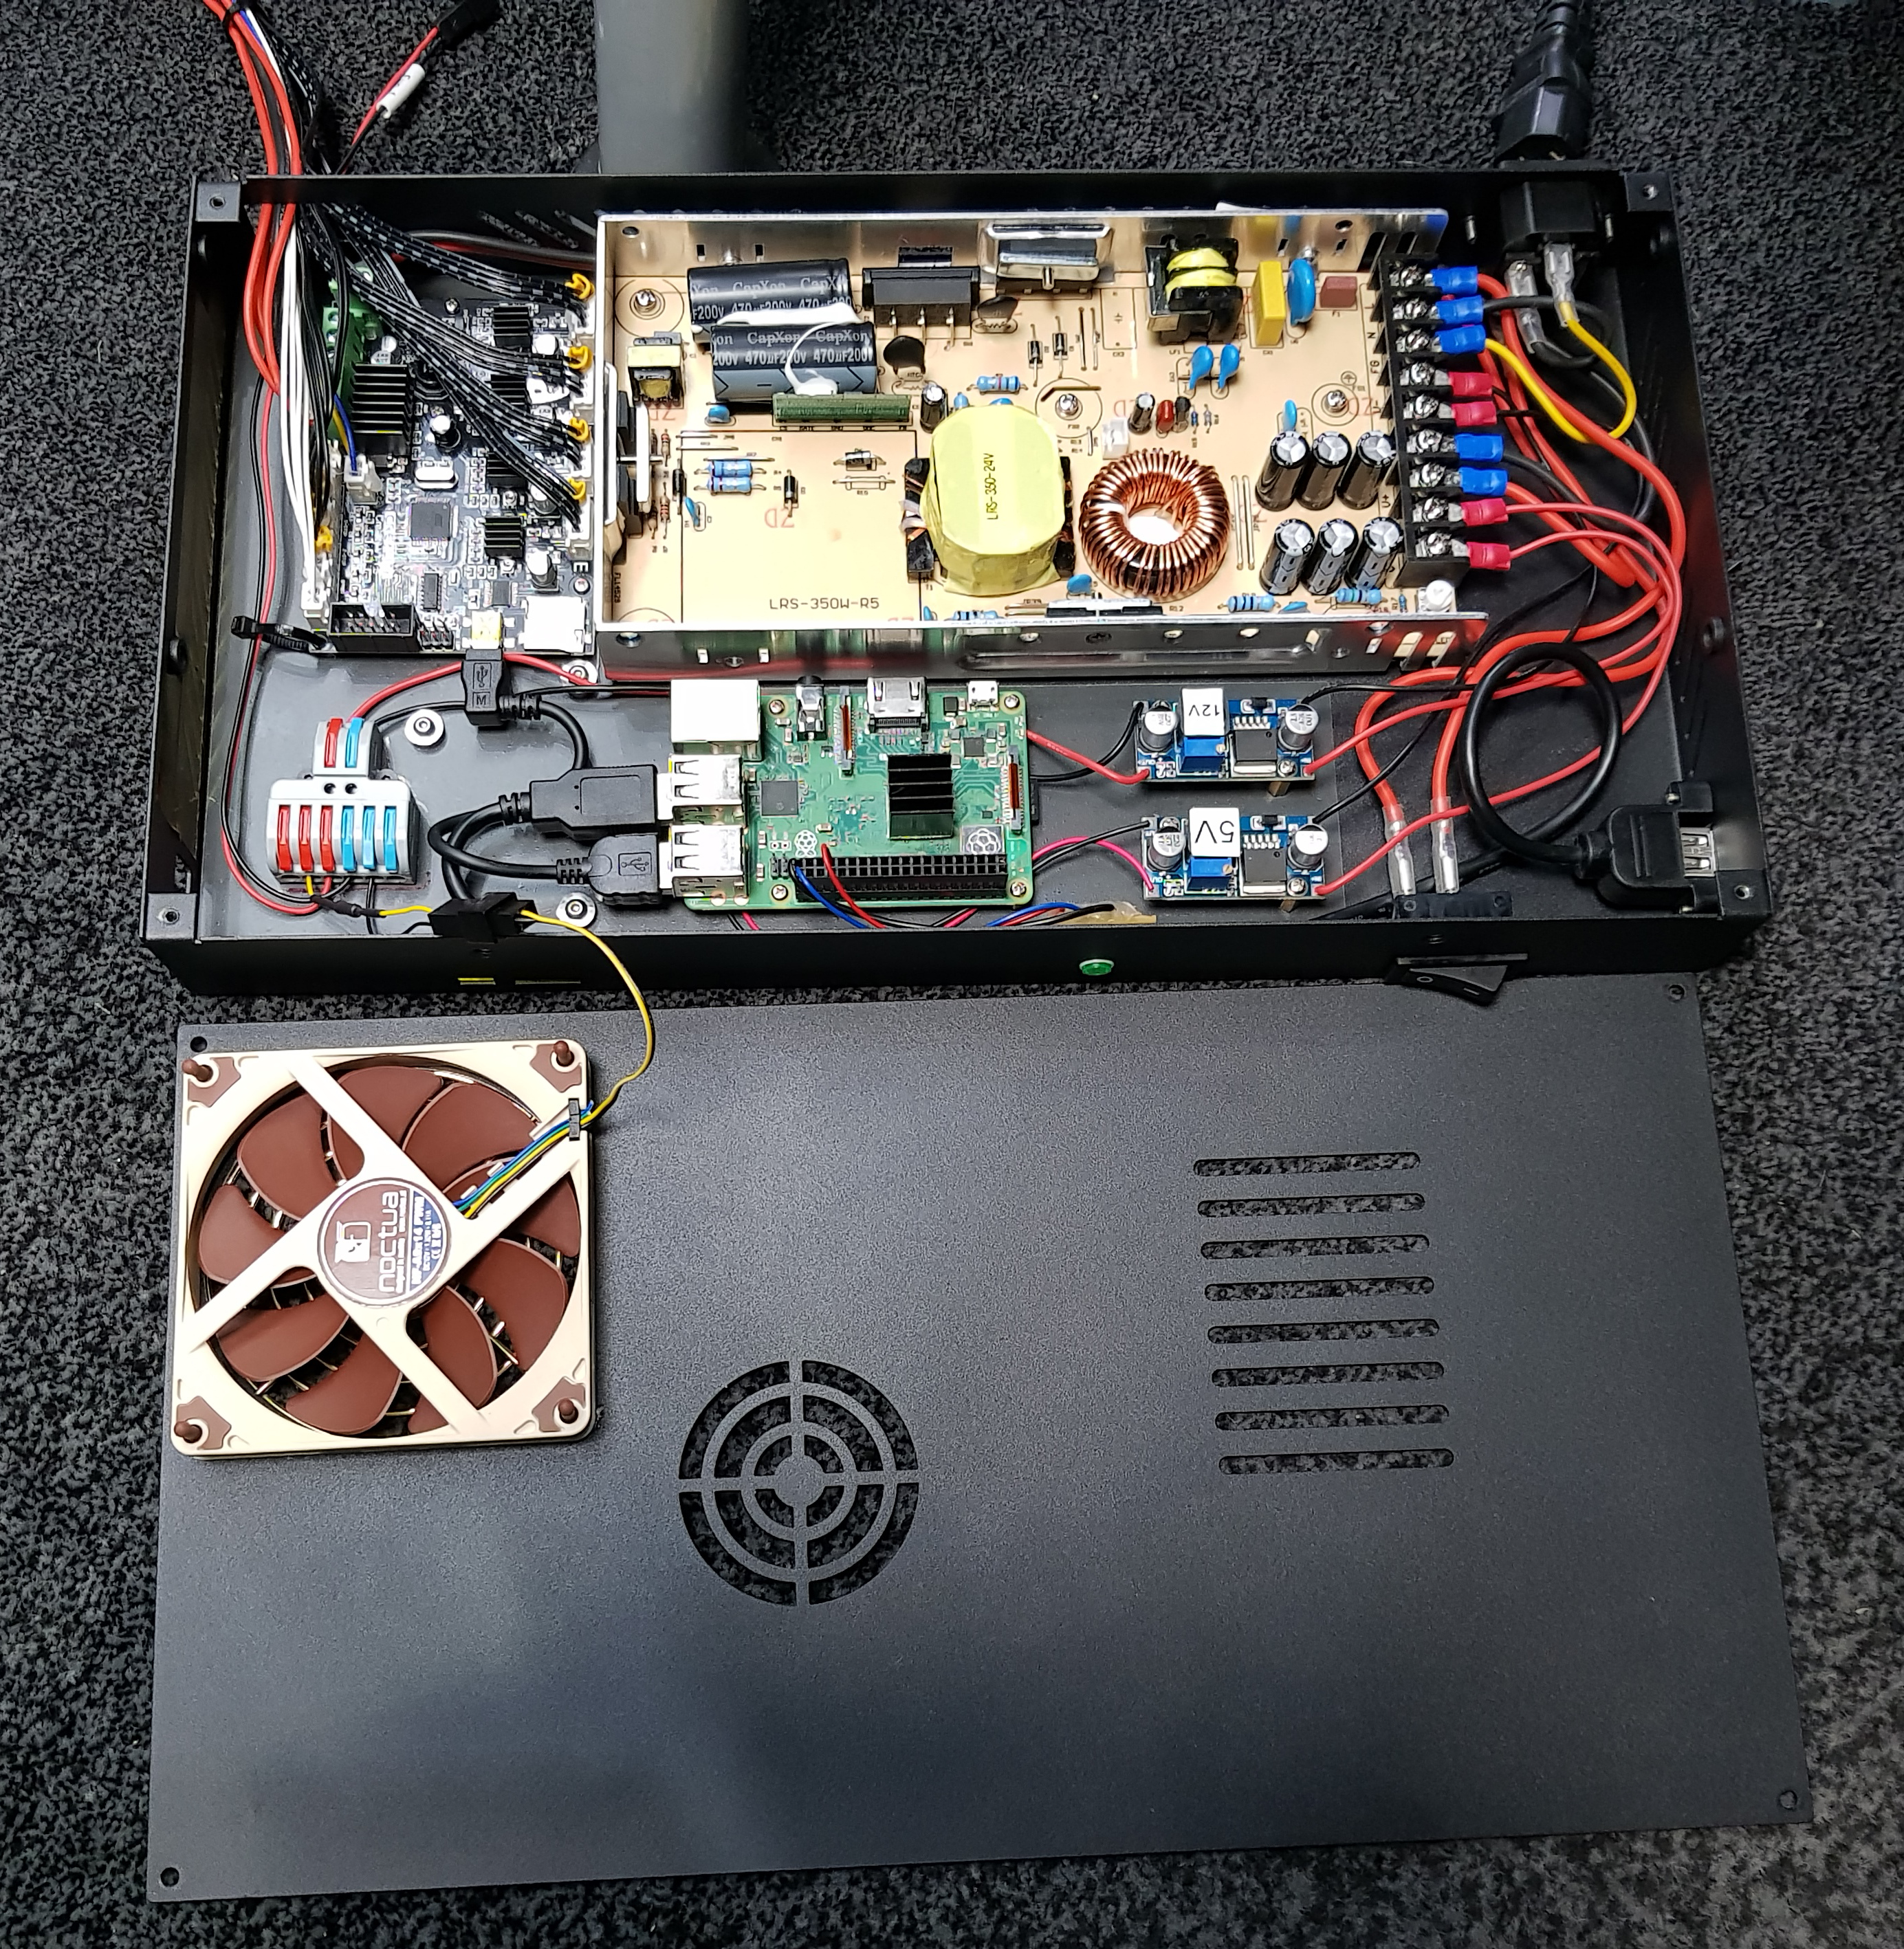
I needed things to be quieter or I wasn't going to be able to use the printer much - wife shares the same office and is now full time. So far we have a Noctua 40x20 as the hotend fan. That's currently got just a couple of M3 standoff nuts holding the cowl further out since it's twice as thick as the stock fan. Went with the thicker one as it was quieter and had higher static pressure. PSU fan (60mm) and control board fan (40mm) are now gone and replaced by a 92x14 Noctua. Went 92mm simply because that was the only one thinner than the 25mm standard....and I was pushed for space as it was! Some of the factory vent holes at the sides have been blocked with Kapton tape and the 60mm fan hole in the lid has been block with some lovely black duct tape - classy! This should mean that the 92mm fan blows air over everything though. I fitted the low-noise adapter (you can see the inline resistor that's left after I stripped it down) and that does mean it's pretty much silent. I can feel an outdraft of air from the vents that are open so hopefully it's all good.

I still need to sort out the layer fan as that's horrible. The bearing is.....bad and the PWM done by the control board is noisy. Can't do much about that until I'm able to print a duct to allow an axial fan to replace the existing radial blower.

So, a mounting board for all the stuff so that I wasn't making ugly holes in the top of the case - mainly gave me the ability for a do-over if necessary. The new base plate used to be the side panel for an aluminium Cooler Master case and it's 1mm thick. Modelled out the insides to make sure everything would fit. Used transfer punches to mark out and then drilled 2.3mm holes in it. Then tapped those with an M2.5 roll tap. These form the threads by displacing the metal rather than cutting it. Apart from the bonus they don't make any chips (not so relevant in this but very useful in blind holes) they also seem to do a better job in very thin sheet materials like this. M2.5 simply because that's what the Pi is pre-drilled for - in hindsight it probably would have been more sensible to just enlarge those holes as the hex of the standoffs is the same size anyway. Ah, you live and learn....well, hopefully.


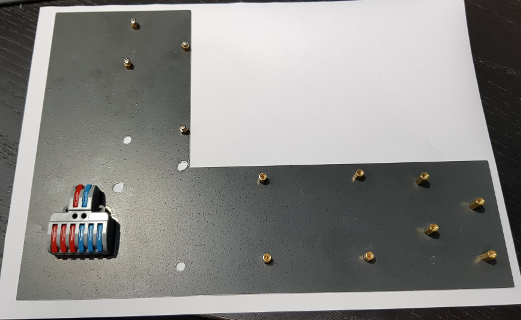
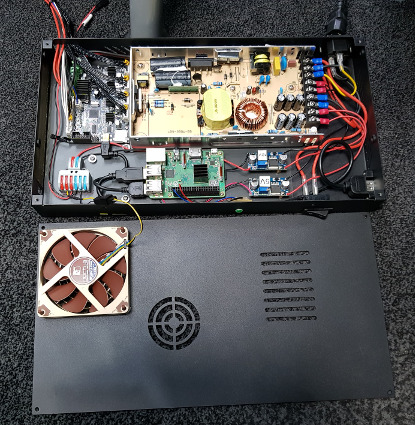
The lever block (SPL-62 Wago-style) is for distribution of 12V. The convertors are LM2596S buck convertors at five for £9 online. One for 12V for the fans and one at 5V to power the Pi. I soldered wires to the points on the bottom for this because I wanted the protection of the polyfuse on the microUSB port (which is bypassed if you feed the header pins directly) but didn't have room for an actual microUSB plug. The Pi is connected to the USB of the control board so I can load prints via OctoPrint.
The USB on the right is for the webcam. I went with a Playstation 3 EyeToy because it was a tenner all-in (and on the supported list)....but mainly 'cos it was cheap :D
The green LED you can see on the front is an illuminated tactile switch. Using GPIO Shutdown to light up when Octoprint is ready and a press of it shuts the Pi down before power-off. I found some copper-clad PCB, drilled the through-holes for the switch's 6 pins and milled the copper off to leave pads to solder to as well as a track to the resistor. The whole thing is friction fit into the 8.2mm hole drilled in the case - step drill essential here or it'll end up triangular and followed up with the 8.2mm after getting to 8mm.

So it's all good now, right? Yeah, you'd think. I wiped down the bed with IPA and levelled it. Started printing a 20mm calibration cube. Got 4mm up it and it left the bed. Good news is that The Spaghetti Detective worked and stopped the print. I was there but left it failing for a bit to test whether TSD worked. I suspect if you pay for the premium version it'll spot the fail earlier as it samples more frames than the freebie.

Re-levelled and had a few goes at printing a hollow cube and got problems. Those turned out to be Cura settings issues with thin walls and I eventually got that printed. It does look like I have adhesion issues though. The nozzle prime down the right hand edge sticks very nicely but the actual print right in the middle, does not. I checked all the corners were level - a sheet of A4 drags - and then checked the middle of the bed. It took three sheets stacked to get a light drag. Is this the infamous Creality bowed bed issue?
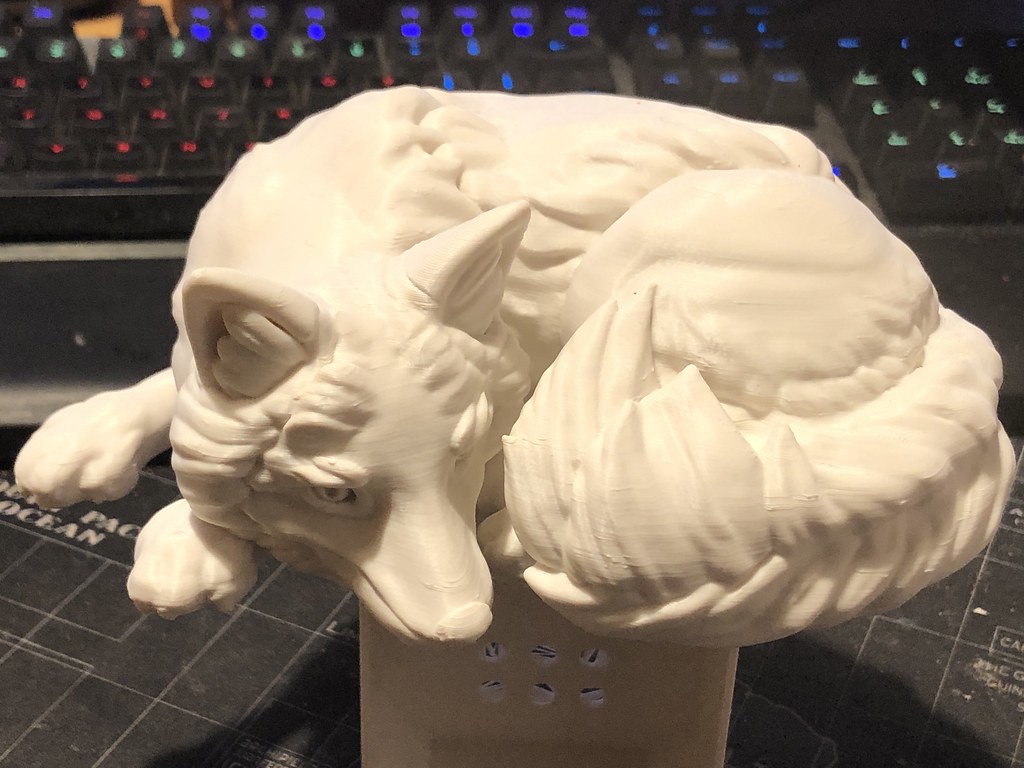
 
Man of Honour
Joined
30 Oct 2003
Posts
13,255
Location
Essex
@LePhuronn - Can you send me your address please mate. Nothing to do with the thread but I appear to have lost it and want to send stuff this morning.

Edit: Found it!
 
Last edited:
Man of Honour
Joined
30 Oct 2003
Posts
13,255
Location
Essex
I'll have to send it via trust, phone signal is rubbish at work and our general use machines are off because of social distancing, so can't email :mad:

No worries I dug deep and found it. Most of the stuff is coming. There was just one thing I still cant seem to find so BL touch will come when I find it! The new bed plus 3 point leveling system is on its way in 10 mins.
 
Man of Honour
Joined
30 Oct 2003
Posts
13,255
Location
Essex
I've actually been meaning to ping you saying "don't think I'm being ignorant for not thanking you for the package, but I don't have anything". Not posting it is better than it being lost :D

Its one of those where every time I intended to post it life got in the way. Then this morning as I was packing up some mm sales I saw it and thought "that bad boy is going as well"
 
Soldato
OP
Joined
4 Jun 2007
Posts
2,618
Location
Watford, UK
Is it a Fat Man missile and/or launcher from Fallout? Took me a minute if so!

I just printed some clips that clip into the bottom of a 2020 extrusion and hold a strip of waterproof 3528 LEDs ('cos that's what I had) so I don't have to leave the lights on when printing. Only took me 6 iterations before the strip fitted the slot! :rolleyes:
 
Man of Honour
Joined
30 Oct 2003
Posts
13,255
Location
Essex
Is it a Fat Man missile and/or launcher from Fallout? Took me a minute if so!

I just printed some clips that clip into the bottom of a 2020 extrusion and hold a strip of waterproof 3528 LEDs ('cos that's what I had) so I don't have to leave the lights on when printing. Only took me 6 iterations before the strip fitted the slot! :rolleyes:

It is a mini nuke :) Thought I would build me a mini nuke model. Had to do a load of repairs on the cheap china 75 quid printer last night and thats printing now so shall hopefully get around to messing with the big boy this weekend :D

Had to replace all the thermistors, havent printed in a while and they repeatedly went into thermal runaway half way through prints. Have had a few successful prints now so hopefully that is no longer an issue.
 
Associate
Joined
23 Jun 2004
Posts
2,459
Location
Macclesfield


Finished printing this Fox this morning, using Sidewinder X1 @ 1.5mm layer height. As near flawless as I could expect - especially with 3 year-old filament that was sat on an open shelf for 3 years lol.
 
Soldato
OP
Joined
4 Jun 2007
Posts
2,618
Location
Watford, UK
1.5mm layer height? I'm a noob so forgive me if I'm not sure whether that's a typo or just my ignorance. I'm used to a layer height being more like 0.2mm. Are we talking bigger nozzle diameters here?
 
Back
Top Bottom