

Associate
So this is my little Neje diode laser setup, originally a 20W model but recently upgraded to a 30W module (30W input which is about 7.5W optical output power). I screwed the base down onto an alloy plate which has small rubber feet stuck to the bottom, and when I want to use it then it sits nicely on the bed of my Artillery Sidewinder X1 3D printer. It can be quickly lifted off when I want to use the printer and is able to use the same air extractor that I have running when using the printer - that's really a must to get rid of smoke and fumes. The X1 uses Octoprint and a camera so that same camera is used to monitor the laser job obviating the need to ever look at the laser when it's operating.
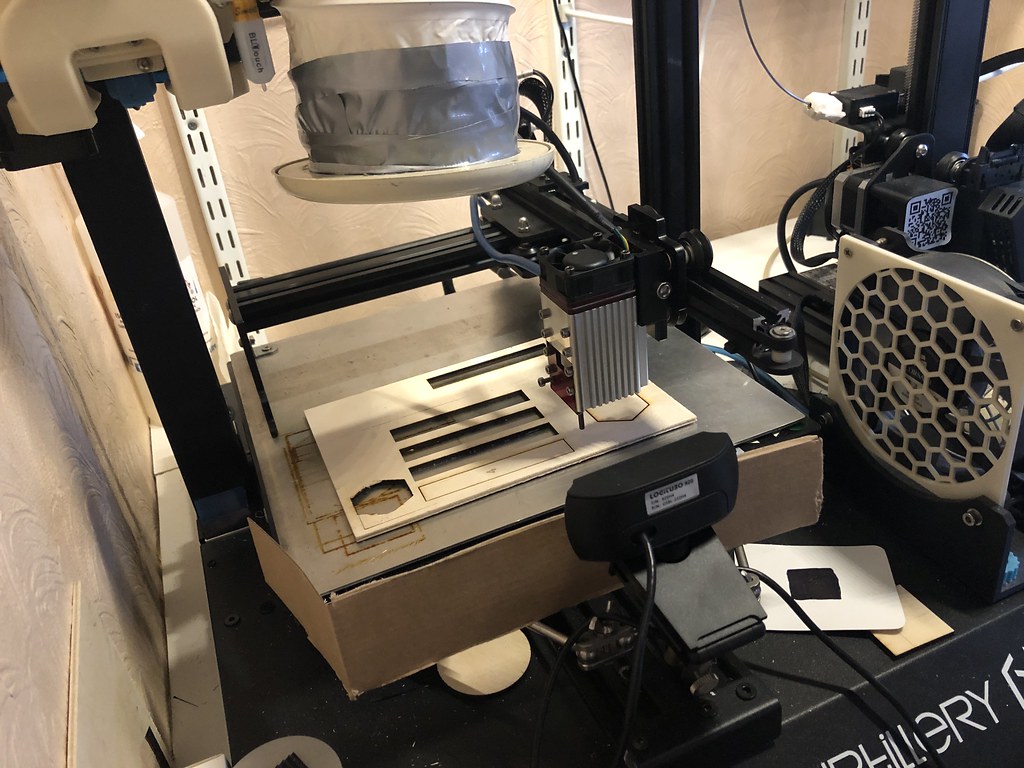
The 30W module was supposedly a simple plug-in upgrade (according to the seller when I asked) but it was far from it! Significant modification of the mounting bracket was required to get it set into the right position, and after that the left-hand acrylic panel needed cutting for extra clearance because this is a 40x40mm casing and with the extra bracket it sticks out further.
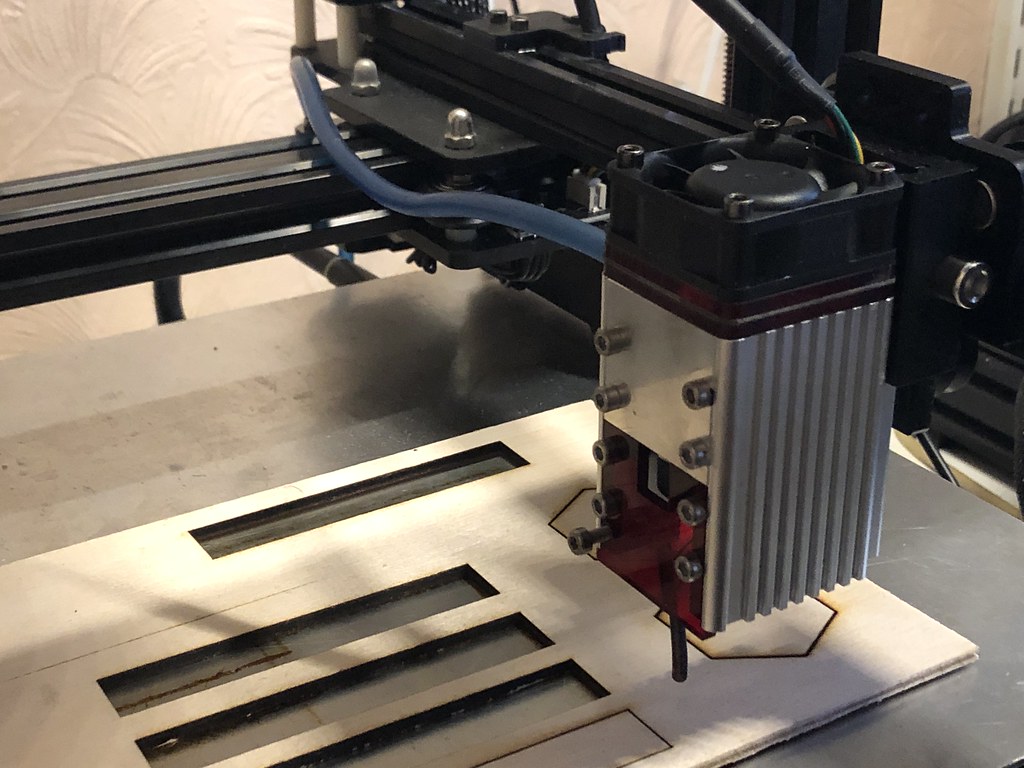
Initial tests proved this laser module was indeed higher power and could cut 3mm ply easily, yet still offered good PWM control to produce nice engravings. What it really needed was an 'air-assist' mechanism to direct a jet of air at the point where the laser was doing its work. This makes a big differrence to the cutting efficiency because it removes smoke and ash which otherwise blocks penetration of the focussed laser beam.The design specs says this capability is designed in - operating from the main cooling fan on top, in practice this is a complete fail because not only is the air flow not focussed where needed it is not controllable by the user (it's variable and only comes on when the module gets very hot). So a separate system was required that utilised an external compressor and some sort of pipe. I tried routing an external tube down the outside but the result was ugly and tricky to get positioned so it pointed near vertical as possible onto the work area. There had to be a better way!
I disassembled the module casing for a better look, thinking I could route the tube inside the housing somehow, then realised there was enough metal thickness to drill down the length and pass the air through and along the housing itself, the actual jet of air being supplied by a short length of shaped 1/8" copper tube inserted into the bore. The air inlet was threaded into the side of the housing mating with the internal drilling (which didn't reach all the way to the top). The photos explain better than words!


One other point worth noting, when the actual diode holder was removed from the aluminium extrusion housing there was no heatsink compound to be seen - that severely reduced the cooling efficiency of the whole module+fan (and heat is the main killer of these diodes). Really daft situation and of course I added some when it was reassembled.
The 30W module was supposedly a simple plug-in upgrade (according to the seller when I asked) but it was far from it! Significant modification of the mounting bracket was required to get it set into the right position, and after that the left-hand acrylic panel needed cutting for extra clearance because this is a 40x40mm casing and with the extra bracket it sticks out further.
Initial tests proved this laser module was indeed higher power and could cut 3mm ply easily, yet still offered good PWM control to produce nice engravings. What it really needed was an 'air-assist' mechanism to direct a jet of air at the point where the laser was doing its work. This makes a big differrence to the cutting efficiency because it removes smoke and ash which otherwise blocks penetration of the focussed laser beam.The design specs says this capability is designed in - operating from the main cooling fan on top, in practice this is a complete fail because not only is the air flow not focussed where needed it is not controllable by the user (it's variable and only comes on when the module gets very hot). So a separate system was required that utilised an external compressor and some sort of pipe. I tried routing an external tube down the outside but the result was ugly and tricky to get positioned so it pointed near vertical as possible onto the work area. There had to be a better way!
I disassembled the module casing for a better look, thinking I could route the tube inside the housing somehow, then realised there was enough metal thickness to drill down the length and pass the air through and along the housing itself, the actual jet of air being supplied by a short length of shaped 1/8" copper tube inserted into the bore. The air inlet was threaded into the side of the housing mating with the internal drilling (which didn't reach all the way to the top). The photos explain better than words!
One other point worth noting, when the actual diode holder was removed from the aluminium extrusion housing there was no heatsink compound to be seen - that severely reduced the cooling efficiency of the whole module+fan (and heat is the main killer of these diodes). Really daft situation and of course I added some when it was reassembled.
") It does reflect the light though and that actually makes it easier to confirm you've cut right through as the light makes it obvious.
It does reflect the light though and that actually makes it easier to confirm you've cut right through as the light makes it obvious.


