You are using an out of date browser. It may not display this or other websites correctly.
You should upgrade or use an alternative browser.
You should upgrade or use an alternative browser.
G4 Mirror Drive Door conversion to....... NOT A HACKAMAC !
- Thread starter ALXAndy
- Start date
More options
Thread starter's postsCheers fella.
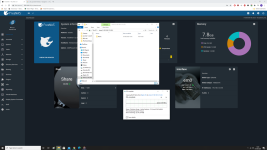
So last night I needed to tackle an issue that has been bothering me since I installed Windows 10. I bought a Silhouette Portrait years ago to make stickers. However, when I realised that they weren't all that and sticking stuff on mods was going out of fashion I repurposed it as the most useful tool for modding I have ever had.
When I use my verniers to measure stuff it is never to the mm. It is always .mm, and this is something that makes it hard to map stuff out onto acrylic with a pen and ruler. Not only that, to compound it you have the ink thickness which pees up all of your sizes too. So things used to be either too big and things would just fall through, or too small and I would need to mess around for ages filing and all of that. With Photoshop I can draw out plans to the exact .mm, and then cut templates and stencils for cuts. Like this thing here? I could draw this up to 100% accuracy in about a minute, rather than spending ages fruitlessly marking it out with pens and ruler etc.

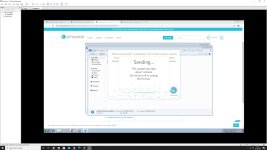
That, in real time is what I used to cut out those cable holes in the PSU cover last night. Problem is every time Win 10 gets an update my plotter gets harder and harder to detect. To the point that the other night I spent an hour standing there plugging in the USB, pulling it out, plugging it in until it finally loads printing devices support without a conflict that you cannot fix. I depend on this plotter, but I am not paying £200 for another when it is a Windows issue. So in the end I installed VMware, installed Win 7, and then flashed the firmware (which you can't do in Win 10 because once you start the firmware update it turns off the plotter itself, turns it back on and then of course can't find it)
So with that issue out of the way we were back in business. I did the metal work earlier.
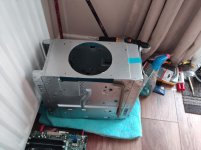
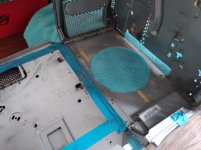
The panel that will hold the mobo is now completely flat, so I can make the holes for that and fit the posts later.
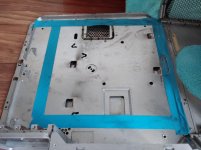
The fan needed a relief slot. Maybe not that big, but I didn't want to take a chance of it not fitting. It turned out to be one small area that was pressed inward, so the fan was a very tight fit and I didn't want it mounted like that. Any way, that is done, I have now cleaned the inside of the chassis a bit and the fan has been fitted.
So last night I needed to tackle an issue that has been bothering me since I installed Windows 10. I bought a Silhouette Portrait years ago to make stickers. However, when I realised that they weren't all that and sticking stuff on mods was going out of fashion I repurposed it as the most useful tool for modding I have ever had.
When I use my verniers to measure stuff it is never to the mm. It is always .mm, and this is something that makes it hard to map stuff out onto acrylic with a pen and ruler. Not only that, to compound it you have the ink thickness which pees up all of your sizes too. So things used to be either too big and things would just fall through, or too small and I would need to mess around for ages filing and all of that. With Photoshop I can draw out plans to the exact .mm, and then cut templates and stencils for cuts. Like this thing here? I could draw this up to 100% accuracy in about a minute, rather than spending ages fruitlessly marking it out with pens and ruler etc.

That, in real time is what I used to cut out those cable holes in the PSU cover last night. Problem is every time Win 10 gets an update my plotter gets harder and harder to detect. To the point that the other night I spent an hour standing there plugging in the USB, pulling it out, plugging it in until it finally loads printing devices support without a conflict that you cannot fix. I depend on this plotter, but I am not paying £200 for another when it is a Windows issue. So in the end I installed VMware, installed Win 7, and then flashed the firmware (which you can't do in Win 10 because once you start the firmware update it turns off the plotter itself, turns it back on and then of course can't find it)

So with that issue out of the way we were back in business. I did the metal work earlier.


The panel that will hold the mobo is now completely flat, so I can make the holes for that and fit the posts later.

The fan needed a relief slot. Maybe not that big, but I didn't want to take a chance of it not fitting. It turned out to be one small area that was pressed inward, so the fan was a very tight fit and I didn't want it mounted like that. Any way, that is done, I have now cleaned the inside of the chassis a bit and the fan has been fitted.
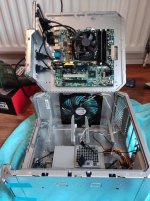
OK. So does it all fit?. Not the PSU side, but the other side of things.
Apologies for the potato pic, but let's cover the fan first.
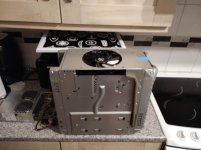
Yup, that fits OK.
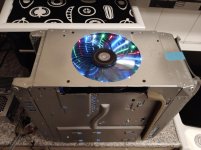
It even works. How embarrassed would I have been if the fan I have not used since the Titan Black days didn't work. It's a little off centre, but it gets the job done. Remember I joked about it being a wind tunnel? yeah, turns out I shouldn't have made that joke.
https://www.youtube.com/watch?v=wE1pe-lfY8U&feature=youtu.be
It's a wind tunnel alright. Thankfully the LEDs can be switched off, and I will run it at 7v. If it doesn't kick in at 7v I will get a PCI slot fan controller for it. There is no way my NAS is making that sort of noise Gawd, it literally blasts air out of every orifice.
Any way, yeah, back to does it fit.
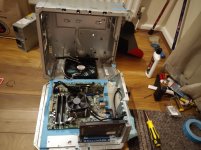
And quite well too. It may not look like a total shed inside after all.
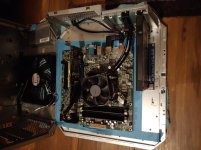
The sound card is only there to get the slot in the correct position.
Apologies for the potato pic, but let's cover the fan first.

Yup, that fits OK.

It even works. How embarrassed would I have been if the fan I have not used since the Titan Black days didn't work. It's a little off centre, but it gets the job done. Remember I joked about it being a wind tunnel? yeah, turns out I shouldn't have made that joke.
https://www.youtube.com/watch?v=wE1pe-lfY8U&feature=youtu.be
It's a wind tunnel alright. Thankfully the LEDs can be switched off, and I will run it at 7v. If it doesn't kick in at 7v I will get a PCI slot fan controller for it. There is no way my NAS is making that sort of noise
 Gawd, it literally blasts air out of every orifice.
Any way, yeah, back to does it fit.

And quite well too. It may not look like a total shed inside after all.

The sound card is only there to get the slot in the correct position.
Drive bays are now fully attached. They screw in through the back side. PSUs are fitted perma now. Speaker has been rewired and put back in.
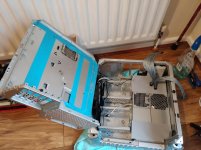
It's a wee bit skew whiff but it's all very solid. I cut my thumb open and it wouldn't stop bleeding so I had to work with a paper towel taped over my thumb lol.
It closes nice too.
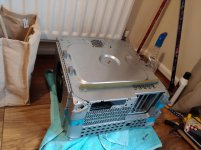
I wanted to drill and tap the board posts but I forgot I snapped my 2.8mm bit and I need one. So I have ordered some.
Other than the IO plate though once the board is in it's literally done. I just need to make an acrylic IO plate at some point tonight or tomorrow and then the plastics can be buffed and it can all be put back together. I am still waiting on the latching switch, but I can literally finish the whole thing without that and add it at the end.

It's a wee bit skew whiff but it's all very solid. I cut my thumb open and it wouldn't stop bleeding so I had to work with a paper towel taped over my thumb lol.
It closes nice too.

I wanted to drill and tap the board posts but I forgot I snapped my 2.8mm bit and I need one. So I have ordered some.
Other than the IO plate though once the board is in it's literally done. I just need to make an acrylic IO plate at some point tonight or tomorrow and then the plastics can be buffed and it can all be put back together. I am still waiting on the latching switch, but I can literally finish the whole thing without that and add it at the end.
OK so I have received and fitted the latching switch for the HDD PSU.
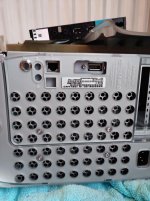
And inside.
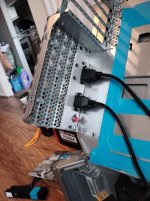
I was going to put that here.
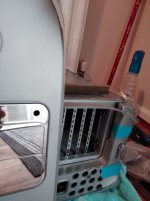
Then realised it was metal. Chromed metal, and I don't have a 12mm drill bit. I don't think I would risk that either, risking the chrome finish and most certainly the plastics inside.
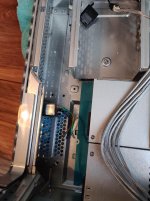
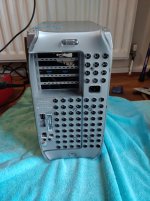
PSUs socket is fitted. So the back is basically finished now.
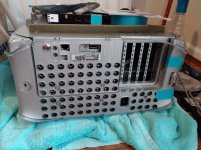
The last piece of modding (well, apart from mounting the board) is just cutting this thing down after modding it and deleting the USB3. Because that is going to the rear PCI bracket on the case. I will also need to connect my power LED (apple one on front IO of case) to this to get it to light up.
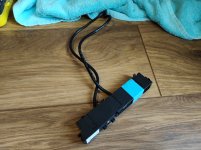
I may delete the USB2.0 header too, and just have the LEDs etc but we will see. Doubt I will ever need the front audio either, but I will decide once I have it apart again.
You can see how much I have done since yesterday. I'm starting to get annoyed with it, but I think I will be finished long before I want to hurl it at the wall.

And inside.

I was going to put that here.

Then realised it was metal. Chromed metal, and I don't have a 12mm drill bit. I don't think I would risk that either, risking the chrome finish and most certainly the plastics inside.

PSUs socket is fitted. So the back is basically finished now.

The last piece of modding (well, apart from mounting the board) is just cutting this thing down after modding it and deleting the USB3. Because that is going to the rear PCI bracket on the case. I will also need to connect my power LED (apple one on front IO of case) to this to get it to light up.

I may delete the USB2.0 header too, and just have the LEDs etc but we will see. Doubt I will ever need the front audio either, but I will decide once I have it apart again.
You can see how much I have done since yesterday. I'm starting to get annoyed with it, but I think I will be finished long before I want to hurl it at the wall.
Thankfully the noise, mess and blood loss seems to have ended now the mods are all done. Thank god. I started on the wiring, and bashed it all out.
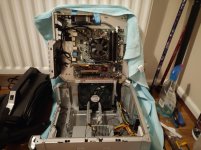
The GT 640 is just there to hold the socket down whilst the epoxy sets. However I can pretty much put whatever I like in there now.
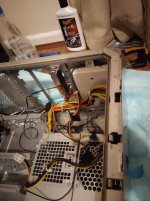
FP is all back in and correct as to how it was when I pulled it apart. Still soldering to do, then I can cloth tape down everything and get it out of the way. I fitted the Dell case fan.
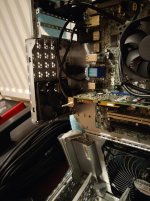
Mostly to stop it whining at boot. It was very quiet, and I probably won't need it with that hurricane machine in there but yeah, if it whines at POST I won't be able to see it (it will be headless once the software is all on and it runs from BOOT into a NAS).
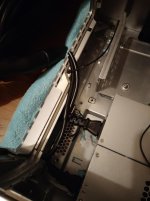
Those are fitted too. Obviously they are too long, not stripped and not soldered but I would rather get the iron out the once.
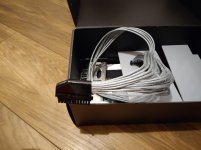
Managed to recycle the Apple angled cover.
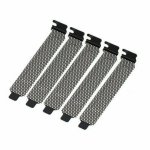
I ordered those.

The GT 640 is just there to hold the socket down whilst the epoxy sets. However I can pretty much put whatever I like in there now.

FP is all back in and correct as to how it was when I pulled it apart. Still soldering to do, then I can cloth tape down everything and get it out of the way. I fitted the Dell case fan.

Mostly to stop it whining at boot. It was very quiet, and I probably won't need it with that hurricane machine in there but yeah, if it whines at POST I won't be able to see it (it will be headless once the software is all on and it runs from BOOT into a NAS).

Those are fitted too. Obviously they are too long, not stripped and not soldered but I would rather get the iron out the once.

Managed to recycle the Apple angled cover.

I ordered those.
Wasn't in the mood for soldering tonight. I am exhausted tbh. Fastest full case mod I have ever done.
Any way, before I made it all permanent I decided to test the hardware. I connected up the board etc PSU, all works perfectly. That was a relief.
Fired up the HDD PSU and again no problems. Phew. Not only that but when I tested the board it did not even notice I did not have that great plastic lump plugged in at all (which I thought it would, hence why it still exists) so I think I am just going to de-pin all of the crap I don't want and just wire up the LED board and bridge off to the PLED on the case (the original white Apple one).
As a complete bonus I found something really cool out about the fan. I can not believe I never noticed it before tbh. It has a speed selector switch on it FFS. 1200 RPM,900 RPM and 600 RPM. At 1200 it was still far too noisy, but once switched to 600 it became virtually silent (you will never hear it from a foot away) and yet still wafted lots of cold air into the case.
That is a total result. It saves me jimmy rigging wires for 7v (which it would still be too noisy at, IMO and would mess up the LED button). However, the LEDs do switch off and they have a memory on them, so you don't need to do it each time you disconnect the power and power it back up (I tested that also).
So I literally don't need to do anything at all now. I don't need any more fans either, meaning the mess is pretty much 0.
Very happy. It's about time it finally stopped fighting me and gave me some positive vibes
I will highly likely bash out the soldering tomorrow, go home Monday for a week and then return with the SSD. Wait for a sunny day, have "one day of suck" wet sanding out the panels and buffing them, then sit back and relax and set up FreeNAS. It also gives me a chance to pull one of the 1tb drives out of the Xbox 1x that never got used.
The last 1tb will come from the other NAS once it has been transferred across.
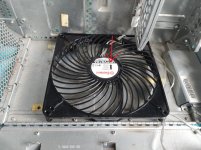
Srsly, what a total spaz. How could I have not noticed that?!?!?!
Any way, before I made it all permanent I decided to test the hardware. I connected up the board etc PSU, all works perfectly. That was a relief.
Fired up the HDD PSU and again no problems. Phew. Not only that but when I tested the board it did not even notice I did not have that great plastic lump plugged in at all (which I thought it would, hence why it still exists) so I think I am just going to de-pin all of the crap I don't want and just wire up the LED board and bridge off to the PLED on the case (the original white Apple one).
As a complete bonus I found something really cool out about the fan. I can not believe I never noticed it before tbh. It has a speed selector switch on it FFS. 1200 RPM,900 RPM and 600 RPM. At 1200 it was still far too noisy, but once switched to 600 it became virtually silent (you will never hear it from a foot away) and yet still wafted lots of cold air into the case.
That is a total result. It saves me jimmy rigging wires for 7v (which it would still be too noisy at, IMO and would mess up the LED button). However, the LEDs do switch off and they have a memory on them, so you don't need to do it each time you disconnect the power and power it back up (I tested that also).
So I literally don't need to do anything at all now. I don't need any more fans either, meaning the mess is pretty much 0.
Very happy. It's about time it finally stopped fighting me and gave me some positive vibes

I will highly likely bash out the soldering tomorrow, go home Monday for a week and then return with the SSD. Wait for a sunny day, have "one day of suck" wet sanding out the panels and buffing them, then sit back and relax and set up FreeNAS. It also gives me a chance to pull one of the 1tb drives out of the Xbox 1x that never got used.
The last 1tb will come from the other NAS once it has been transferred across.

Srsly, what a total spaz. How could I have not noticed that?!?!?!
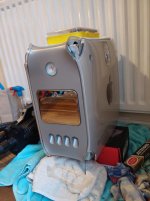
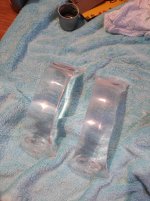
I figured I would do some wet sanding and buffing today. The front and top panels are not gloss so they just need a bath. The side panels were in bad shape, however, and needed the works. I figured cool, I will take out the anger by sanding and buffing loads. And it went very well.
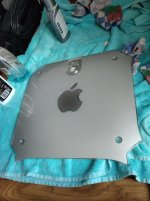
I was very proud of myself, given that side had a huge great gouge in it. Took forever to sand out, but hey it came out. I started with 1200 wet, then to 2000 wet and then I usually go to 3000 wet. However, I didn't have any 3000 so I did two runs with Tcut metallic (note metallic, NEVER EVER use Tcut on plastic panels) and then PlastX. PlastX is the secret weapon here. Nothing else I have ever tried is fine enough to make plastic shine without any haze.
So I thought cool I will put the panel back on !. Then the crap started.
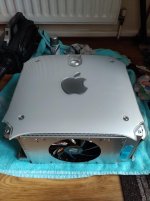
It won't stay closed because I forgot to fit the U hoops back to the solid metal panel. And, you can't just remove the panel again easily oh no, you have to take the motherboard out because there is a clip under it. So I took it out (the mobo) removed the clip, fitted the U hoops and then put it back together. Only I didn't realise the handle also needs to be bolted into the metal panel so I had to remove the board AGAIN and do it all again.
The mesh bits came.
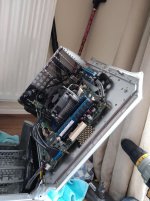
So it is literally one more "Session of suck" and then I can do the soldering and get to work with the software.

I was very proud of myself, given that side had a huge great gouge in it. Took forever to sand out, but hey it came out. I started with 1200 wet, then to 2000 wet and then I usually go to 3000 wet. However, I didn't have any 3000 so I did two runs with Tcut metallic (note metallic, NEVER EVER use Tcut on plastic panels) and then PlastX. PlastX is the secret weapon here. Nothing else I have ever tried is fine enough to make plastic shine without any haze.
So I thought cool I will put the panel back on !. Then the crap started.

It won't stay closed because I forgot to fit the U hoops back to the solid metal panel. And, you can't just remove the panel again easily oh no, you have to take the motherboard out because there is a clip under it. So I took it out (the mobo) removed the clip, fitted the U hoops and then put it back together. Only I didn't realise the handle also needs to be bolted into the metal panel so I had to remove the board AGAIN and do it all again.
The mesh bits came.

So it is literally one more "Session of suck" and then I can do the soldering and get to work with the software.
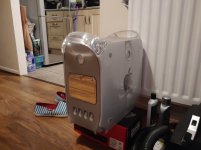
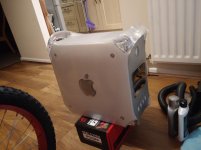
Done.
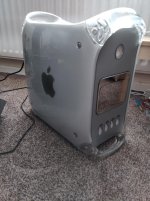
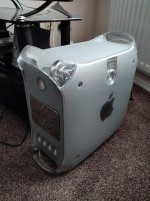
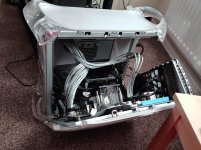
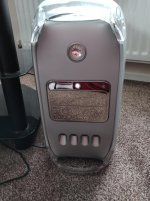
I installed FreeNAS last night. I had to remove the RAID card for now because you can't boot from it in JBOD so it was freezing at the drive detection bit. FreeNAS is on, but it wants a network cable plugged in to continue and that's a problem right now.
Might try and cobble something together later, but the hard bit is done.


