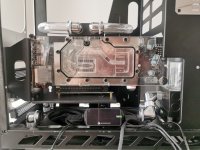
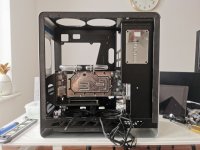
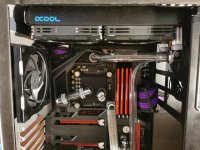
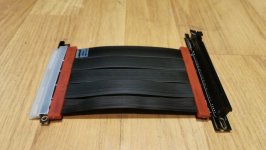
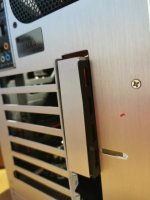
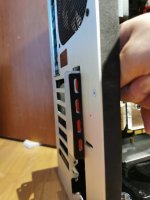
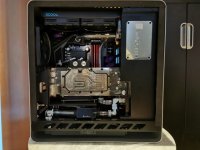
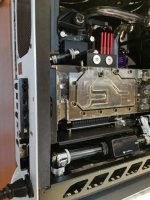
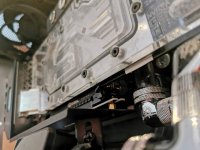
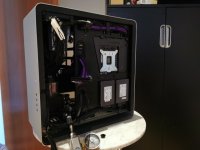
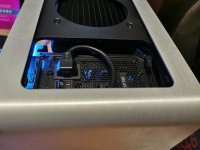
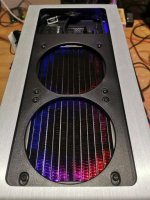
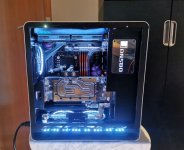
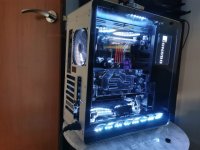
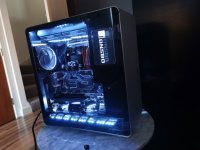
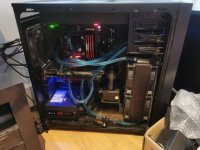
Doesn’t seem to be many UMX4 builds (new revision) out there let alone Jonsbo builds, so thought I’d add my own here. It’s not a complex build at all, and I’m hoping it’ll act as a reference to anyone who had one or thinking of purchasing one, knowing what they can fit and/or limitations to this case.
Been out the loop for a while and think it’s time for a PC refresh... specifically donating majority of my current computer parts to a new build to act as my VR system, which will help complement the Valve Index I have on order and given the hardware specs it requires.
This gives me an excuse to the missus to upgrade my 750D with new hardware and for that I’ll be joining the AMD bandwagon for its bang-for-buck performance, and well, I get to build a new PC. That will come later once we see what AMD’s new offering is during October... so second build log will be introduced.
For now, let’s focus on the donor hardware:
CPU: Intel 4770K Haswell - Delidded
Motherboard: Asus Maximus Formula VI Z87
Memory: 4x8Gb Corsair Vengeance 2400
GPU: EVGA GTX1080 FE (this will be going back into my 750D build once the new GPU is released and reviewed)
Primary Storage: Corsair MP510 960Gb m.2
Secondary Storage: 2x 256Gb Samsung 850 Evo SSD
WaterCooling: EK Supremacy CPU Block, EK Crosschill and Chipset Block, EK GTX1080 GPU Block and back plate, EK-xRes 140 D5 CSQ Acetal
This will be replaced/supplemented with:
Case: Jonsbo UMX4 Silver – Window version
PSU: Corsair SF750
Case Fans: 2x Noctua Chromax A12x15 120mm Fans, 5x Arctic Cooling P12 PST 120mm (Temp replacement till Noctua release Chomax A12x25)
WaterCooling: Alphacool NexXxoS ST30 240 V2 Radiator, XSPC TX240 Radiator, EK X3 64mm Reservoir tube, Replacement Supremacy Evo top and EK Supremacy Nickel plate, EK Cryofuel, Bitspower 16mm Rigid tubing, various Bitspower fittings, Bitspower Crystal Link 16mm tubing
Monitoring: BarrowCh Multimode OLED, Alphacool Flow Sensor
Lighting: Various LED
What should have been a simple transfer, ended up being a bit more complicated as I had a habit of unintentionally impulse buying watching/reading reviews on this and that. (OCUK must love me with the amount of orders I’ve been placing together with the sub £8.70 delivery charge.. probably over £100 worth in under 2 weeks). Thus I have ended up with multiples of same/similar items so I can choose what will work with this build or the 750D build. This may be an OTT build for what it's worth, but meh!
I'm not going to post pictures of what the original case looks like, there's plenty on Google images for that.
On with some pics of what i've done so far, while i wait for more stuff to arrive.. and when i can be arsed dismantling the 750D.
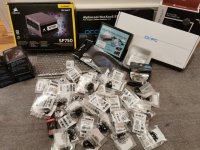
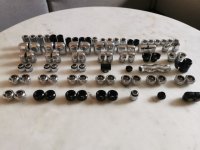
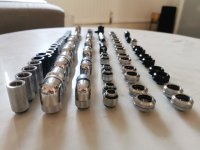
Think i bought too many fittings for what i needed. Oh well, better to have too many than too little.

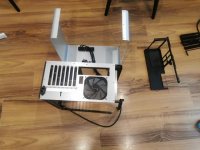
Remove the HDD tray as i haven't used mechanical 3 1/2" drives since God knows when (excluding externals obviously). Unfortunately to do that, you need to dismantle the case fully as the bottom HDD tray is held on by 4 screws between the bottom tray and the outer aluminium shell. Annoying.
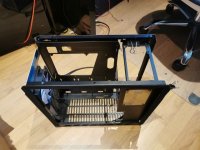
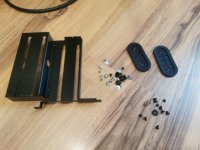
30 or so screws later
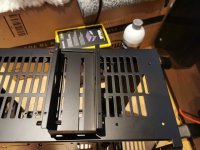
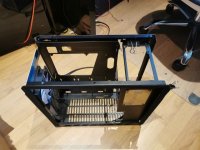
Binder clips were used in several places as i spent near enough 2 days working out measurements all over the place
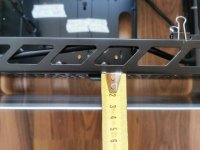
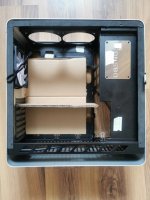
No mobo needed. mockup using cardboard
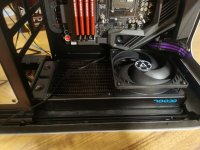
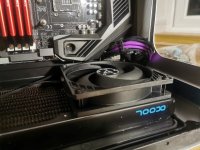
Many have mentioned it being very difficult to attach a 30mm radiator and 25mm fans at the top of the case. Let's try it out. I have 15mm fans at the ready if i can't get it to work.
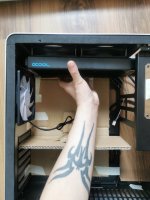
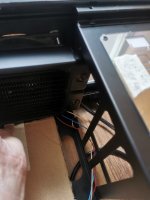
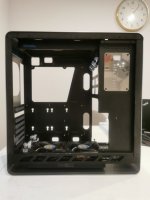
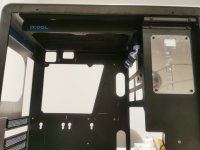
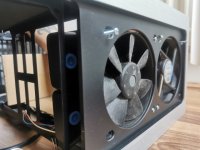
Fan positions to be decided. Possibly have the bottoms fans in a Pull config while the tops fans underneath the top rad in a Push... or maybe a pull as shown above.. hmm. Trial and error needed.
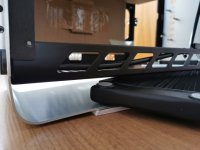
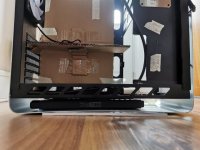
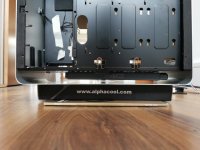
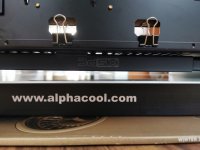
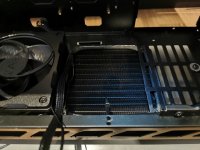
Not seen anyone do this yet. Put a radiator in between the bottom tray and outer shell? The XSPC TX240 radiator fits perfectly with a 10-15mm gap. I'll probably add a Demciflex filter to it so it will be easy to clean.
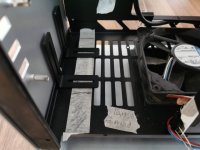
Area to mark off where i can add the EK holders for the pump.
After viewing a Jonsbo owners thread elsewhere, gave me some inspiration of what was and was not possible with this case, so first thing to get rid of was the bottom fan grills as many have mentioned the fans increased sound due to them being so close the the grill.
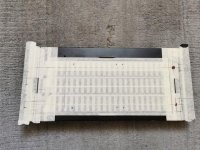
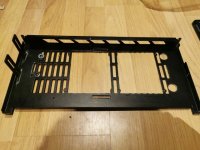
Areas marked off and cut. I could've bolted the holders inside rather than the way i did it.. but i was tryying to be creative. Oh well. no-one is perfect, and won't be seen once everything is fitted anyways
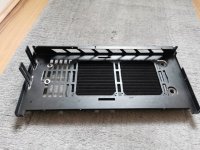
Had to make one of the radiator holes bigger since it was a few mm off center :/
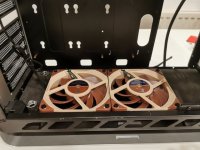
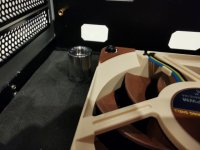
I had a couple of XSPC 240mm gaskets lying around, so use that to attach the radiator to the bottom. This should help reduce vibrations and leaks. Then used whats left of the gasket to make the tray look a bit cleaner
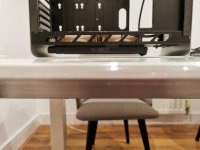
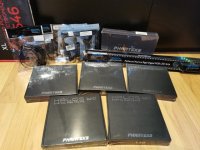
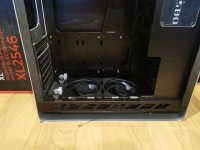
More goodies turned up, so replaced the brown Noctuas with a bunch of Arctic P12 and Phanteks ARGB rings... until Noctua release a black version of the A12.
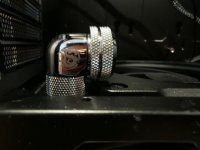
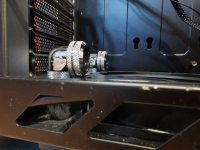
Bit of cable management.
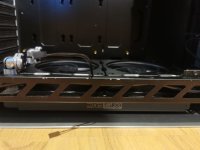
Middle cable will connect to the BarrowCH flow meter
That's it for today. I plan to dismantle my 750D tomorrow.
Been out the loop for a while and think it’s time for a PC refresh... specifically donating majority of my current computer parts to a new build to act as my VR system, which will help complement the Valve Index I have on order and given the hardware specs it requires.
This gives me an excuse to the missus to upgrade my 750D with new hardware and for that I’ll be joining the AMD bandwagon for its bang-for-buck performance, and well, I get to build a new PC. That will come later once we see what AMD’s new offering is during October... so second build log will be introduced.
For now, let’s focus on the donor hardware:
CPU: Intel 4770K Haswell - Delidded
Motherboard: Asus Maximus Formula VI Z87
Memory: 4x8Gb Corsair Vengeance 2400
GPU: EVGA GTX1080 FE (this will be going back into my 750D build once the new GPU is released and reviewed)
Primary Storage: Corsair MP510 960Gb m.2
Secondary Storage: 2x 256Gb Samsung 850 Evo SSD
WaterCooling: EK Supremacy CPU Block, EK Crosschill and Chipset Block, EK GTX1080 GPU Block and back plate, EK-xRes 140 D5 CSQ Acetal
This will be replaced/supplemented with:
Case: Jonsbo UMX4 Silver – Window version
PSU: Corsair SF750
Case Fans: 2x Noctua Chromax A12x15 120mm Fans, 5x Arctic Cooling P12 PST 120mm (Temp replacement till Noctua release Chomax A12x25)
WaterCooling: Alphacool NexXxoS ST30 240 V2 Radiator, XSPC TX240 Radiator, EK X3 64mm Reservoir tube, Replacement Supremacy Evo top and EK Supremacy Nickel plate, EK Cryofuel, Bitspower 16mm Rigid tubing, various Bitspower fittings, Bitspower Crystal Link 16mm tubing
Monitoring: BarrowCh Multimode OLED, Alphacool Flow Sensor
Lighting: Various LED
What should have been a simple transfer, ended up being a bit more complicated as I had a habit of unintentionally impulse buying watching/reading reviews on this and that. (OCUK must love me with the amount of orders I’ve been placing together with the sub £8.70 delivery charge.. probably over £100 worth in under 2 weeks). Thus I have ended up with multiples of same/similar items so I can choose what will work with this build or the 750D build. This may be an OTT build for what it's worth, but meh!
I'm not going to post pictures of what the original case looks like, there's plenty on Google images for that.
On with some pics of what i've done so far, while i wait for more stuff to arrive.. and when i can be arsed dismantling the 750D.

Think i bought too many fittings for what i needed. Oh well, better to have too many than too little.


Remove the HDD tray as i haven't used mechanical 3 1/2" drives since God knows when (excluding externals obviously). Unfortunately to do that, you need to dismantle the case fully as the bottom HDD tray is held on by 4 screws between the bottom tray and the outer aluminium shell. Annoying.


30 or so screws later


Binder clips were used in several places as i spent near enough 2 days working out measurements all over the place


No mobo needed. mockup using cardboard
Many have mentioned it being very difficult to attach a 30mm radiator and 25mm fans at the top of the case. Let's try it out. I have 15mm fans at the ready if i can't get it to work.


Fan positions to be decided. Possibly have the bottoms fans in a Pull config while the tops fans underneath the top rad in a Push... or maybe a pull as shown above.. hmm. Trial and error needed.


Not seen anyone do this yet. Put a radiator in between the bottom tray and outer shell? The XSPC TX240 radiator fits perfectly with a 10-15mm gap. I'll probably add a Demciflex filter to it so it will be easy to clean.

Area to mark off where i can add the EK holders for the pump.
After viewing a Jonsbo owners thread elsewhere, gave me some inspiration of what was and was not possible with this case, so first thing to get rid of was the bottom fan grills as many have mentioned the fans increased sound due to them being so close the the grill.


Areas marked off and cut. I could've bolted the holders inside rather than the way i did it.. but i was tryying to be creative. Oh well. no-one is perfect, and won't be seen once everything is fitted anyways


Had to make one of the radiator holes bigger since it was a few mm off center :/


I had a couple of XSPC 240mm gaskets lying around, so use that to attach the radiator to the bottom. This should help reduce vibrations and leaks. Then used whats left of the gasket to make the tray look a bit cleaner

More goodies turned up, so replaced the brown Noctuas with a bunch of Arctic P12 and Phanteks ARGB rings... until Noctua release a black version of the A12.


Bit of cable management.


Middle cable will connect to the BarrowCH flow meter
That's it for today. I plan to dismantle my 750D tomorrow.

Last edited:


