New 4k Gaming Rig Build Log (No newbie, but need help)

Associate
Joined
1 Jun 2020
Posts
65
Hi all,

Following on from some solid advice over on this thread by @Sparx https://forums.overclockers.co.uk/threads/4k-res-gaming-rig-queries.18894329/#post-33793768 on components to go towards a 4k PC rig (Or at least get close to it right now)

My components arrived yesterday to start my build & eventually turn it into something capable of running smooth frames at 4k.

Spec:

CPU
- AMD Ryzen 9 3900X Twelve Core 4.6GHz
CPU Cooler - Corsair Hydro Series iCUE H115i PRO XT RGB Performance Liquid Cooler - 280mm
MOBO - Gigabyte X570 AORUS ELITE (AMD AM4) DDR4 X570
RAM - Corsair Vengeance RGB PRO Black 16GB (2x8GB) 3600 MHz AMD Ryzen Tuned DDR4
SSD - WD Black 1TB SN750 M.2 2280 NVME PCI-E Gen3
GFX - 1070 8gb (Pending the 3080 TI being released in September)
PSU - Corsair 1000W Gold

Case - Phanteks Eclipse P500 Air ATX
Monitor - ASUS ROG STRIX XG27UQ 27" 3840x2160 IPS 144Hz 1ms FreeSync/G-Sync Compatible HDR400

6bH0BTA.jpg
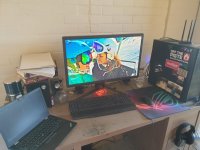
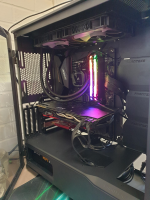
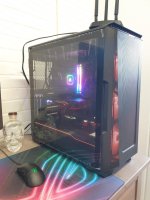
Current Rig setup + Office working from home!​

Zl2c7yN.jpg
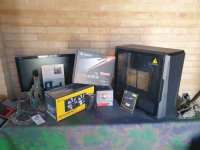
New components

First step:

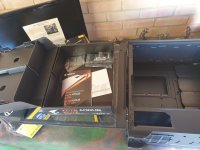
Open up the Mobo box, and flick through the guides in case there is anything odd in there...
v14KL2r.jpg
Noted nothing out of the ordinary. Although it did come with a CD with its drivers on.
dKd2Zyq.jpg
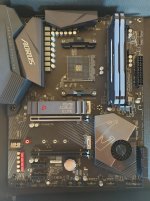
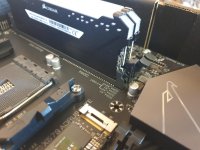
Had an issue with seating the RAM. The first slot saw the holding pin snap off on one side (Started to think... oh it's going to be one of those builds is it)
erTIydW.jpg
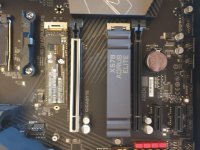
Then got to the NVME SSD, so find that it's shorter than (What I assume is a protective cover on the Mobo when you get it set in?)

I didn't want to seat the CPU just yet, as I also had a screw snap its head when seating the Mobo which was not good news! May need new decent screws to avoid seating issues.

Queries on next steps:

  1. NVME/SSD installation - Whilst there is another round pin slot to align with the shorter SSD strip, how on earth do I get the holding pin out of slot "110" to place it into "80" closer up? I unseated the mobo but can't seem to get it out at all from the backside either.

  2. I'm also struggling on the knowledge front, of when I do get everything seated and installed.... Where do I start in regards to drivers? The mobo came with a disk, but I have no optical drive. Whilst in order to instal drivers online, surely I need a working Mobo for wifi, let alone an OS installation? I suppose what I'm really asking, is what are my steps after the physical instal?

    Many thanks,

    Luvvo

 
Associate
OP
Joined
1 Jun 2020
Posts
65
Resolved No.1 Turns out that first pin higher up for "110" is immovable. However, the second pin set into the lower "110" has a screw head once you remove is pin, so I could take this out and seat it into the higher side of "80", then reset the protective NVME SSD cover over the top of it.

As for the drivers though, I'm at a loss.

I do have an older Optical drive in my other rig I could detached and use temporarily?

JvuITZf.jpg
 
Soldato
Joined
30 Jul 2007
Posts
5,185
Location
Lincolnshire
How'd you break the memory slot?! Just gently slot it in (the right way) :o Lol. You need to change the RAM order anyway, you want them in slot A2 and B2 so they run dual-channel correctly. So they're both further away from the CPU slot :)

NVMe isn't a problem, you just slot the drive in like you have, then chuck the heatsink cover back on and screw it down at the end. The heatsink screwed down, will keep the NVMe down so you don't need to screw the drive down as well.

CPU is simple, just be VERY careful holding it, hold it by its side and be gentle. Don't touch or damage the pins underneath the CPU or on the motherboard CPU socket. That's the one very delicate part you don't wanna man-handle lol. Just lift the CPU socket latch, drop it in securely (only goes in one way) then lower the latch so it tightens. Then you just put the AIO cooler on it later (tip: you remove the 2 black brackets above and below the CPU socket, before you fit your AIO. Just chuck them in the mobo box in case need them in future. As the AIO has it's own mounting brackets)

You don't need an optical drive so don't worry about that lol. So if you haven't already, you need a Windows 10 key (can get it from that popular auction website for £5-10). You'll get sent a download link and the activation key. You download it then copy it to a USB memory stick. Then when the PC is all ready built, you just plug your USB stick in, boot from the USB and it'll start the Windows install process for you. It'll likely automatically find the network/wifi drivers during the Windows install (usually does) so you can get internet access when it's all finished.

Then when Windows is installed and you're on the desktop, you just go on all the websites and download the latest drivers directly from the manufacturers i.e. Nvidia for graphics drivers, AMD for the Ryzen chipset drivers, Gigabyte for any BIOS updates and motherboard software you might want, Corsair for your their iCUE software which controls your RAM/AIO's RGB lights and performance profile on AIO etc. Then Western Digital to get the SSD utility tool for any firmware updates on your NVMe drive etc.

Hope that helps clear things up a bit
 
Associate
OP
Joined
1 Jun 2020
Posts
65
I'm going to owe you a few pints after this I think @Sparx !

Really not sure on the RAM, I typically take my time with builds as know how easy it is for things to go wrong. Was maybe heavy-handed, but I felt like I was being gentle, and had the RAM the right way around. Admittedly not running on the dual channels though!

Now seated happily in A2/B2.

Sorted the NVME, as the mobo didn't come with an additional pin in order to prop the NVME up before the heatsink (not protective cover). That spare pin was already in the lower "110" slot on the mobo, so was scratching my head for a bit, although if I ever add another SSD, I'm still going to need another pin. Just didn't fancy it flapping around!

Wow, was forgetting USB drives altogether (Jehhzzusss) In regards to Windows 10, is there any particular on that makes a difference, i.e definitely 64 bit, but pro, home, whatever else might be out there...

Thanks,
 
Soldato
Joined
30 Jul 2007
Posts
5,185
Location
Lincolnshire
Haha I'll remember that if you're ever around my area ;)

W10 Pro is more widely available I usually see, definitely get 64-bit.

Make sure it's one that says 'instant delivery' or similar and they send you the key via email. A few random ones say it's posted out to you, ofc you don't want that lol
 
Associate
OP
Joined
1 Jun 2020
Posts
65
Cringe, I seated the CPU no problems, whilst I have Win 10 media downloading to a USB.

I then went to work on the CPU AIO.

I went to remove the integrated intel bracket. Thinking they were screwed on as opposed to just click fit.

Proceed to unscrew the actual cooler, with the liquid leaking out as I got halfway through doing that. (this was nowhere near the PC build at all!)

Obviously screwed the cooler back, on. The liquid seems to be an alcohol equivalent by the way (Stings), but now I'm concerned if I've lost too much of it for it to be effective?

We're talking 3-5 drops or less.
 
Soldato
Joined
22 Apr 2008
Posts
3,875
Location
Bryn Celyn Wales
Cringe, I seated the CPU no problems, whilst I have Win 10 media downloading to a USB.

I then went to work on the CPU AIO.

I went to remove the integrated intel bracket. Thinking they were screwed on as opposed to just click fit.

Proceed to unscrew the actual cooler, with the liquid leaking out as I got halfway through doing that. (this was nowhere near the PC build at all!)

Obviously screwed the cooler back, on. The liquid seems to be an alcohol equivalent by the way (Stings), but now I'm concerned if I've lost too much of it for it to be effective?

We're talking 3-5 drops or less.
if it's that it's nothing mate don't worry about it.
 
Associate
OP
Joined
1 Jun 2020
Posts
65
@pugheaven Thanks for the assurance bud. Felt I had stuffed it then!

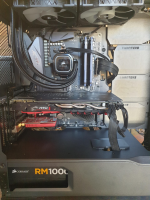
7wmedAy.jpg
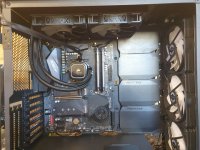
How it looks in her current state. Power cables from the Cooler pending a good home. Manged to put the USB cable from the cooler behind the mobo and it just fits, so that was a win.

Just the PSU, Wifi card, cable management, and GFX card to go. All whilst juggling work, other think it would have been a tad quicker.

 
Soldato
Joined
30 Jul 2007
Posts
5,185
Location
Lincolnshire
Looking good Luvvo - always worth spending an extra 20-30 mins to keep the cables tidy and routed well :)

Can't believe how clumsy you are... Snapping the RAM slot mechanism and unscrewing your AIO crikey :o Haha
 
Last edited:
Associate
OP
Joined
1 Jun 2020
Posts
65
Thanks for the encouragement chaps @pugheaven & @Sparx

X7317pF.png

Everything is physically in now. Including the 1070 & PSU. I'm just down to the cabling now, before powering up and installing Win OS. Really enjoying the flexibility of the case to hide cables or have more efficient rat runs for them.

That being said, all my additional PSU and cabling is in my In-Laws garage right now, and I'm not sure I have the right cables, connections in.​

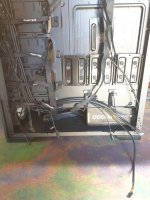
I58JILG.jpg

So I have the water cooling cables poking through the middle there. Not sure what they connect to.

Whilst I have all of the internal case fans, which seems a reall mix of 3 pin, or SATA, and I'm not sure which bits to bother with. i.e do I need to connect the endpoints on the bottom left side, or is Phanteks that great those are just splitters, and I only need to connect the bottom right side bunch of cables?

Many thanks,

Luvo!​
 
Soldato
Joined
30 Jul 2007
Posts
5,185
Location
Lincolnshire
So the bigger blue end cable is your USB 3 header for the case, route that from the bottom into the USB 3.0 header. Same for the other smaller black end USB 2.0 header cable looks like also loose there bottom right of photo, goes in next to it at bottom of mobo.

The AIO cables is a USB header that can route behind back of mobo tray and come up from bottom into USB header port. Also should be a SATA connector for the pump that needs to connect to PSU with SATA power lead. (so you'll need the SATA power cable ;))

Those velco cable ties btw if you open them, they can wrap around that bit of metal to the right on the photos, then come back round to neatly close the velcro on itself.
 
Associate
OP
Joined
1 Jun 2020
Posts
65
@Sparx Sorted the front panel and blue USB3, those two were easy enough.

Pilfered the two sata cables I had from my Optical Drive, and SSD in the old rig, to connect the front panel and AIO in new rig.

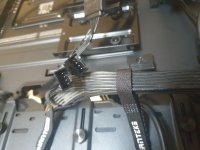
I just have these cables left to go now. For the life of me I can't find where they slot in

For the AIO cables on the first image I can only see *male to *male connection points, unless I'm missing something on the mobo.
dp0BDof.jpg


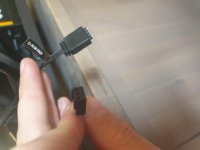
Then on the second image the 3 PIN did come with a cover on it, but can't find a slot for it on mobo.

Likewise the *female 3 pin I dont see a slot on the mobo either.

KhoWxGg.jpg
 
Associate
OP
Joined
1 Jun 2020
Posts
65
Ah think I know where I've gone wrong.

I've connected the RAD fans directly to the Mobo, instead of connecting them to the 2x4 shrouded pin connectors coming out of the AIO.

Having completely ignored the pump tach cable, needed to go directly onto the CPU_FAN slot.

Right thats one issue solved.

Now for those mystery cables :(
 
Associate
OP
Joined
1 Jun 2020
Posts
65
OK, cables all seemed to be sorted.

Plugged in all the peripherals, and PSU power supply, but I'm not getting anything spin up.

Just the RAM lighting up.

ANLJ90V.png


Missing something somewhere right?

I have the main power cables going into the mid/top right side of the mobo, as well as the smaller one into the top left.

Not sure what cable im potentially missing?
 
Associate
OP
Joined
1 Jun 2020
Posts
65
Nevermind we have lights! What a journey fellas!

I can't get the mobo to pick up the monitor though, "HDMI signal not found" (yeah im plugged into the mobo, not the GFX.

Made a mental note, that the two top case fans are not operating!

3taADtb.jpg
 
Soldato
Joined
30 Jul 2007
Posts
5,185
Location
Lincolnshire
You got the case power/reset switch connectors in the right order? (the small pins on bottom right)

Double check the power cables are securely in and clicked in both ends (into mobo and into PSU, it's modular isn't it?)

You connected the SATA power up on the AIO too didn't you? And got the fan cables connected into the pump too?

Edit: Crossed over your latest post lol. You need the monitor plugged into the GPU, not the mobo :p

Edit2: Also those top 2 fans are your AIO rad fans aren't they? You'll want them working so they can cool down the rad from CPU heat. Check they're connected into the AIO pump and then SATA is in too, I've checked my own and the other 2 cables loose aren't connected, just the USB header and SATA. Think I used to have the loose ones into my Commander Pro though but it's dodgy atm so disconnected it lol
 
Back
Top Bottom