Scratch build valve power amps

Kei

Kei

Soldato
OP
Joined
24 Oct 2008
Posts
2,750
Location
South Wales
I've been using it regularly since the start of August and it's been running great. It sounds superb. It's surprising just how loud 20-30W is capable of. Having resampled all of the valves, at best, the differences between them are subtle. I'm currently sticking with the JJ KT77's as they are a matched pair rather than a quartet and they are also the cheapest so I can wear these down whilst I work on building the second amp. Swapping valves around all the time isn't going to bode well for the sockets or the valves and I wouldn't want to wear half a quartet. I'll use the quartets once I have both amps finished. Currently I've got the left channel powered by my solid state amp and the right channel via the valve amp. They sound remarkably similar, though I think the valve amp has a tubbier bass which I reckon is down to the low damping factor due to the higher output impedance.

I moved it from behind the door to where the turntable was which has helped with cooling. The turntable needed to move anyway as the top of the "flexi-rack" is not stable enough for the turntable. I had to tip toe around whenever it was on. That will get it's own wall shelf at some point.


Did another video with better audio this time. (albeit worse IQ)

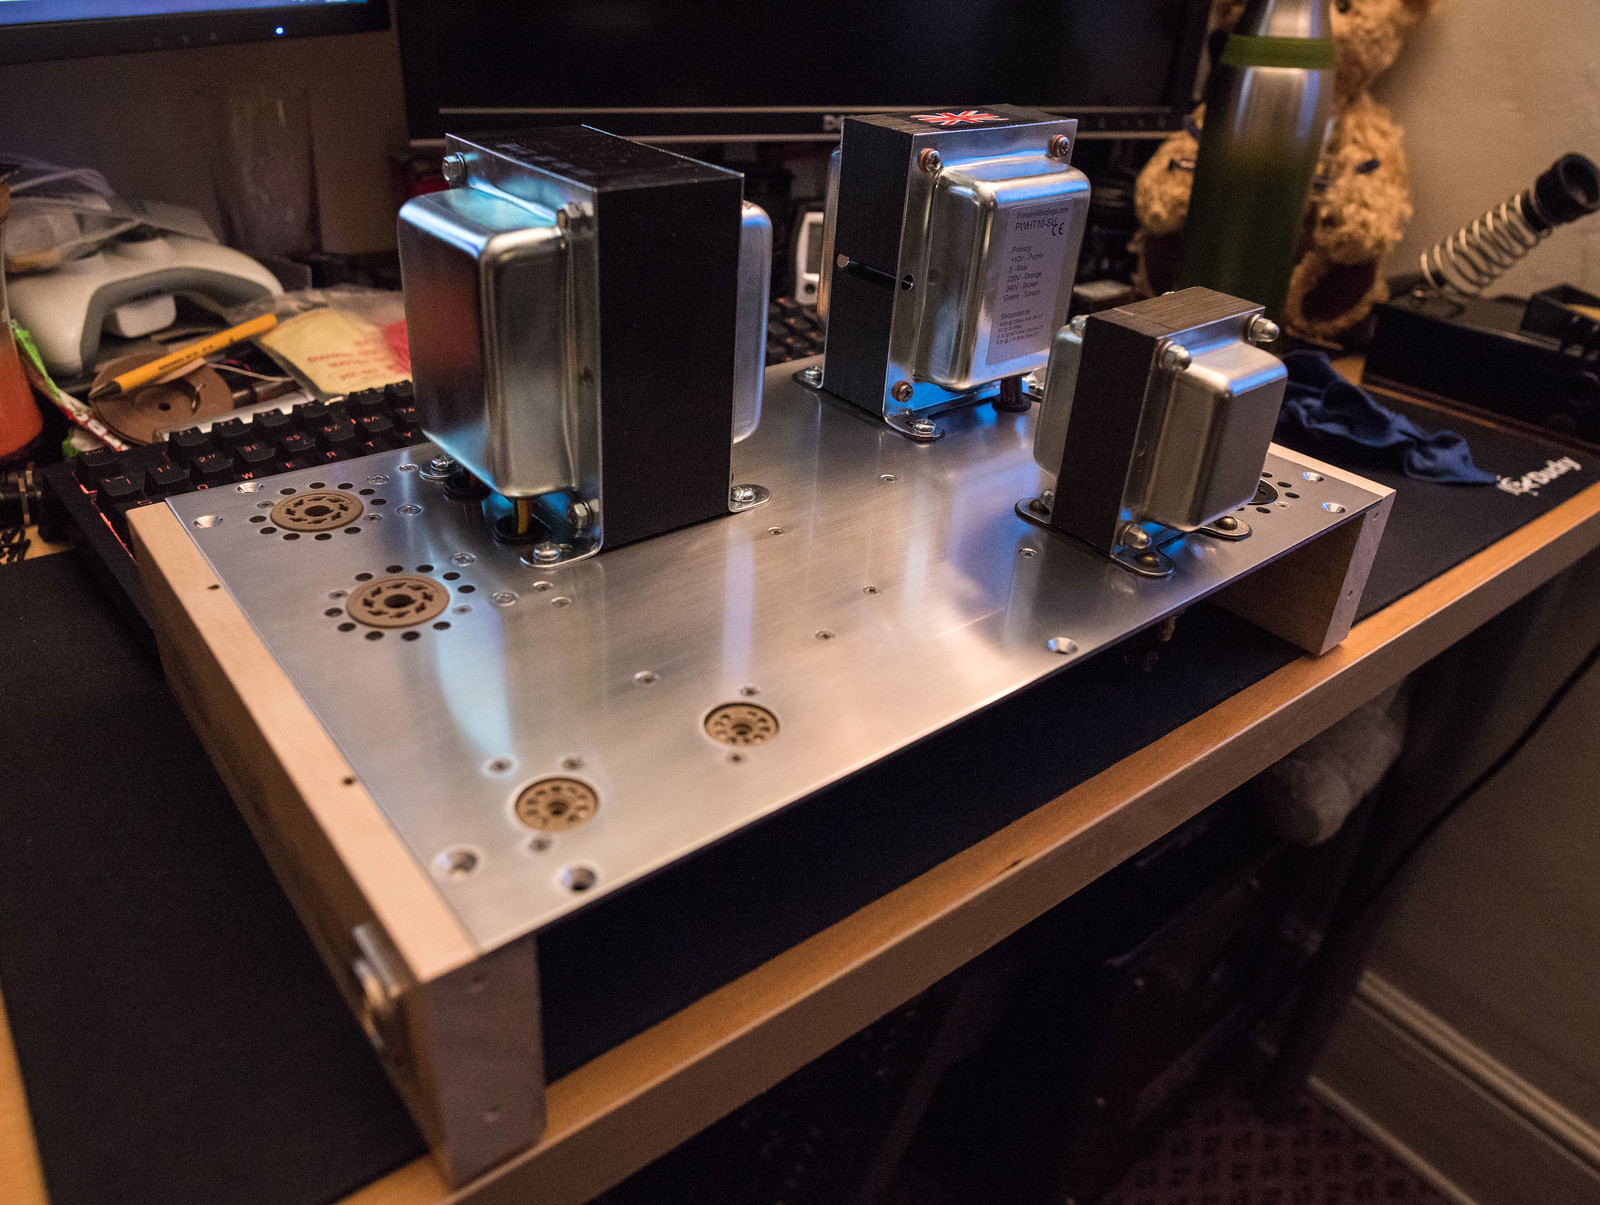
I'm still working on the "how to build an all metal chassis" issue. I'm torn between the simpler 3mm aluminium plate on a wooden frame like I've already build against an all metal box like a hammond 1444 folded aluminium chassis. An american company called Landfall Systems seems to make an extremely good looking item but shipping and taxes are likely to be painful.
 
Last edited:

Kei

Kei

Soldato
OP
Joined
24 Oct 2008
Posts
2,750
Location
South Wales
Added the feet to help aid convective cooling. I doubt there will be much difference but every little helps. Also spent the last two days testing the NOS mullard EF86 and GE JAN 6CG7's I bought from Watford. All four work great with no issues.


I've also looked at reducing the footprint by shifting the cathode biasing section of the turret board off the main board onto it's own separate board situated beneath the output transformer on taller stand offs.
A quick and dirty photoshopping of the principle. The power section squeezes up and the divider shifts into the freed up space. The potential benefit in my eyes would be a significant reduction in the length of the wires to the cathodes on the output valves.
 
Last edited:

Kei

Kei

Soldato
OP
Joined
24 Oct 2008
Posts
2,750
Location
South Wales
Some changes are a foot as I have found during testing that the amplifier has too much gain. My marantz AV7701 pre amp has some issues with my TV over HDMI causing a ground loop that I cannot break. Because of this, there is always a very small amount of mains hum present on the outputs. Thankfully it is small enough that it is almost always inaudible. In the case of the valve amp, there was simply too much gain which made the problem audible. The problem wasn't the valve amp itself as that is silent. The easiest thing to do would be to attenuate the input signal but it is a bit of a bodge so I've taken a different approach, trying to reduce the amplification in the first stage. Fingers crossed it works out as expected. It'll only drop about 9dB of open loop gain and the feedback should take care of another 17.5dB so I'm hoping for a closed loop gain of around 23dB instead of nearly 34dB.

Schematic changes. Essentially, the lead-lag compensation network off the cathode of EF86 has been moved to form a divider inside the feedback path
50319974811_8c159e252e_h.jpg


Turret board changes
50323008596_6f84d62836_h.jpg


Changes applied to the turret board. Now all I need to do is reinstall it and reconnect all of the wiring.
50330751386_f7458dc1fc_h.jpg
 
Associate
Joined
7 Dec 2010
Posts
46
I can fully appreciate just how loud Valve amps are, my mate has a Marshall JCM800 50w into a 4x12 cab it is idiotically loud, and to get the best out of valves u need to push them. Build looks awesome @Kei
 

Kei

Kei

Soldato
OP
Joined
24 Oct 2008
Posts
2,750
Location
South Wales
I can fully appreciate just how loud Valve amps are, my mate has a Marshall JCM800 50w into a 4x12 cab it is idiotically loud, and to get the best out of valves u need to push them. Build looks awesome @Kei
Thanks. It is quite surprising how loud things can get with seemingly little in the way of power. Efficient speakers and a smaller listening environment help a lot. This amp is only really designed to output 20W cleanly but can be pushed to around 30W before it starts to get unruly. At that point, I'm practically deaf.

I finished the reassembly late this afternoon. I then spent nearly an hour trying to find my dummy load resistor as I'd "put it away". I've given up for tonight, better not start testing it this late as I risk making silly mistakes.
 

Kei

Kei

Soldato
OP
Joined
24 Oct 2008
Posts
2,750
Location
South Wales
Tested this morning. Stability seems similar, it still gets a bit upset below 12Hz with large input signals. The expected reduction in sensitivity is pretty decent. The only not so good thing is the HF response falls off worse with feedback now than it did with no feedback at all previously which I thought was a bit odd. I've not tested open loop in this configuration yet but I'm guessing it will be worse too. Closed loop gain appears to sit around 25dB.


Close to maximum clean output.


Clips around 0.9V input.


10KHz Square and 1KHz square look pretty clean. I was expecting 10KHz to be more rolled in considering the drop off in HF response. Some wrinkles start to form as the input level increases but nothing that looks worrying.


Kei

Kei

Soldato
OP
Joined
24 Oct 2008
Posts
2,750
Location
South Wales
The voltages across EF86 seemed a bit out of kilter which will always have a big effect on everything downstream. I reduced the dropping resistor for it's supply to raise the anode voltage which seemed to be just the ticket. No more oscillation at very low frequencies. All I get with very large infrasonic signals now is transformer core saturation which is without a doubt ugly and not pleasant sounding but it is not potentially amplifier destroying like oscillation can be.

10Hz clean @ 12.6W is incredibly good going for an output transformer.


10Hz @ technically 22W going by p-p values. The ugly look of core saturation.


10KHz square wave performance is pretty similar. The gain difference is obvious when you compare the input signal levels against the RMS value on the scope. I'm thinking of testing the input infrasonic filter to see if I can reduce the HF losses by reducing the 22K resistor to 10K.


These tweaks have successfully dropped the gain from 49.54dB open loop and 33.26dB closed loop to 45.77dB open loop & 25.87dB closed loop. That also took feedback from 16.5dB to 19.9dB.

Final(ish) schematic


Under test, working very well.
 

Kei

Kei

Soldato
OP
Joined
24 Oct 2008
Posts
2,750
Location
South Wales
Been on the hunt for EF86 alternatives and found a few good substitutes. E80F seems to work great, sounds identical and is pin compatible. Brimar CV4006/6059/6BR7 may also prove to be a very good substitute with the added bonus being how cheap it still is. It's only downside is the need to rewire the socket. (which I'll be doing tomorrow so I can test them)


I also finally figured out how to use LTspice so I've been running a variety of simulations to see if I can subtly tweak the feedback network to improve the HF response a little without overdoing it.

Simulated oscillations


Simply changing valve 1 from EF86/6267 to a 6BR7. Massive reduction but still there. (only obvious on the FFT)


Feedback network frequency response testing. These components make quite the difference to the performance and the stability.


Weirdly, the mix of components I found that eliminated the oscillation creates a hump in the HF response.
 

Kei

Kei

Soldato
OP
Joined
24 Oct 2008
Posts
2,750
Location
South Wales
I've started construction of a Mk IV amp which shrinks the overall package down. The Mk III underneath is the same size aluminium sheet, 19"x10.5" down to 15"x9.5". Even though the overall chassis size has been reduced, I have been able to increase the separation of the output valves in order to improve thermals.


So far I only had time to get the piece cut down to size and mark the holes with a punch. Tomorrow I will be drilling the holes out.
 

Kei

Kei

Soldato
OP
Joined
24 Oct 2008
Posts
2,750
Location
South Wales
I've now deconstructed the first amp I built so that I can rebuild it as the Mk4. It's surprising just how quickly I took the whole thing to bits. 1.5 hours and it was done. I swear it took me over a week to build it.


Kei

Kei

Soldato
OP
Joined
24 Oct 2008
Posts
2,750
Location
South Wales
More progress today. All holes now drilled and countersunk. I quickly found that I had undersized the holes for the cable grommets by 2mm so need to sort that tomorrow.


I've cut the turret boards down so that the cathode bias circuit is now placed under the output transformer. I need to buy some shorter nylon standoffs for it.


Test fitted the transformers to get an idea of the size and distances. The output transformer does sit a bit closer to the valves than I'd like but it's not extremely close so shouldn't pose a problem.
 

Kei

Kei

Soldato
OP
Joined
24 Oct 2008
Posts
2,750
Location
South Wales
Sorted the turrets on the boards today.


I also decided that since the finish on the aluminium was a bit marred, I would sand it smooth. I'm now trying to decide whether to go all out and polish it up or try to get a smooth brushed finish. Currently part way through as it's taken more effort than I expected.
 
Last edited:

Kei

Kei

Soldato
OP
Joined
24 Oct 2008
Posts
2,750
Location
South Wales
Getting there with the sanding and polishing. I think I've decided to stick with a lightly brushed look over mirror finish. This is done to 1200 grit and a light polish with brasso.
 

Kei

Kei

Soldato
OP
Joined
24 Oct 2008
Posts
2,750
Location
South Wales
I think I've got the finish I was looking for now.


I'm also about 90% of the way through building the boards. A few capacitors, the zeners and the veroboards are left to do.
 

Kei

Kei

Soldato
OP
Joined
24 Oct 2008
Posts
2,750
Location
South Wales
I finished up the turret boards yesterday after building the veroboards for the CCS and the input filter.


I found some more inner tube which I've cut to the shape of the transformer base which acts as a vibration damper. I did the same on the Mk III build and it seems to work reasonably well. This time I had sufficient to cut one piece to do the whole base where I did the 4 mounting points previously. All the bits and pieces are now fitted to the plate.


The polished plate definitely looks better than the anodized version. I've noticed a few small niggles with the layout that I've corrected for the final version. The rectifier valve is a bit close to the choke and the position of the phase splitter valve is closer to the input valve than it needs to be. Neither is a big issue though and shouldn't pose any problem. The only thing I need to make now is the chassis framework to hold the plate in place.
 

Kei

Kei

Soldato
OP
Joined
24 Oct 2008
Posts
2,750
Location
South Wales
I've now made up some side panels. The sides are actually recycled from the MK II wooden build as this happened to be the same width. Sadly they come with some holes from their previous use.

I just need to create a front and rear panel to complete this version. (plus obviously finishing off the wiring.)


Kei

Kei

Soldato
OP
Joined
24 Oct 2008
Posts
2,750
Location
South Wales
The amp has been working great, doing 10-14 hours a day almost every day for nearly 4 months now.


I finally managed to get a decent picture showing all of the grids with decent depth of field.


The compacted MkIV version is still in progress. Time and the weather have not been on my side. I've done 90% of the wiring and I've got the front and back panels ready to fit. I just need to mount them and then wire up the mains input and switch. I also need to wire the input socket via the high pass filter board which will also need to be mounted. It sounds like a lot but it shouldn't take more than an afternoon to sort.
 

Kei

Kei

Soldato
OP
Joined
24 Oct 2008
Posts
2,750
Location
South Wales
I've finished fitting the front and back along with the divider. The capacitors are all in place too. Not the prettiest as the wood is reused from previous builds. (the black on the back panel is where it got used to support something being painted)


Most of the wiring is now done. Hopefully I can have this finished tomorrow so I can test it.
 
Last edited:
Back
Top Bottom