You are using an out of date browser. It may not display this or other websites correctly.
You should upgrade or use an alternative browser.
You should upgrade or use an alternative browser.
Zee Sim Rig
- Thread starter Zeeflyboy
- Start date
More options
Thread starter's postsCheers 
The wife just gave birth a few days ago so that has slightly reduced play time, but I did get a chance to finish off the actuator:
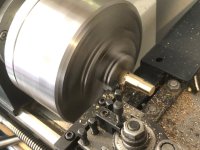
So picking up where we left off, first I machined the end nut... this again is a press fit into the shaft with some sleeve lock, drilled with a 6mm hole to allow it to attach to the upper module.
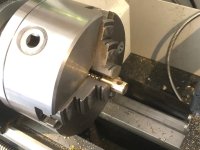
Also remembered to make this little part - just stops the screw from being able to rattle about inside the metal tube
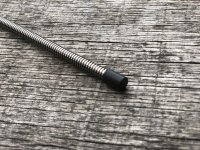
some 4mm stainless rod used as guide rods to stop the screw housing from rotating (given the end of the shaft is fixed to the rig you could actually do without these as the rig itself would prevent the screw from rotating).
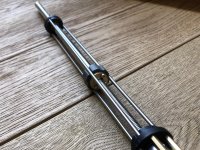
3D printed motor covers:
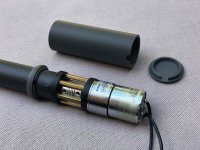
Et voila:
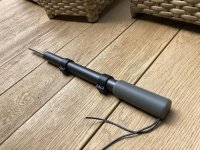
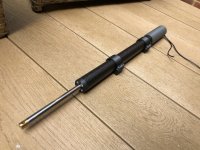
Now I just need to do another

The wife just gave birth a few days ago so that has slightly reduced play time, but I did get a chance to finish off the actuator:
So picking up where we left off, first I machined the end nut... this again is a press fit into the shaft with some sleeve lock, drilled with a 6mm hole to allow it to attach to the upper module.


Also remembered to make this little part - just stops the screw from being able to rattle about inside the metal tube

some 4mm stainless rod used as guide rods to stop the screw housing from rotating (given the end of the shaft is fixed to the rig you could actually do without these as the rig itself would prevent the screw from rotating).

3D printed motor covers:

Et voila:


Now I just need to do another

Soldato
Sheer class, as always 
Congrats on the little one

Congrats on the little one

Cheers guys! Little one is doing well, thankfully getting some sleep 
Little more progress:
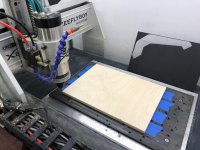
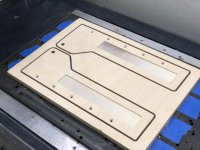
Machined the side plates for the upper module (Machined a little pocket for a decorative carbon inlay I can add later):
Fitted the left actuator:
Cockpit "closed":
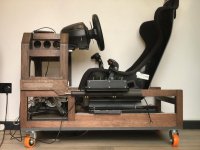
Cockpit "open":
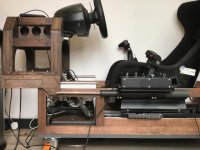
Next will be making the right hand side actuator, then wiring them up properly to work from one switch and add limit switches.

Little more progress:
Machined the side plates for the upper module (Machined a little pocket for a decorative carbon inlay I can add later):


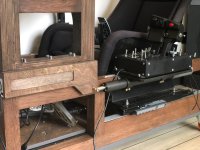
Fitted the left actuator:

Cockpit "closed":

Cockpit "open":

Next will be making the right hand side actuator, then wiring them up properly to work from one switch and add limit switches.
Apologies for the lack of progress reports for anyone that's interested, had a bit of a stall over the last few months what with all the job stuff, new baby, attention demanding 3yr old etc! Anyway enough excuses.
I have made some solid progress over the last week grabbing some hours to work where I can:
- made the second actuator for the upper slider, some limit switches set
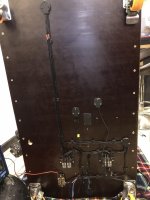
- a whole lot of wire organisation. I also re-wired the actuators to work via relay so I can add an over-ride with a remote switch later which will allow the whole rig to be fully opened/closed with one button push for getting it out/putting it away.
- designed and built some tablet mounts for touchscreen goodness in gameglass etc and for telemetry in racing games.
- have centralised everything to a single USB hub so there is only one connection to be made to the computer.
- ordered a 2ch amp (found a stonking deal on a behringer NX3000D refurb) and will be adding a second shaker to better be able to separate out effects.
I'm still plugging away at the last bits of wiring there and will have some pictures to share shortly. The end of "phase 1" is finally in sight though and once that's done I'll probably do some proper photos and maybe a video tour.
Here's a little peek at the in progress rewiring though to prove I haven't been completely inactive.
The main reason for the post was to see what you guys think of these two things I've been working on for the rig... would be interesting to get some feedback before I commit parts to the CNC and printer.
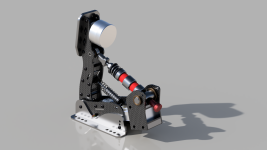
First up are my load cell based brake pedal/hall effect clutch and accelerator. Work on the load cell pedal design is pretty much done and now just needs prototyping to check how it all functions... I thought one thing quite interesting to try would be putting a resonance speaker behind the pedal for ABS effects driven from the standard simshaker style software. If you felt like it you could make it work from tyre slip in cars that don't have ABS just to add a bit of feedback.
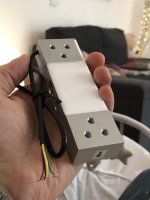
I've seen others use rumble motors powered by an arduino board but a buzzing pedal doesn't really sell ABS to me. This resonance speaker goes down to 50hz and should be able to give a nice fore/aft pulsing effect which can be customised in the normal simhub et al software. It's also using a 100kg loadcell which is this chonky boy right here:
Still fleshing out the designs for the accelerator and clutch, planning on using a cam roller on the clutch to give a "bite point".
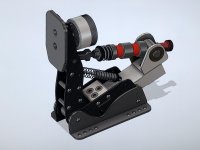
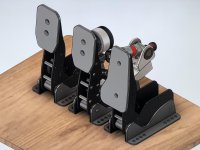
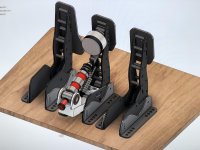
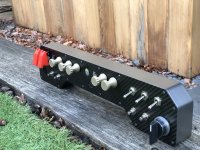
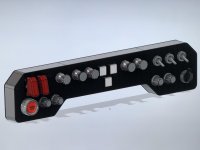
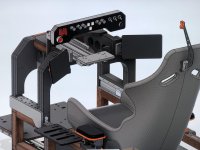
Next up I have my generic FCU style button box which I've tried to design to be good for both driving and flying. I have set up the rotary encoders (with push) and middle buttons to mirror the airbus setup and designed the knobs to have the same shapes for each function they would correspond to as I plan on playing in VR. Given I'm intimately familiar with the bus layout after 9,000+ hours in one I figured it would be a good one to go for and you can feel the different knob styles to help determine which control you are holding... even though I don't intend to fly an airbus much in MSFS it'll be good to know what I'm blinding reaching for. Running from left to right they would correspond to Baro, Speed, Heading, Altitude and lastly V/S.
The rest are potentiometers x4, an assortment of toggle switches, a 3 way momentary dial on the right, and assortment of momentary square pushbuttons in the middle (corresponds to AP1/AP2/ATHR on an airbus), and an engine start on the left.
I also plan to have the ability to add a small remote gear up/down module on the right side of the sim and a flap/mixture lever on the left but those can come later. Anyhoo, let me know what you guys think and if you have any cool ideas/input/criticisms have at it! These will probably be worth threads of their own as I think it'll be interesting to work on them.
I have made some solid progress over the last week grabbing some hours to work where I can:
- made the second actuator for the upper slider, some limit switches set
- a whole lot of wire organisation. I also re-wired the actuators to work via relay so I can add an over-ride with a remote switch later which will allow the whole rig to be fully opened/closed with one button push for getting it out/putting it away.
- designed and built some tablet mounts for touchscreen goodness in gameglass etc and for telemetry in racing games.
- have centralised everything to a single USB hub so there is only one connection to be made to the computer.
- ordered a 2ch amp (found a stonking deal on a behringer NX3000D refurb) and will be adding a second shaker to better be able to separate out effects.
I'm still plugging away at the last bits of wiring there and will have some pictures to share shortly. The end of "phase 1" is finally in sight though and once that's done I'll probably do some proper photos and maybe a video tour.
Here's a little peek at the in progress rewiring though to prove I haven't been completely inactive.

The main reason for the post was to see what you guys think of these two things I've been working on for the rig... would be interesting to get some feedback before I commit parts to the CNC and printer.
First up are my load cell based brake pedal/hall effect clutch and accelerator. Work on the load cell pedal design is pretty much done and now just needs prototyping to check how it all functions... I thought one thing quite interesting to try would be putting a resonance speaker behind the pedal for ABS effects driven from the standard simshaker style software. If you felt like it you could make it work from tyre slip in cars that don't have ABS just to add a bit of feedback.
I've seen others use rumble motors powered by an arduino board but a buzzing pedal doesn't really sell ABS to me. This resonance speaker goes down to 50hz and should be able to give a nice fore/aft pulsing effect which can be customised in the normal simhub et al software. It's also using a 100kg loadcell which is this chonky boy right here:

Still fleshing out the designs for the accelerator and clutch, planning on using a cam roller on the clutch to give a "bite point".


Next up I have my generic FCU style button box which I've tried to design to be good for both driving and flying. I have set up the rotary encoders (with push) and middle buttons to mirror the airbus setup and designed the knobs to have the same shapes for each function they would correspond to as I plan on playing in VR. Given I'm intimately familiar with the bus layout after 9,000+ hours in one I figured it would be a good one to go for and you can feel the different knob styles to help determine which control you are holding... even though I don't intend to fly an airbus much in MSFS it'll be good to know what I'm blinding reaching for. Running from left to right they would correspond to Baro, Speed, Heading, Altitude and lastly V/S.
The rest are potentiometers x4, an assortment of toggle switches, a 3 way momentary dial on the right, and assortment of momentary square pushbuttons in the middle (corresponds to AP1/AP2/ATHR on an airbus), and an engine start on the left.
I also plan to have the ability to add a small remote gear up/down module on the right side of the sim and a flap/mixture lever on the left but those can come later. Anyhoo, let me know what you guys think and if you have any cool ideas/input/criticisms have at it! These will probably be worth threads of their own as I think it'll be interesting to work on them.


Last edited:
Right so, What have we been up to?!
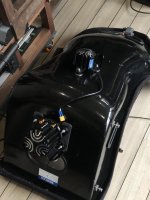
Firstly, I decided to go with some more butt based stimulation. The main thing here is that I wanted two units so that I could separate out different effects which lets you play with things a little more... for example when flying spitfires in IL2, I gave the buttkicker a nice strong engine beat to simulate that big old merlin engine (amazing when you fire it up in game and the whole rig shakes to life), but that meant it was getting a little saturated so gunfire for example wasn't as clear and separated as I would like, smaller effects like flap movement and gear travel got lost in the noise.... same with driving games, road noise and bumps could drown out the finer effects.
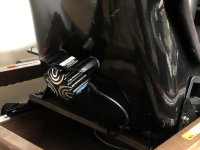
I thankfully got the opportunity to step up the game too by moving up to a BK4-Advance for the main unit, which is substantially larger than the Mini-CT. Here they are, made some custom spacers from 95A durometer TPU on the 3D printer which especially help to fit the curve on the back for the smaller unit.
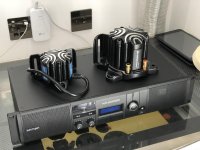
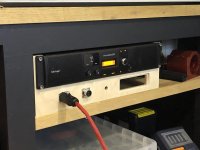
To drive it all, I managed to get a stonking deal on a factory refurbished Behringer NX3000D 2ch amp.... poifect! I need to look into the software to allow to do some some useful things with the DSP to set things like peak limits to avoid any bottoming out and whipped up a quick little box for the new amp, the space on the right is for the small 50w amp that will be driving the pedal transducer.
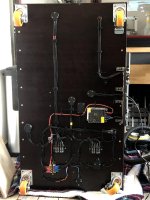
It was a faff but finally got all the wiring sorted:
And it all hooks up to an easy interface panel with quick connect/disconnect to cut down on bother rolling the rig out and getting it connected. I also changed the switch box to have 3 switches as I intend to make the seat position electric in the future.
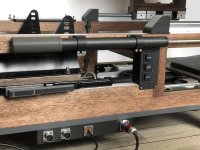
Used some drag chains to tidy up the wiring for pedal platform USB cable, and the speaker cables to the seat and installed a USB hub to give a single USB connection to the PC.
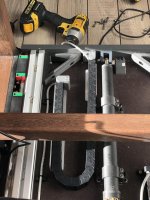
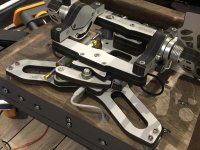
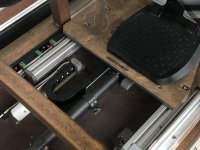
Bought 2 cheap android tablets in the sales, designed a quick tablet mounting arm using magnetic mounting for the tablets. These will be used mostly for gameglass in starcitizen but may see some use in other games too.
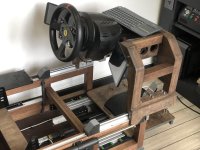
Fold up out the way when storing the rig:
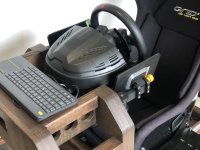
And finally the whole thing neatly tucked away by the CNC.
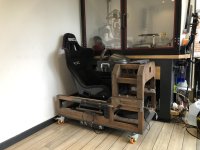
So with that we're pretty close to finishing phase 1. What's left to do?
I will be converting my thrustmaster warthog HOTAS over to quick connect using the same connection as the Virpil stuff (they kindly shared their connector and pinouts with me) as I intend to eventually get some of their stuff. I would like to also build a central mount for the stick (it both matches more what I tend to fly and also leaves room on the right for an H-pattern shifter) but it will need to be easily removable for driving, and ideally I'd upgrade to a wheel with quick disconnect to stop the wheel getting in the way. As mentioned previously I'd like to make the seat move electrically and already added that cross piece it is now sat on with that in mind.
Other than that and just some small bits and bobs like making the arm rests though, pretty much done for now until I look to making the G-seat. First though, I'll be starting work on those new loadcell racing pedals!
Firstly, I decided to go with some more butt based stimulation. The main thing here is that I wanted two units so that I could separate out different effects which lets you play with things a little more... for example when flying spitfires in IL2, I gave the buttkicker a nice strong engine beat to simulate that big old merlin engine (amazing when you fire it up in game and the whole rig shakes to life), but that meant it was getting a little saturated so gunfire for example wasn't as clear and separated as I would like, smaller effects like flap movement and gear travel got lost in the noise.... same with driving games, road noise and bumps could drown out the finer effects.
I thankfully got the opportunity to step up the game too by moving up to a BK4-Advance for the main unit, which is substantially larger than the Mini-CT. Here they are, made some custom spacers from 95A durometer TPU on the 3D printer which especially help to fit the curve on the back for the smaller unit.


To drive it all, I managed to get a stonking deal on a factory refurbished Behringer NX3000D 2ch amp.... poifect! I need to look into the software to allow to do some some useful things with the DSP to set things like peak limits to avoid any bottoming out and whipped up a quick little box for the new amp, the space on the right is for the small 50w amp that will be driving the pedal transducer.

It was a faff but finally got all the wiring sorted:

And it all hooks up to an easy interface panel with quick connect/disconnect to cut down on bother rolling the rig out and getting it connected. I also changed the switch box to have 3 switches as I intend to make the seat position electric in the future.

Used some drag chains to tidy up the wiring for pedal platform USB cable, and the speaker cables to the seat and installed a USB hub to give a single USB connection to the PC.


Bought 2 cheap android tablets in the sales, designed a quick tablet mounting arm using magnetic mounting for the tablets. These will be used mostly for gameglass in starcitizen but may see some use in other games too.

Fold up out the way when storing the rig:

And finally the whole thing neatly tucked away by the CNC.

So with that we're pretty close to finishing phase 1. What's left to do?
I will be converting my thrustmaster warthog HOTAS over to quick connect using the same connection as the Virpil stuff (they kindly shared their connector and pinouts with me) as I intend to eventually get some of their stuff. I would like to also build a central mount for the stick (it both matches more what I tend to fly and also leaves room on the right for an H-pattern shifter) but it will need to be easily removable for driving, and ideally I'd upgrade to a wheel with quick disconnect to stop the wheel getting in the way. As mentioned previously I'd like to make the seat move electrically and already added that cross piece it is now sat on with that in mind.
Other than that and just some small bits and bobs like making the arm rests though, pretty much done for now until I look to making the G-seat. First though, I'll be starting work on those new loadcell racing pedals!
Associate
- Joined
- 30 Aug 2018
- Posts
- 2,483
Amazing work
many thanks gents 
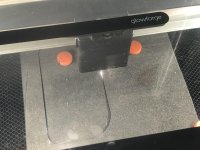
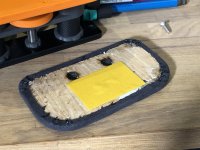
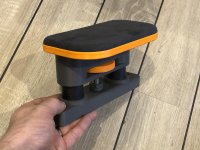
Got arm rests mostly done now - mostly 3D printed parts, laser cut piece of wood and foam, couple of offcuts of CF tube and an m12 threaded rod. Trimmed with Alcantara which I found at my old man's house from about 18 years ago when I was trimming my first car lol.
Laser cutting foam:
Trimmed wood piece:
Voila
where it'll go when I get some suitable bolts:
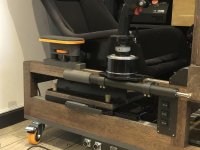

Got arm rests mostly done now - mostly 3D printed parts, laser cut piece of wood and foam, couple of offcuts of CF tube and an m12 threaded rod. Trimmed with Alcantara which I found at my old man's house from about 18 years ago when I was trimming my first car lol.
Laser cutting foam:

Trimmed wood piece:

Voila

where it'll go when I get some suitable bolts:

Soldato
I’m just browsing forums I don’t normally visit and this is simply incredible. I feel ever so slightly inadequate. You’re a carpenter, metal and plastics worker, you’ve demonstrated superb electrical and IT skills. Basically everything. Oh, and design as well. Amazing. Merry Christmas!
Associate
looks awesome zee. good job. got a friend that would love this as he is a big sim racer 

Soldato
Superb craftmanship. You should be extremely proud.
Do you know how much the build has cost you to date?
Do you know how much the build has cost you to date?


