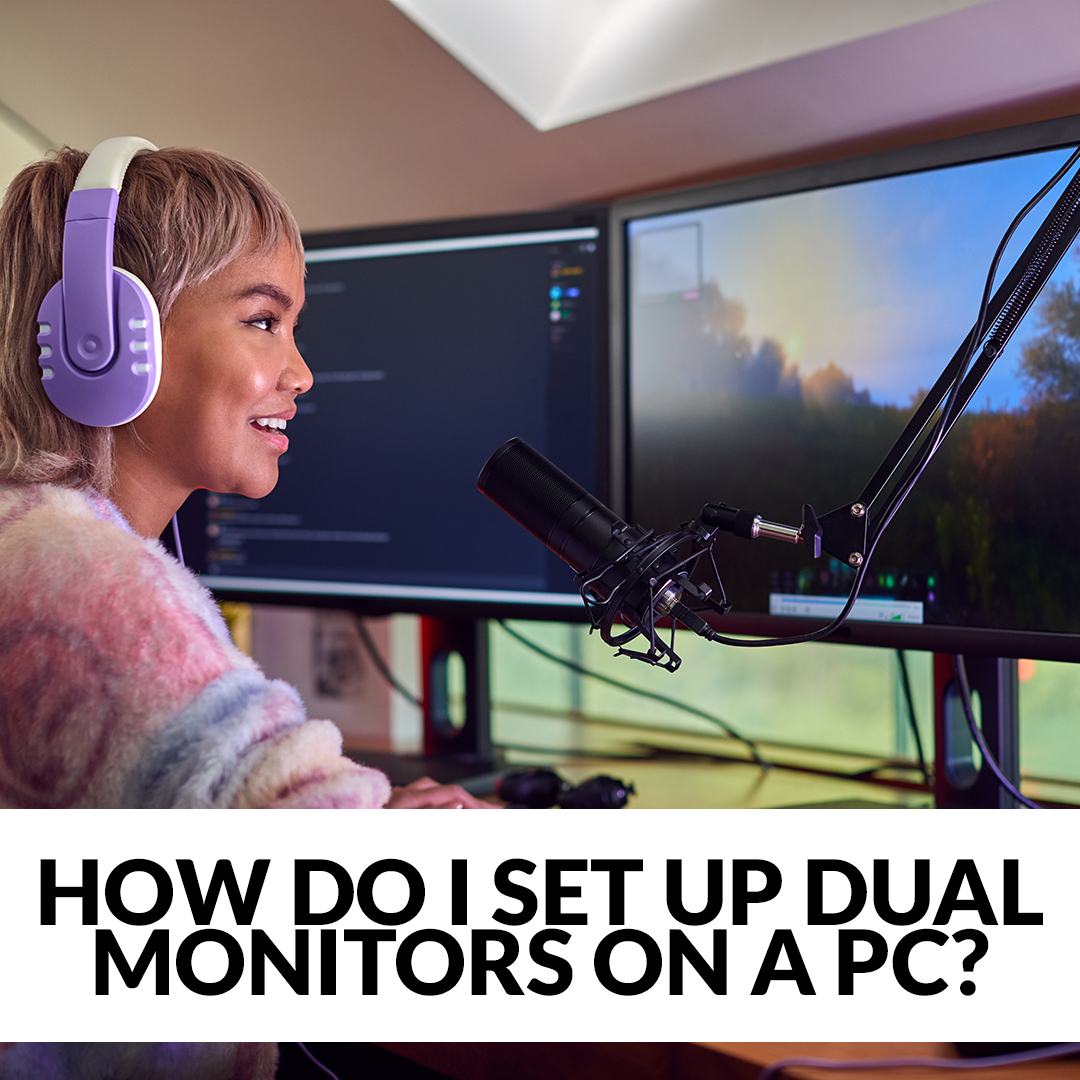
If you want to level up your battle station with a dual monitor set up but don’t know how, here at Overclockers UK we’ve put together everything you need into one handy blog article.

In this guide, we highlight the benefits of a dual monitor set up, along with step-by-step instructions on how to configure your monitors in both Windows 11 and 10.
Dual Monitor Set Ups
A dual monitor set up will provide you with a lot of added benefits, for both work and play.
Ideal for those who are still actively working from home, a dual monitor set up will massively help to boost productivity. You can split your tasks across two screens which means no more flicking between multiple tabs or programs.
On the other hand, for gaming, a dual monitor set up will help to optimise your overall experience. You can choose to run games across the two monitors for incredible immersion plus a much wider scope, which will be sure to offer you a distinct advantage against your enemies. What’s more, if you are a fan of FPS titles or multiplayer games, you can choose to keep one screen for chatting with your teammates or reading guides, and the other for playing the game.
In addition to all of this, a dual monitor set up can help free up precious desk space for all your necessary accessories and ultra-fast mouse movements. You can do this by utilising a monitor arm mount, such as the Kolink M32G9SS-2 Dual Monitor Mount.
Kolink M32G9SS-2 Dual Monitor Mount:
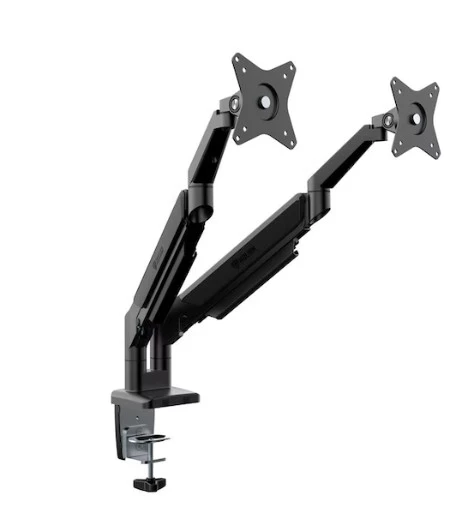
- Dual monitor mount
- 3-jointed arm with gas spring
- Up to 440mm extend
- Supports monitors between 17” and 23”
How to Set Up:
Before you begin, make sure all your cables are connected to your monitors. This could be either an HDMI, USB/C, Thunderbolt, or DisplayPort cable.
Whilst the majority of monitors will support HDMI, you will have to check with the model and manufacturer if your monitor is compatible with DisplayPort, USB/C, or Thunderbolt.
In Windows 11:
To set up dual monitors in Windows 11, you will need to go into Settings > System > Display. Here you should see the monitors you have connected to your PC.
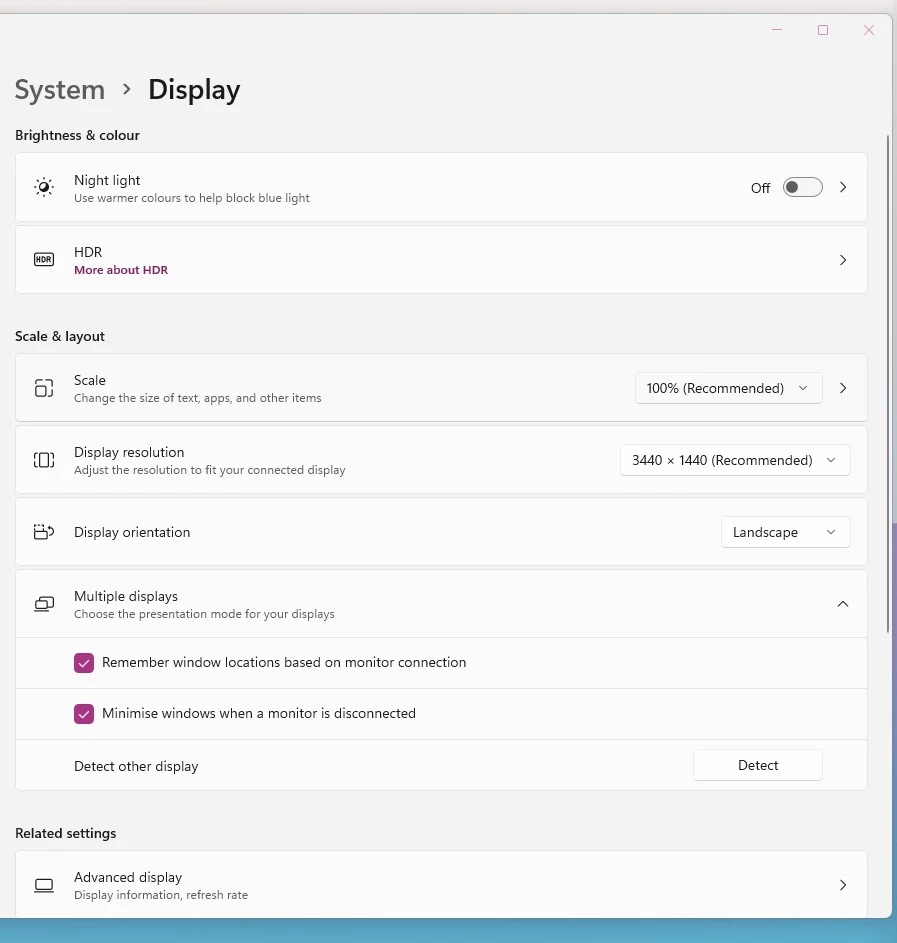
If you don’t see this, select Multiple Displays > Detect. Here you will see a dropdown list where you can choose how your screen will be displayed across the two monitors. Once you’ve chosen your desired set up, select Apply.
In Windows 10:
In Windows 10, go to Start > Settings > System > Display. If you don’t see your monitors listed here, select Detect.
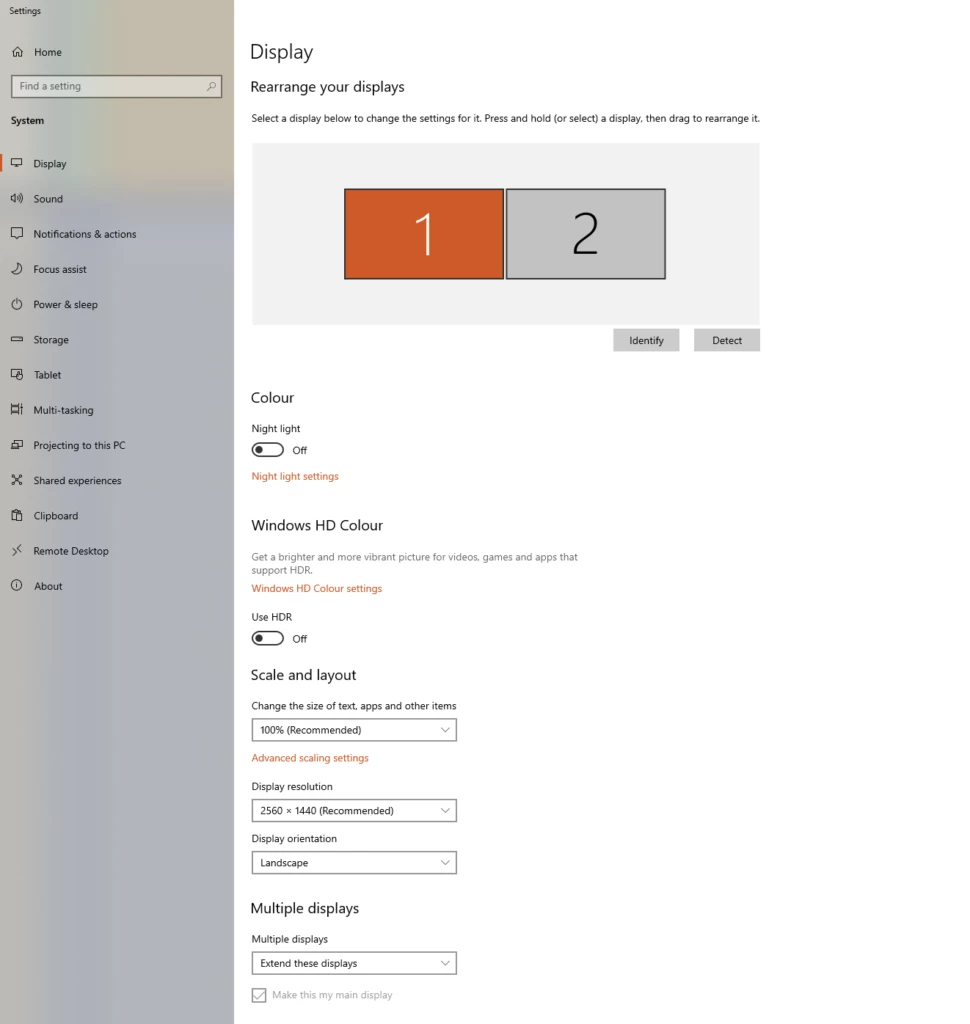
In the Multiple Displays section, you can choose an option from the list to select how your desktop will be displayed across your monitors. Once you’ve done this, select Keep changes.
You can also adjust how your screen is displayed across your dual monitors. This includes either an extended or duplicated screen.
Extended:
Extended will make your two monitors act like one big monitor, spreading the display across all of them.
Duplicate:
Duplicate on the other hand, is just how it sounds. This will make your monitors display the exact same thing, duplicating the desktop across your dual monitor set up.
- 3 min read
Ruth Rowley
Author
Ruth has been with Overclockers UK for over a year and has gone on to write about everything ranging from in-depth hardware guides to monthly game releases.
Outside of writing blog posts, she can be found wrapped in a blanket with her black cat, engrossed in a book or playing life-simulation games such as The Sims, Stardew Valley, and Animal Crossing.
Read More >>