
The Steam deck is more than just a powerful gaming handheld! In this guide, we’re covering all the steps on how to install Windows on your Steam Deck.
SteamOS is a pretty great experience for most gamers. However, if you’re looking to use your Deck for something other than gaming, you’ll likely need to be able to boot into a Windows environment.
Can I install Windows on Steam Deck?
Let’s get the most important question out of the way first. No, this article isn’t clickbait. Thanks to the inclusion of an SSD, 40Whr battery, and the incredible AMD Zen 2 APU inside the Steam Deck, it is more than capable of running the latest version of Windows 11 or, if you prefer, Windows 10.


Can you dual-boot Windows on the Steam Deck?
Yes, you absolutely can! Generally speaking, you have two options for installing Windows onto your Steam Deck. You can either load Windows 10/11 to the internal SSD, removing SteamOS from the device, or you can opt to create a bootable microSD card allowing you to switch between SteamOS and Windows.

Installing Windows onto the Deck is easier now than ever before, thanks to Valve publishing Windows Drivers for the Steam Deck’s internal components. However, these drivers are not guaranteed to be bug-free, with Vale stating they are provided as is and they are unable to offer ‘Windows on Deck’ support. Don’t panic, though! If you get stuck or your installation goes wrong, Valve have also provided recovery instructions and the SteamOS files for you to return your Deck back to factory settings. (more on this later)
Option 1: Create a bootable MicroSD card. – Recommended
For obvious reasons, we recommend creating a bootable MicroSD card version of Windows. This method is more straightforward and allows you to change between SteamOS and Windows without uninstalling anything.
Step 1: Gather What You Need
- Steam Deck (duh)
- MicroSD card (at least 64GB)
- MicroSD card reader
- USB Stick
- Type C to USB A adapter (Alternatively a Steam Deck Docking Station)
- Windows ISO file (Windows Creation Tool)
Step 2: Download Required Software
You’ll need a couple pieces of software before you start. The Windows Creation Tool will allow you to download a Windows 10/11 ISO. We’ll also use Rufus, a tool that can create bootable environments for our OS. When downloading Rufus, make sure to select the file named “Portable”.
Step 3: Time to Install!
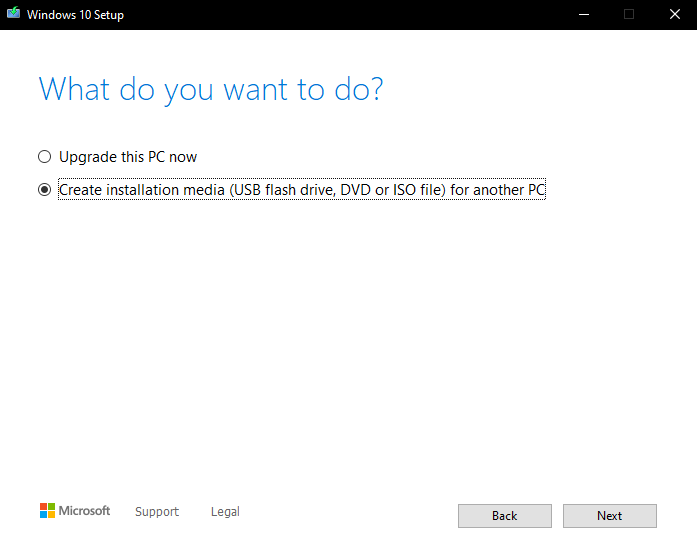
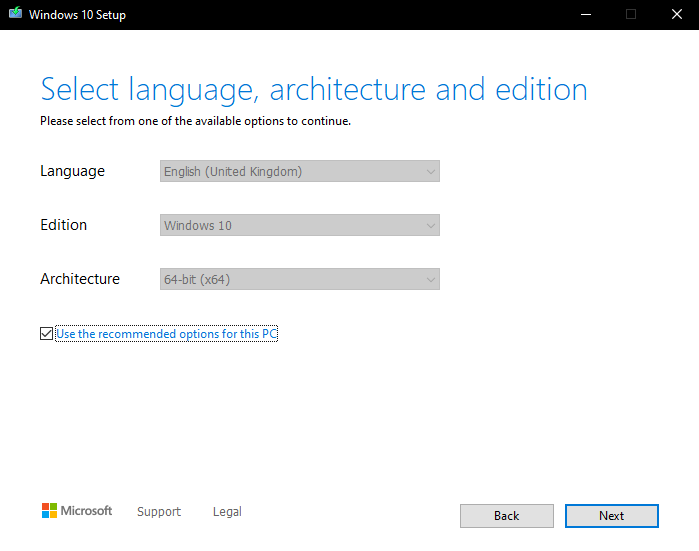
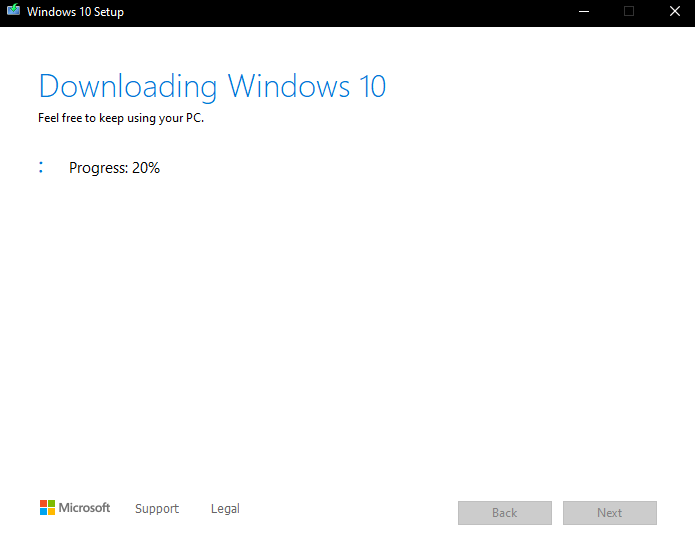
Open the Windows Creation Tool and create an installation for either Windows 10 or 11. Save this somewhere on your PC (you’ll need it soon).
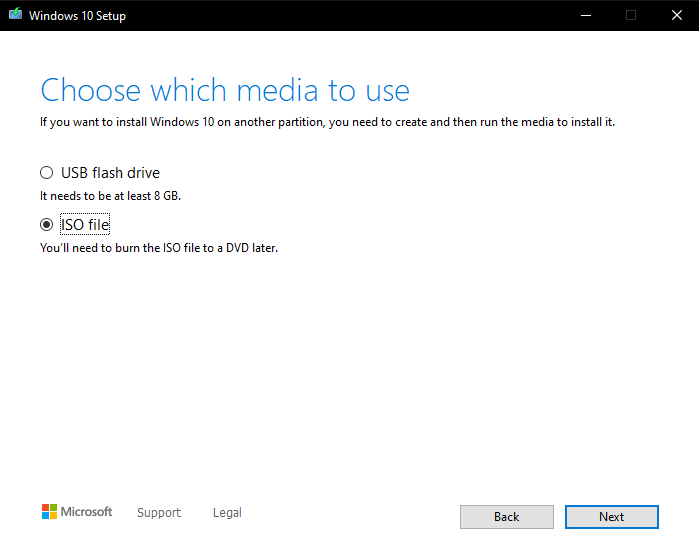
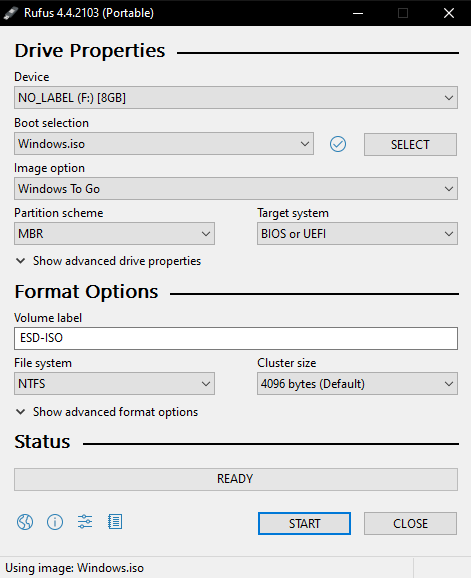
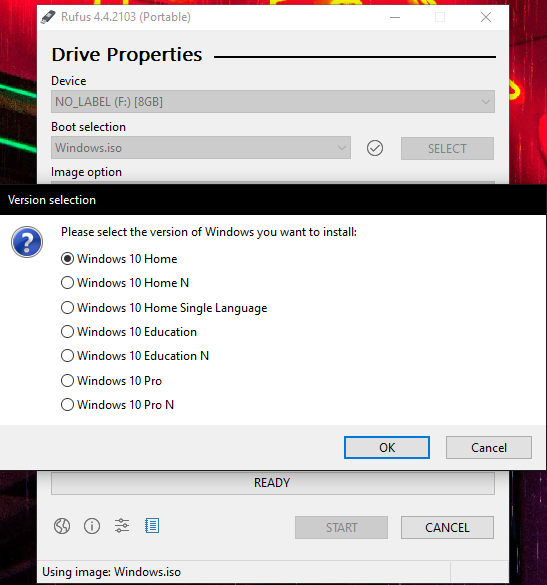
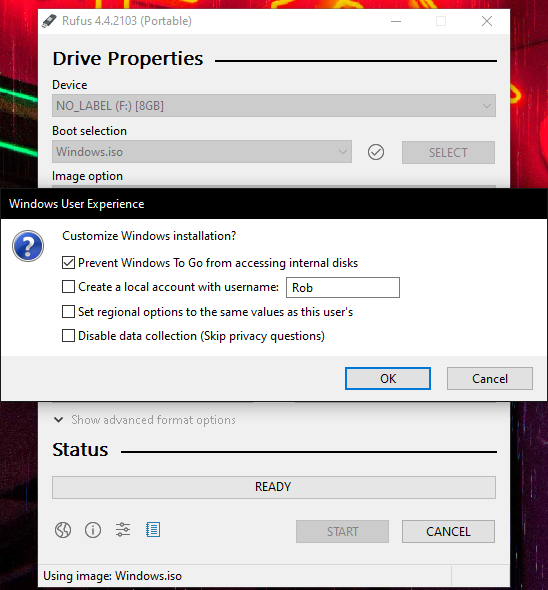
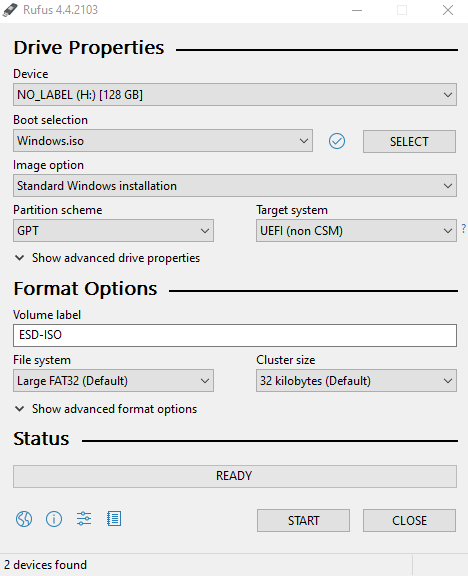
Next, you’ll need to open Rufus and Navigate to the Windows ISO you saved earlier once this is selected, make sure you choose Windows To Go under the Image Option drop-down. Additionally, you’ll need to set Partition Scheme to MBR and Format Option to NTFS. Finally, click the start button and leave both the following dialogue boxes to their default selection.
* Once started, this process can take upwards of one hour to complete.
While you’re still at your computer, you’ll need to download Windows Drivers for the Steam Deck. Make sure you place these onto a separate USB stick. The required drivers can be downloaded from Steam here.
Step 4: Launching Into Windows
- Before turning on your Deck, insert the MicroSD card into the relevant slot on the Steam Deck.
- Hold both the power and volume down buttons to turn on the Steam Deck and enter the boot menu.
- Once inside the boot menu, select Windows.
Step 5: Steam Deck Windows Drivers
Finally, you’re almost ready to use Windows on the Steam Deck. The last step in this process is to install the drivers from the USB we prepared earlier. You can do this either by connecting the USB stick via a Type C adapter or with a Steam Deck Docking Station.

Option 2: Install Windows Internally – Not Recommended
If you want a full Windows experience with the benefit of running from the Deck’s SSD, it is possible to install Windows directly to this drive. However, we don’t recommend this for most users as you will need to completely reinstall SteamOS should you want to use the Deck as intended. It is worth noting that whilst the Deck works very well as a Windows handheld, this was not the intended scenario for the device, and some bugs may be present.
Step 1: Gather the following
- Steam Deck (Obviously XD)
- Windows ISO file (Windows Creation Tool)
- A USB C Hub with Ethernet (Alternatively a Steam Deck Docking Station)
- USB Stick (At Least 8GB)
Step 2: Install Required Software
This setup for installing Windows directly onto the Deck’s storage is similar to creating a bootable MicroSD card. However, there are a couple of important differences, so make sure to double check you have the correct software.
- Install Rufus (The non-portable edition). Just like in Option 1, this is going to allow us to create a bootable environment; however, this time, we will be installing a copy of Windows rather than booting into one.
- Download the correct Windows ISO file. You can choose to either create a Windows 11 or Windows 10 ISO file by selecting the relevant Windows Creation Tool.
Step 3: Installation Time!
Open the Windows Creation Tool and create an ISO for either Windows 10 or 11. Select the option to save this to your PC. (Remember where, as we will need this again shortly).
- Next, you’ll need to open Rufus, select the USB drive you want to use, and locate your Windows ISO file.
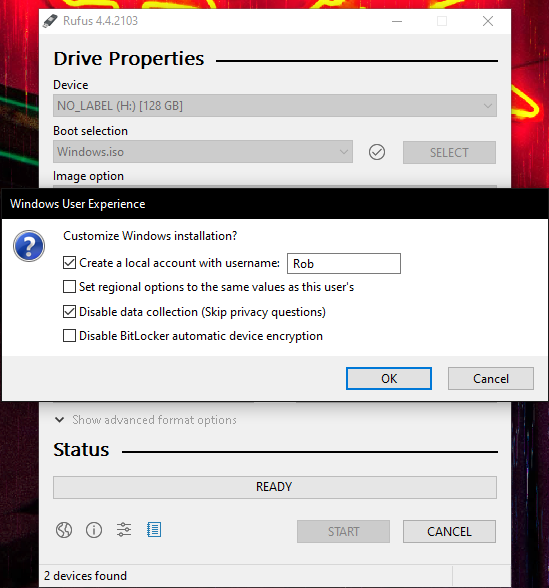
- After pressing start, you’ll be prompted to choose an edition of Windows, for simplicity, select Windows Home, you’ll also be able to choose whether you want a local account instead of an online Microsoft Account.
- Once you’ve selected all your options, completing the creation process should take about twenty minutes.
You’ll also need to download the Windows drivers for your Steam Deck. These are available on Steam’s help website and are provided “as is”. Once downloaded, extract the files and place them into a new folder on your desktop, as you’ll need them in a little while.
Step 4: Boot Into Windows
This step is a little more involved than the previous option as you’ll need to set up Windows as if you’re building a new PC.
- First, connect your Windows USB stick via an adapter or with a Steam Deck Dock.
- Next, you’ll need to enter into the Deck’s boot manager. To do this, power off the device and then hold both the volume down and power buttons simultaneously.
- Inside the boot manager, choose your USB stick and follow the steps on the screen.
- You’ll need to enter your Windows Product Key.
- When prompted to select an install drive, delete all currently listed partitions on the SSD and create a new one.
Step 5: Steam Deck Windows Drivers
You should now have Windows installed on your Steam Deck’s internal SSD. The final step you’ll need to do is install the drivers we downloaded earlier.

Have You Installed Windows on Your Deck?
The Steam Deck is a brilliant choice for gamers, and even more so thanks to the ability to install Windows onto the handheld. Let us know if you have or are thinking about installing a new OS onto your Steam Deck.
- 7 min read
Robert Mullane
Author
When not working, you'll find me in VR or losing in bottom-tier Valorant matches. I write about all topic's tech and gaming with a particular focus on representation in gaming, virtual reality, and LGBTQ+ themes. If you're still not fed up with me, you can also catch me over on the Overclockers UK TikTok and YouTube accounts.
Read More >>