
Our Overclockers UK Academy is back with a brand-new in-depth guide!
In this blog article, we’ll be covering everything you need to know about building your very own mechanical keyboard, including all the parts you need, step-by-step instructions, and a detailed video tutorial.

Pick Your Keyboard Parts!
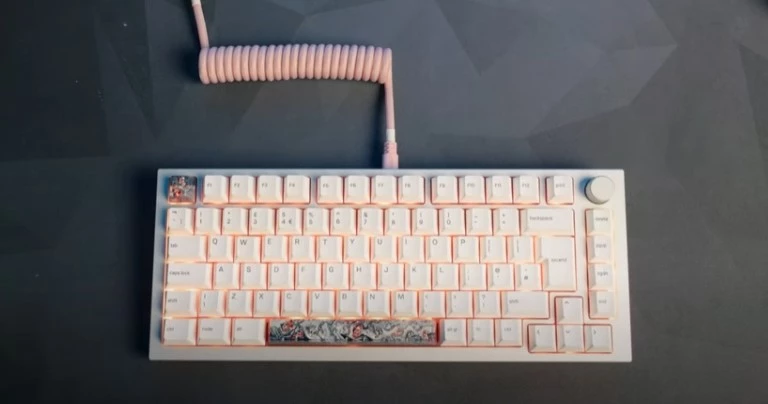
The first and most important step in building your own mechanical keyboard is selecting the right parts. This includes the barebone keyboard body, key switches, and cable. You also opt for additional accessories such as braided or coiled cables, different coloured rotary knobs, and artisan keycaps.
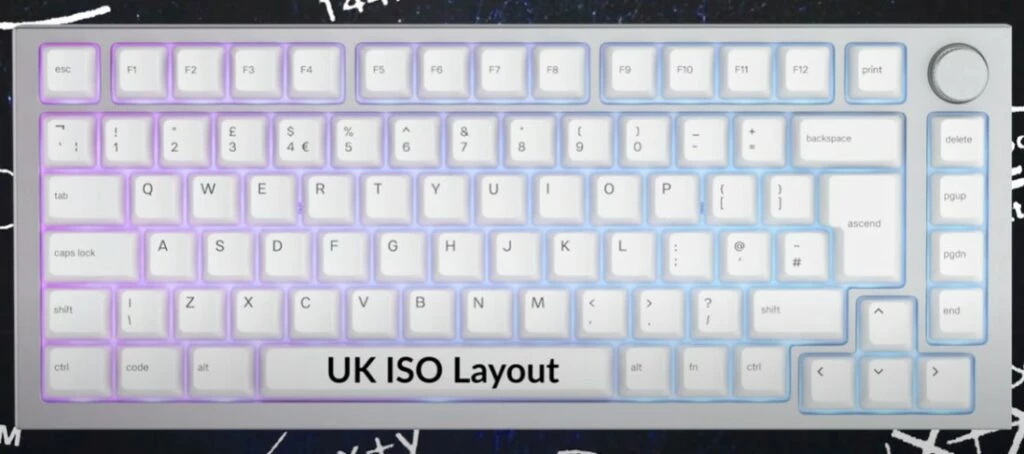
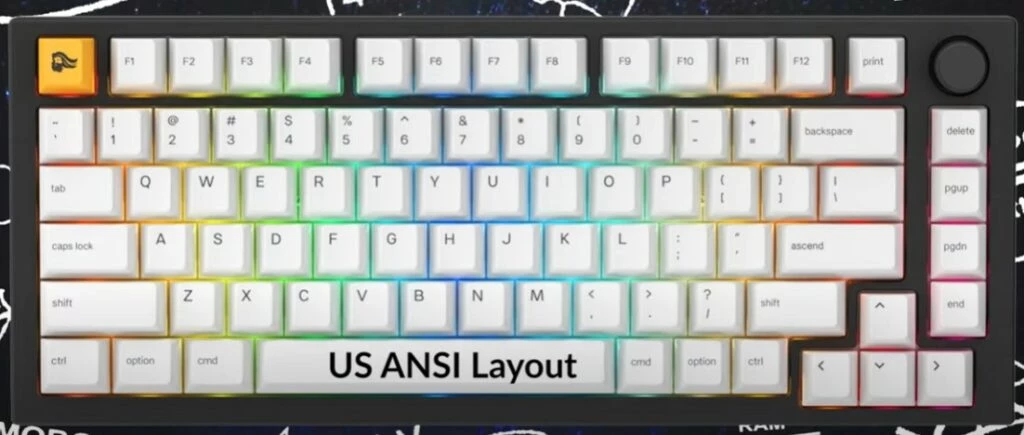
Barebone keyboards are available in different sizes and in either an ISO or ANSI layout. The layout you choose will impact what keycaps you can pick, as certain models aren’t available in ISO layout and vice versa.
You can further customise the barebone keyboard body by opting to add a coloured top frame. These are available in a variety of different colours, including white, navy blue, electric blue, yellow, green, and pink.
Before you can build your keyboard, you will also need to pick your key switches and keycaps.
There are endless key switches available from multiple different manufacturers. Each type will feature a unique set of characteristics. The most common type of key switch includes linear, for a smooth typing feel, tactile for a bumpy feel, or clicky for that classic audible click when pressed.
If your keyboard is hot-swappable, you’ll be able to chop and change between whatever key switches you like, in order to find the set that perfectly matches your individual preferences and gameplay style.
In addition to key switches, your creativity can run wild with your choice of keycaps. In fact, there are hundreds of keycap variants available from different manufacturers in every colour imaginable.
In addition to all of this, you can further customise your mechanical keyboard. This includes opting for a different backplate, upgrading the stabilisers, choosing a braided or coiled cable, coloured rotary knobs, and even artisan keycaps for an extra unique look to your keyboard.
Watch how to build a mechanical keyboard:
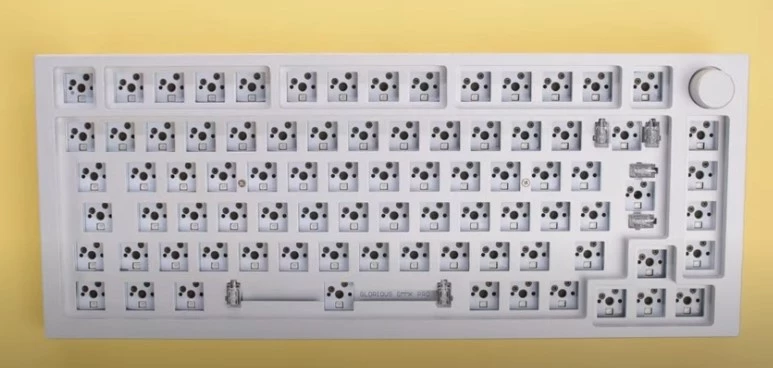
In the video above, Briony has chosen a Glorious GMMK Pro. We’ll be using the same barebone keyboard in our step-by-step guide.
Let’s Get Building!
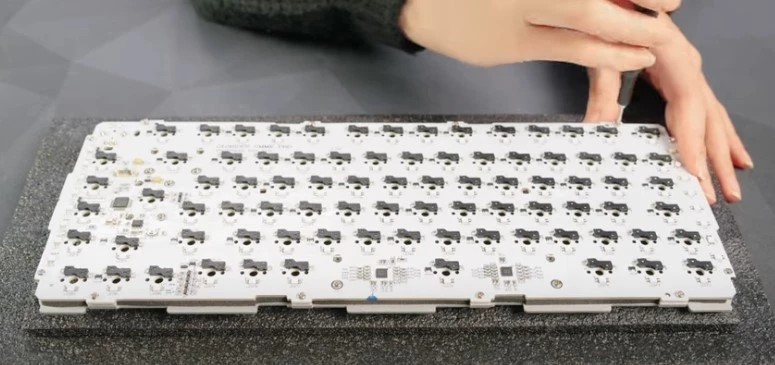
If you want to customise the backplate, faceplate, or stabilisers, you’ll need to begin by flipping your keyboard over and unscrewing the screws on the back. After which, you can lift up the faceplate.
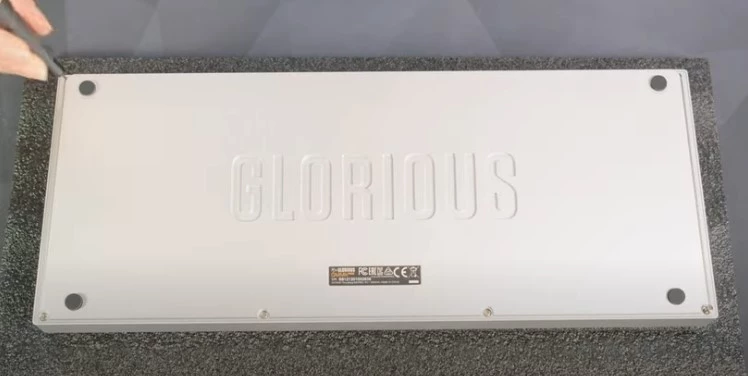
There are two further screws to undo the PCB layer. This will give you access to each of the individual components.
If you are opting to upgrade the stabilisers, you will need to build and lube them. This can be quite challenging however, Glorious have an in-depth guide online, which can be found here.
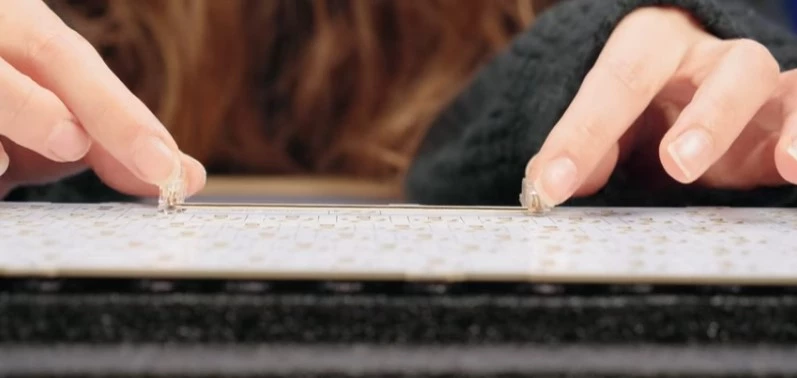
To adjust the stabilisers, you will need to gently lift up the PCB layer, unplug the USB-C cable, and flip the board over. On the back, there will be twelve additional screws that will need to be unscrewed in order to separate the backplate.
Once you’ve done this, use a small screwdriver to remove the eight stabiliser screws. After which, you can gently remove the stabilisers by sliding them downwards before lifting them out. If you do find there is some excess lubricant left over, you can remove this with isopropanol alcohol.
Now you can install your new stabilisers. You can do this by sliding them into place and gently screwing in the stabiliser screw whilst holding the stabiliser flush against the PCB. You will want to repeat this process for all of the other stabilisers.
Once you’ve completed this step, you can install the new backplate (if you’ve opted for this). You will need to remove the old one and then gently line up the new one in place.
After which, you can then screw in all of the screws, plug in the USB-C cable, and reattach the back of the board.
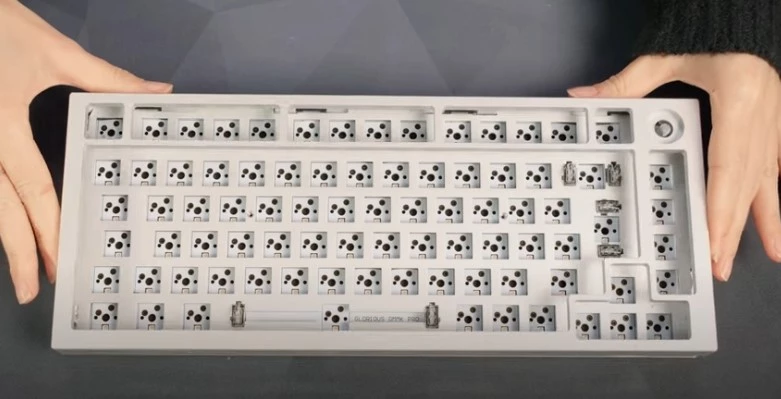
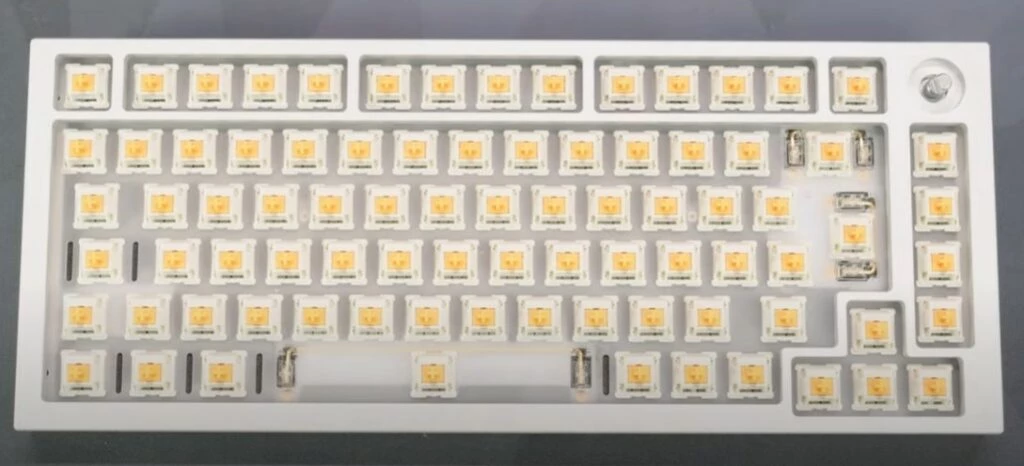
Installing Key switches:
The next step is to install your chosen key switches!
If you are lubing your switches, you will need to make you do this before installing them. There is a range of accessories, including a brush and lubing station designed to make this process easier.
To install them, you will need to match up the switch contact with the ones on the PCB. Once you have them in the correct orientation, all you need to do is press them down into place.
After this, it’s time for the satisfying part!
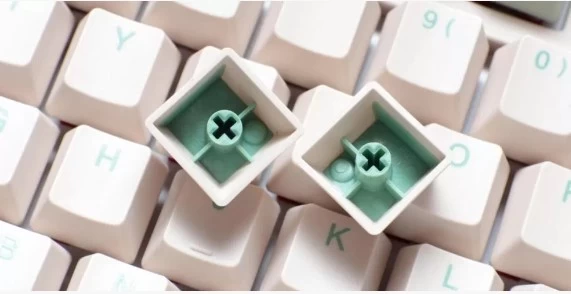
Installing Keycaps:
To install your keycaps click them into the correct place on the keyboard. This will all depend on which keyboard layout you’ve chosen.
If you want to swap out your keycaps, or accidentally put one in the incorrect place, you can easily take it out with a keycap puller.
To complete your mechanical keyboard, all you will need to do is plug in your cable. After which, you can download the Glorious CORE software, which will allow you to customise key bindings, macros, RGB lighting, and much more.
Your mechanical keyboard is now complete! You can sit back and marvel at the masterpiece you’ve created and enjoy an optimised gaming experience.
More From the Overclockers UK Academy!
Did you like this article?

- 5 min read
Ruth Rowley
Author
Ruth has been with Overclockers UK for over a year and has gone on to write about everything ranging from in-depth hardware guides to monthly game releases.
Outside of writing blog posts, she can be found wrapped in a blanket with her black cat, engrossed in a book or playing life-simulation games such as The Sims, Stardew Valley, and Animal Crossing.
Read More >>