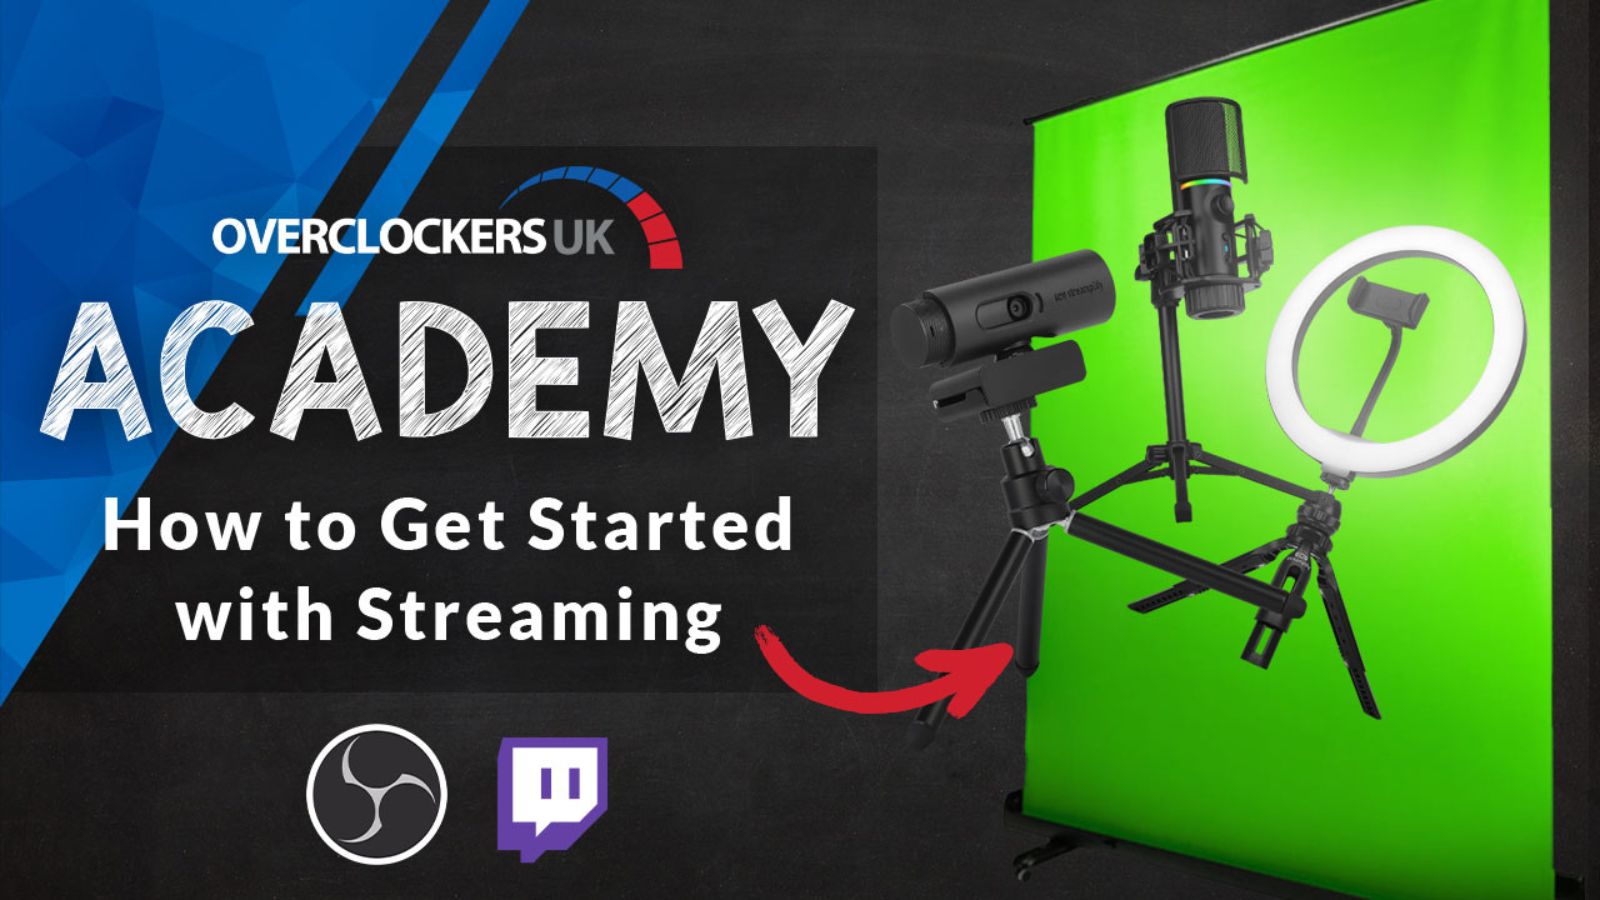
In this guide, we are going to show you how to create a high-quality PC streaming set up!
Ideal for those who may already have a following and want to boost your view count or perhaps it’s your new year’s resolution and don’t know where to get started. That’s where the OcUK Academy comes in! Our team of experts have compiled everything you need about hardware and broadcasting software so you will have all the tools you need to go Live!
Watch How to Start PC Streaming:
Our Step-by-Step Guide
Setting up Your Hardware:
The perfect streaming set-up is incomplete without your PC or laptop, peripherals, lighting and even a green screen. You don’t need all of this kit to get started with your channel but our aim here is to give you all the answers you need to ensure your channel succeeds!
Our main focus in this tutorial is how to set up the peripherals, if you want an in-depth look at what PC components are good for building a streaming PC – take a look at our dedicated blog post.
- Firstly, you will want to plug in all your new peripherals and configure the perfect layout for your desk. Most peripherals are plug–play compatible; however, some manufacturers will have dedicated software to adjust the audio, lighting and more. Make sure you double-check this and download any additional software to enhance your stream further.
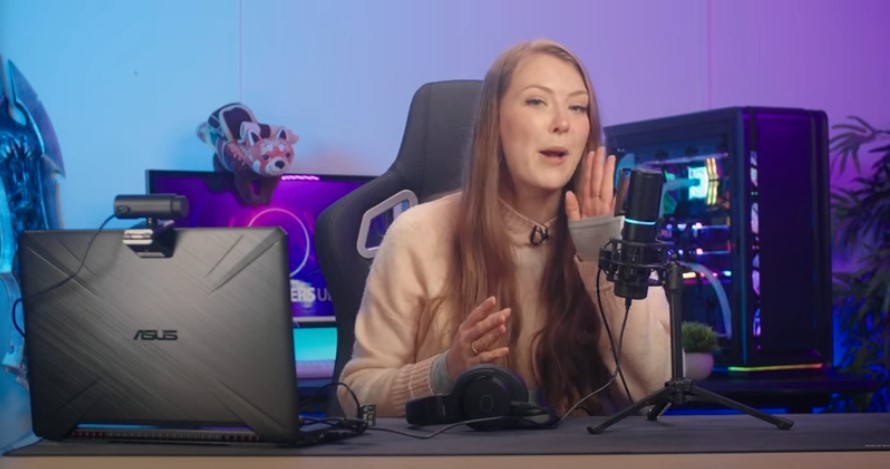
- For your webcam, the best configuration is for it to be at head height. This could be at the top of your monitor or even off to the side.
Your webcam is how you connect to your viewers so you want to adjust it so it’s not too far away and you are situated in the middle of the frame to ensure you are always in focus.
3. If you are using a cardioid microphone in your set-up, try to position it around a hand’s width away from your mouth. Unless you are planning on ASMR, you certainly don’t want to have your microphone too close. Think about your viewers using headphones…
4. Next up is for those investing in a green screen. A green screen can hide your backdrop to make your stream look more professional and grab your viewer’s attention. Ensure that the fabric has no creases and situate the screen as far back as you can, while still giving yourself enough space to move around in the frame. This will prevent the green colour from spilling onto your shoulders and skin.
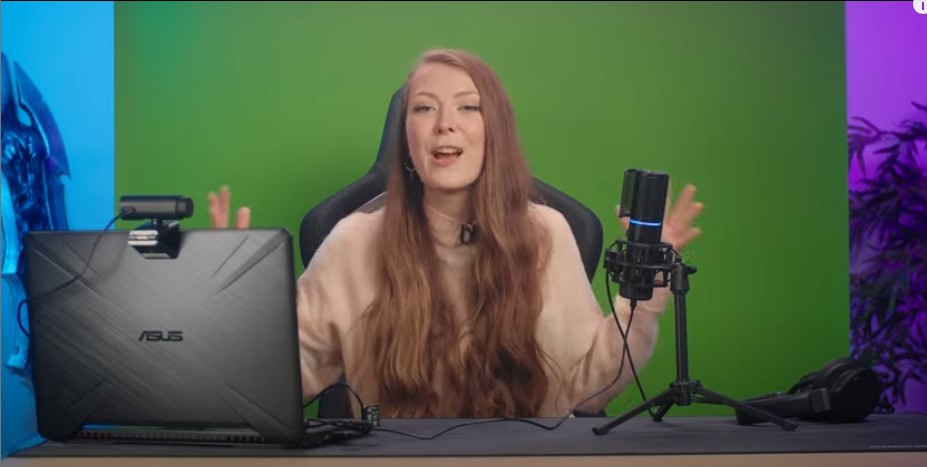
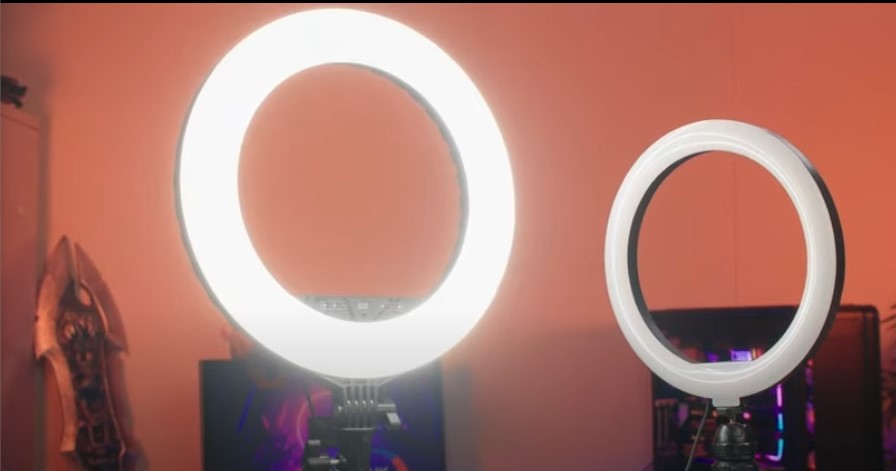
5. After this, you are ready to configure your lighting. To make sure you are always looking your best, you will want to situate your lights on either side and from the front. Good lighting will make any webcam – high- or low-quality look better and more professional. If you are planning on implementing a green screen into your set-up, you will need to ensure that your lighting doesn’t result in any shadows.

Setting up Broadcasting Software:
Now you’ve got all the tech – you need to move on to configuring your capture software.
Broadcasting software enables you to capture and stream your content to your audience by transmitting the footage from your display to your desired platform. The most widely used examples are OBS, XSplit and Streamlabs.
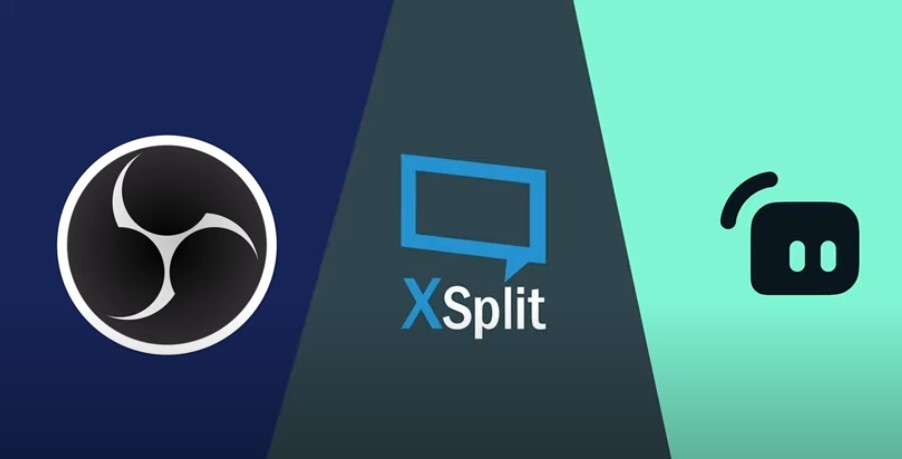
We’ve chosen OBS to use in this guide as it’s free to download and easy to use.
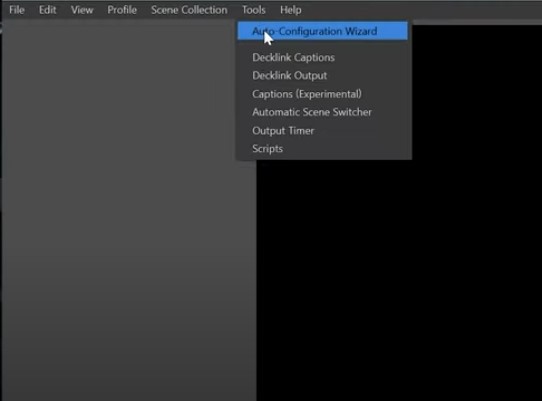
- Begin by downloading and installing OBS. The simplest way to get started with OBS is by using the Auto-Configuration Wizard.
All you need to do is follow the steps on screen and the tool will automatically test your PC and attempt to find the perfect configuration based on your hardware. This will include, streaming or recording, resolution, bitrate, and encoder. There is also the option to input your streaming platform by logging into your account.
Alternatively, you can add your stream Key, which can be found in your account details on your chosen platform.
If you’ve not yet made an account for your desired platform, open your browser and do that now. The most widely known are sites such as Twitch, YouTube and Facebook. In our example, we are going to use Twitch.
2. Once the testing is complete, OBS will display what it believes to be most suitable depending on your internet and PC.
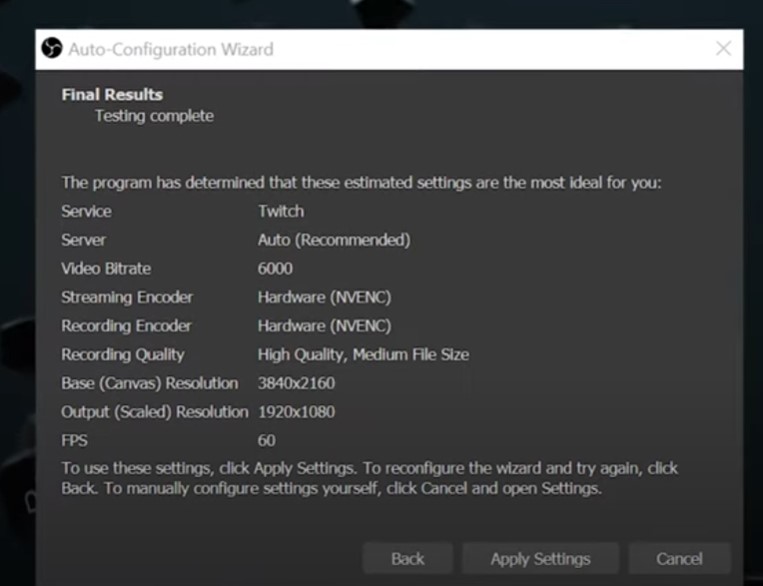
3. If you take a closer look at our settings here, OBS has recommended a video bitrate of 6000KBPS, which is actually the Twitch recommendation for the best bitrate for HQ 1080p streaming. In addition, the configuration wizard tool is suggesting that we use Hardware NVENC encoding.
(It’s important to note, NVENC is the encoder used by NVIDIA GPUs. So don’t panic if yours is different! If you have an AMD card, yours will say VCE or Quick Sync for Intel)
4. The final thing to check, is the FPS. If you want to truly grab the attention of your viewers, you want to achieve the glorious, smooth 60 FPS gameplay. Thankfully, 60 FPS is currently the highest frame rate that OBS can support. This will, however, depend on what platform you are streaming to. YouTube live, for example, can support streams at 4k and 60 FPS, if you’ve got the PC and internet to handle it.
5. Remember, you can also go into the Output settings menu later to change this manually. Plus, you want to run the Auto-Configuration Wizard once more, go into the Tools menu.
Setting up Audio:
- By default, OBS studio is configured to capture your desktop audio and microphone. You can verify this by looking at the volume meters in the Audio mixer of the main OBS studio.
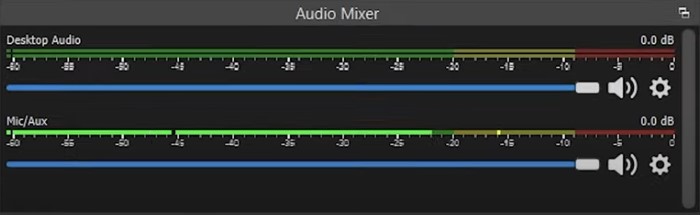
If you want to manually set up your audio, click on settings > audio > then select the devices you want to use. Check the volume levels and adjust the gain until the peak of your voice is hitting the 10db mark, which is near the top of the yellow on OBS.
Setting Up Video Sources:
- Now it’s time to add your video sources. You want to begin by selecting the option ‘Sources’, found in the bottom of the OBS window. Click the + or right click inside the Sources box and select the one you want to capture.
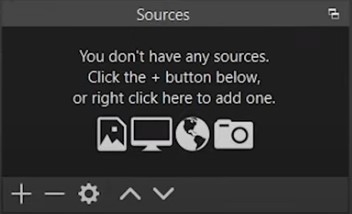
- To record everything visible on a monitor – Display Capture
- To record a game – Game Capture
- To record non-game applications – Window Capture
- To record your webcam or capture card – Video Capture Device
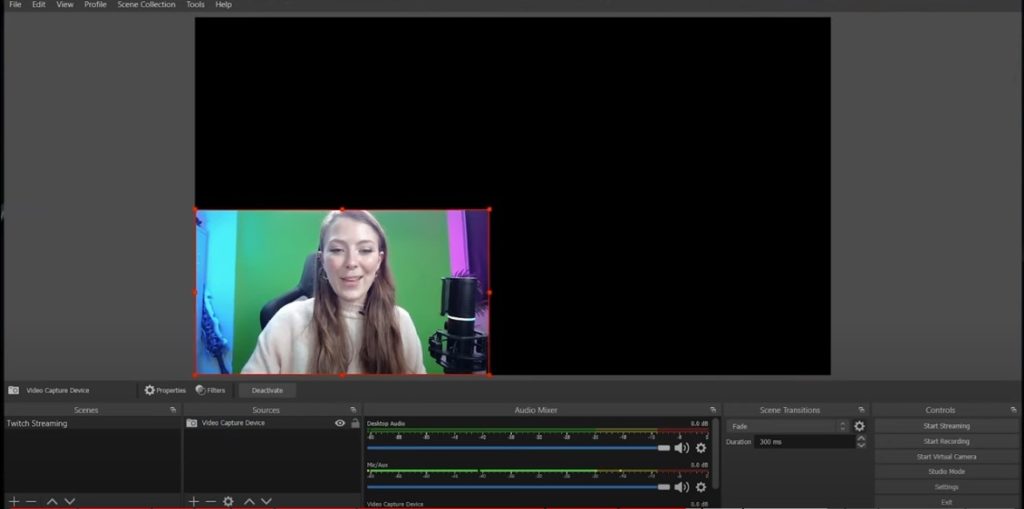
2. Your chosen source will now appear in the preview window. This is where you can customise the size of your content by selecting them and dragging the corner. For gaming, we would suggest making the webcam quite small and moving it into the corner.
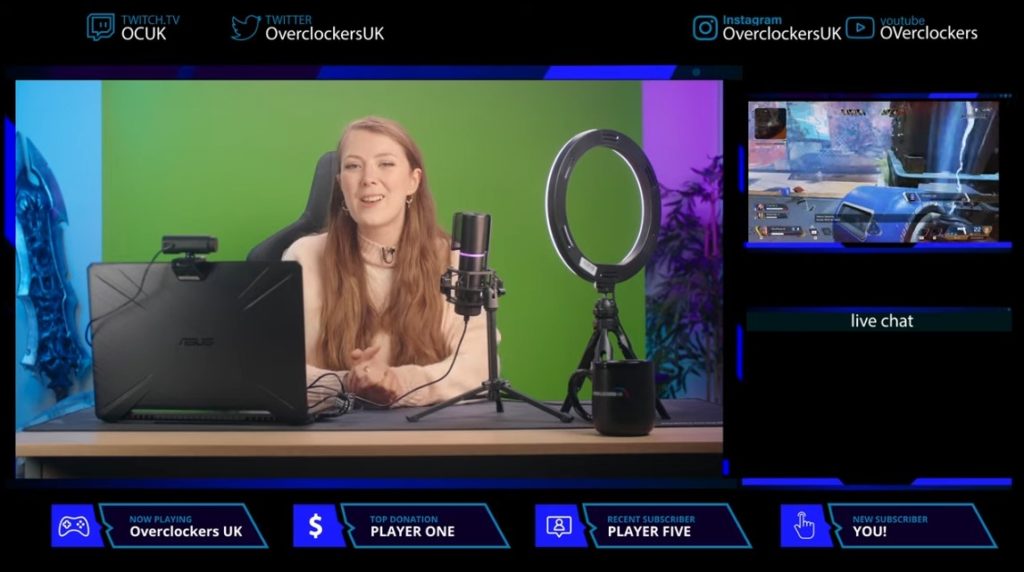
3. OBS also includes a feature to add your own custom Stream Overlay. This can really add a personal touch to your stream and develop your own sense of style and brand. You can create your own using Photoshop or with one of the many online services.
These can be added as a source and we would recommend that you make and add them as different scenes. This will add variety to your content and make your stream appear more professional. Such as, including a break screen when your stream is paused.
Configuring Your Green Screen:
Now you’ve configured your audio and added your video sources, you can add in your green screen.
- Right click on the webcam source and select > Filter > click the ‘+’ under the effect filter section > then chroma key.
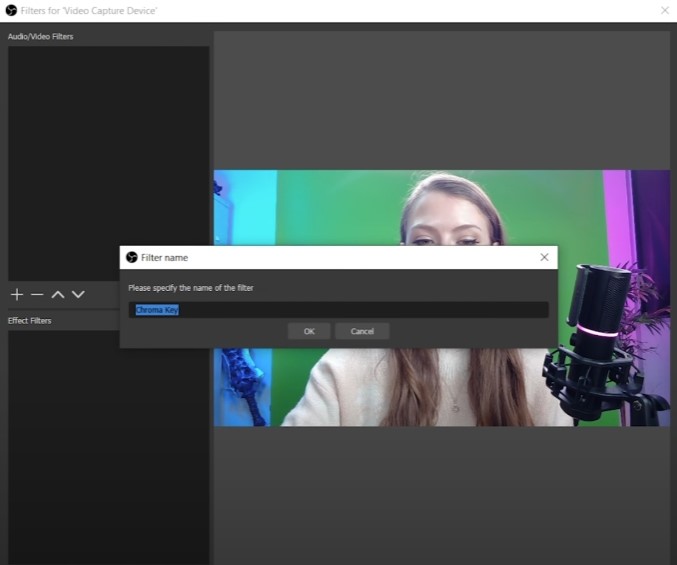
2. When adding a chroma key, OBS will automatically configure the settings. However, in most cases, you will need to manually fine tune this using the slider to ensure all the green is taken out. You will need to tweak them and play around until you achieve your desired look.

3. If you are still having issues, you may not have enough lighting hitting your screen and it’s creating unwanted software. Play around with your lighting and make sure you also aren’t wearing green!
Order:
- The final thing to do, is to double-check the order of your sources. This is an important step as you don’t want to have your webcam source below your gameplay source. Otherwise, you won’t be able to see your webcam.
- If they aren’t in the wrong place, simply drag them into the correct place.
- If you’ve got a green screen, you can put your webcam over the top of your gameplay and make it appear as if you are a part of the game.
It’s Time to Go Live!
That’s it! It’s time for you to go live! When you’re ready, all you need to do now is click on > start streaming.
Other Things to Consider:
Some more things for you to consider implementing into your stream are popular adds on, such as sound alerts, which allow your audience to interact with your stream. Along with the Moobot plug in a dedicated bot which helps with the complicated, more arduous tasks of streaming, such as sharing social media profiles or removing undesirable comments from your chat. This allows you to focus on what is more important, engaging with your audience and building your community! To make this easier – why not invest in a stream deck?
This handy accessory is compatible with a wide range of streaming platforms, such as Twitch, and allows you to create individual macros. Change scenes, switch cameras, lighting and much more with the push of a button. We would recommend the Elgato 6 Key Stream Deck.
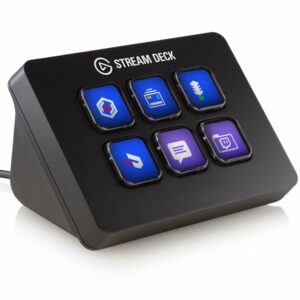
Elgato 6 Key Stream Deck
- 6 customisable key LCD
- USB 2.0 connectivity
- Compatible with Elgato Game Capture, OBS, Streamlabs, Twitch and much more!
To ensure you can engage well with your chat – why not invest in a second monitor? This will allow you to always have your eye on your chat, followers, and makes it easier to engage and interact with your viewers by removing the need to alt-tab back and forth between Twitch and your game. We would recommend the incredible 27’’ ASUS ROG Swift Gaming Monitor!
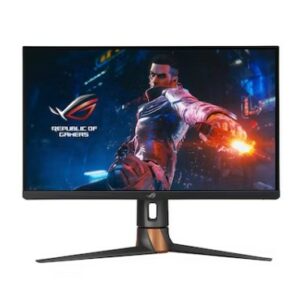
ASUS ROG Swift 27” Gaming Monitor
- 2560×1440 display resolution
- 360Hz refresh rates
- IPS panel
- G-Sync compatible
- 1ms response time
Get Started with Streamplfiy
If you are now inspired to kickstart your very own streaming channel – check out Streamplify‘s range of high-quality streaming accessories.
Streamplify MIC
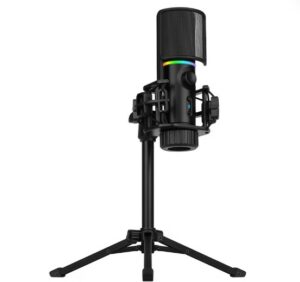
- Cardioid microphone
- Two audio out modes: Full and One Way Playbacks
- RGB lighting
- Includes tripod and shock mount
Streamplify LIGHT 10”
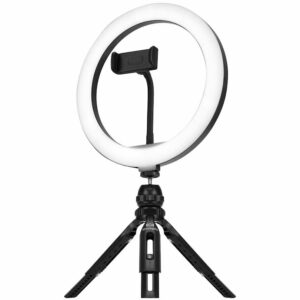
- 10” ring light
- 10 different levels of brightness
- 3 contrast levels
- Includes smartphone holder, camera mount, and tripod
Streamplify CAM
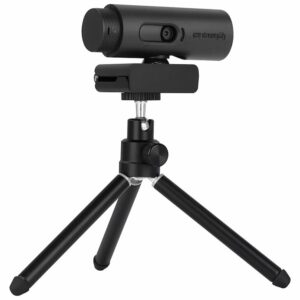
- 1080p Webcam
- Records in full HD at 60 FPS
- Integrated dual microphone
- Auto-adjust feature
The Overclockers UK Academy
Dedicated to helping you troubleshoot simple PC issues, check out our range of OcUK Academy articles and videos for more!
Looking for the best streaming tips and tricks? We’ve compiled the Overclockers UK Ultimate Collection of Streaming Guides. Be sure to check it out!
- 10 min read
Ruth Rowley
Author
Ruth has been with Overclockers UK for over a year and has gone on to write about everything ranging from in-depth hardware guides to monthly game releases.
Outside of writing blog posts, she can be found wrapped in a blanket with her black cat, engrossed in a book or playing life-simulation games such as The Sims, Stardew Valley, and Animal Crossing.
Read More >>