
Memory can be the root cause of all sorts of issues. As such, troubleshooting this can become a difficult and seemingly impossible task if you are new to DIY PC building.
That’s where this helpful tutorial from the OcUK Academy comes in! As the experts on building PCs, we’ve compiled all our knowledge into this guide on how to reseat and reinstall your RAM/memory. Our aim here is to help you solve simple technical issues before you spend money on a hardware replacement or submit an RMA with us.

Before you start – remember to shut down, turn off and unplug your PC!
Watch how to reseat or install RAM:
Our step-by-step guide:
How to reseat memory:
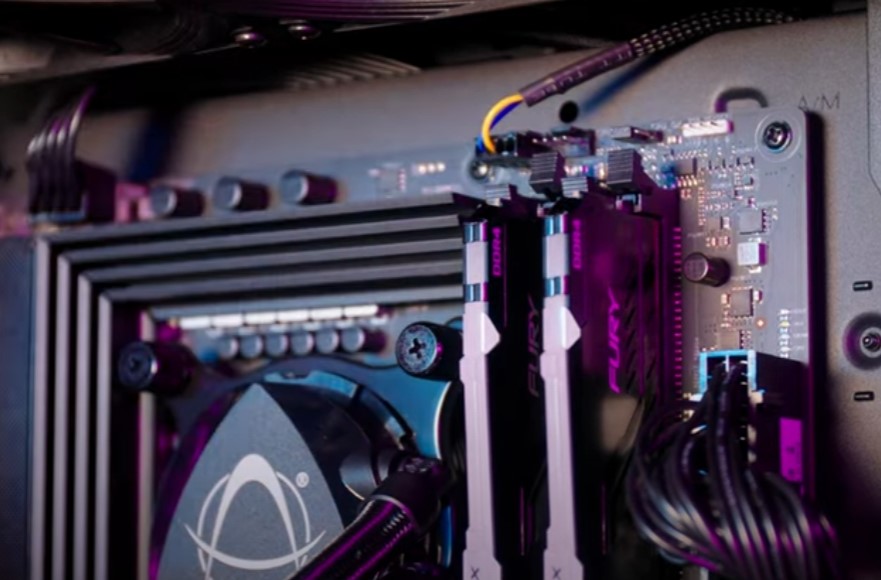
- First, turn off your PC and remove the side panel. Then you need to identify the memory modules. These are nearly always located in the same place in every PC – to the right of your CPU and cooler. Your RAM modules may look different to the model pictured, depending on the manufacturer, heatsink, RGB lighting, etc.

2. There might be one or two retaining clips keeping your memory in place. These need to be undone before each stick can be removed. They are located at either the top or bottom of the slot and you simply need to push down on each one to unclip.
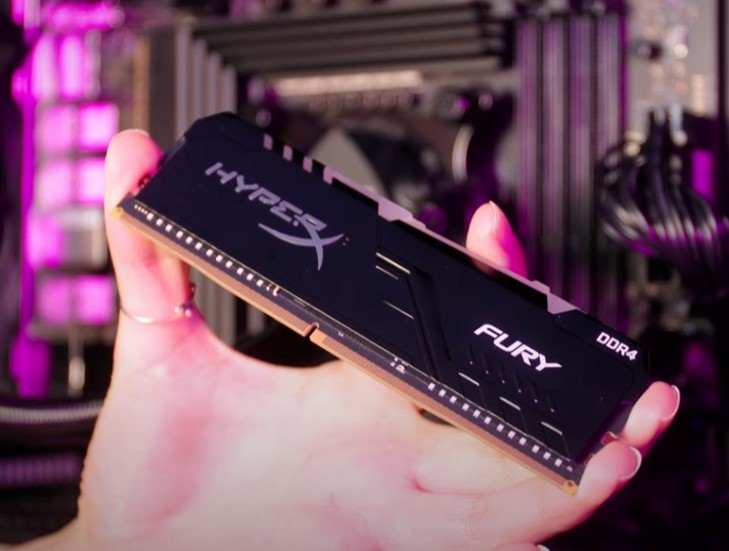
3. The memory will now rise up from the motherboard and you can carefully remove it. Try not to touch any of the more delicate components. Instead, hold the edges of the module or heatsink if there is one.
4. If you are reseating the memory, begin by carefully slotting it straight back into place, in the same slot. Ensure you apply even pressure across the stick as it will require a firm push in order to click into place. If you feel as if you are forcing it, double-check that both clips are still undone and that the module is lined up correctly.
Installing Memory
If it’s time to install new memory, you will want to start with ensuring you have the correct memory type. This is likely to be the current standard, DDR4 or next-gen, DDR5. Alternatively, if it’s in an older PC, it could be DDR3, DDR2, etc. Your motherboard manual will tell you what it supports and at what speed.
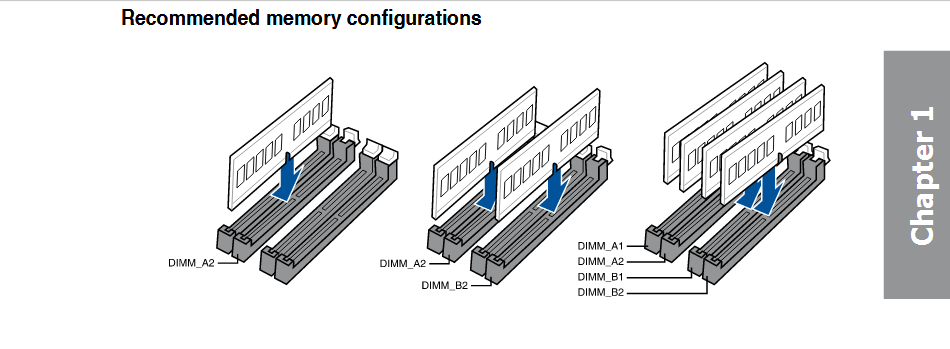
In addition to selecting the correct RAM type, you need to check how many memory slots are available on your motherboard. This will directly affect how much RAM can be installed. A standard motherboard typically has 4 DIMMS in which memory can be installed. However, don’t mix and match RAM from different manufacturers. RAM kits are designed to work efficiently with the included modules and if you mix and match, you may experience performance issues.
Don’t worry if you no longer have your motherboard manual. Simply search for your motherboard manufacturer and model number on Google.
How to reinstall your RAM:
- To begin with, remove your new memory from the packaging carefully and identify the notch in the PCB. This will line up with the DIMM slots on your motherboard. Memory can only be installed in the correct orientation so you need to double check each RAM stick before pushing it into place.
- Check that the clips are still undone and push each RAM stick into place with even pressure. Often you will hear a click when you’ve pushed it in far enough and the clips will fold back over to hold the RAM in place.
3. That’s it! You’ve finally successfully reseated or installed your brand-new memory kit!
How to enable XMP:
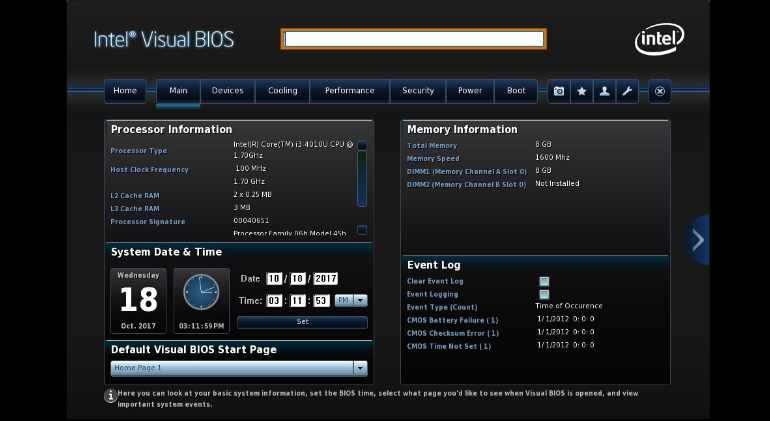
Once the new memory has been installed, it’s time to enter your motherboards BIOS and ensure that the XMP (Intel CPUs) or DOCP (AMD CPUs) setting is enabled. These profiles automatically increase the memory latency and speed from the standard 2133MHz to the advertised frequencies.
Your motherboards manual will detail what keyboard keypress is required to open your BIOS setting on boot, usually, this is the delete or F12 key. Once in the BIOS, you simply need to locate the correct tab. Often it will be easy to access on the first page in BIOS or check the manual to find the location.
Enabling XMP or DOCP will ensure your RAM runs at the correct speed and you get the performance you paid for!
AMD EXPO:
Now available on compatible RAM kits and the latest gen of AMD processors is AMD EXPO. AMD EXPO, or Extended Profiles for Overclocking, is AMD’s alternative to Intel XMP. It has been fine-tuned to deliver high-speed memory overclocking which is easy to use.
If you want to read more about AMD EXPO and how to use it, be sure to check out our dedicated blog post.

How to troubleshoot RAM in Windows:
If reseating your RAM kit hasn’t fixed the issue, you can also use Windows Memory Diagnostic Tool or Memtest86 to troubleshoot.
Windows Memory Diagnostic Tool
Windows built-in Memory Diagnostic Tool is simple and easy to use.
- Search for ‘Windows Memory Diagnostic’ in the start menu and open the application.
- Select restart now and check for problems. Windows will then automatically restart, run a test, and reboot back into Windows.
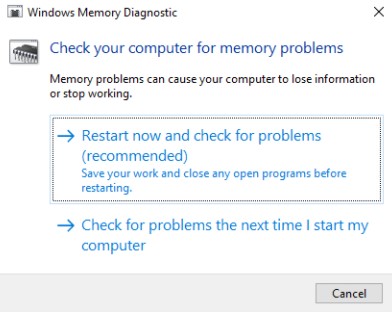
3. Once your PC has restarted, wait for the result message. This can take a few moments to pop up as your PC reboots.

Memtest86
PassMark’s Memtest86 is another tool for testing your memory. Memtest works without an operating system, meaning it will work on Linux as well as Windows PCs. The software runs off a bootable USB stick and is straightforward to use.
- Firstly, download PassMark Memtest86.
- Extract the contents into a folder on your PCs desktop.
- Back up your data on a USB stick as PassMark’s tool will format the USB stick.
- Run the ‘imageUSB’.
- Select the correct USB drive and then ‘Write’.
- Make sure to double check all the information is correct.
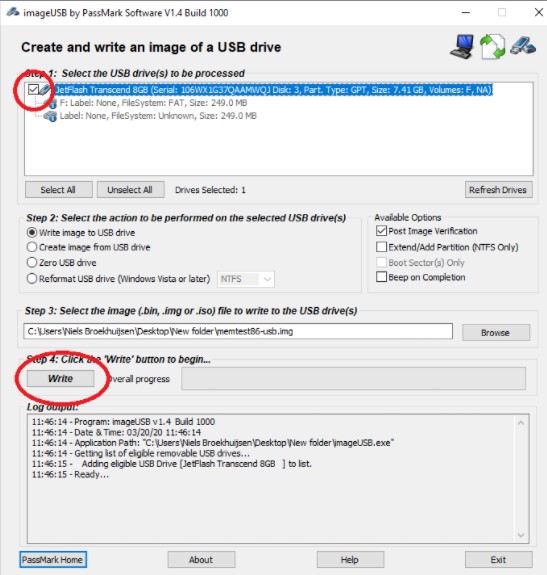
7. Writing will take a few minutes, depending on the speed of the USB.
8. Next, you need to restart your PC and enter the boot menu – the keypress needed will be located on your post screen.
9. Boot off the USB stick.
10. Press ‘Config’.
11. Select ‘(S)tart Test’ in the Memtest86 home screen.
12. The application will now run until completion or errors appear. Depending on the memory size, testing can take from 20 minutes up to a few hours. If you receive an error – stop testing, you’ve found the problem with your RAM kit!
Alternatively, our support team is available to call Mon-Fri 9am – 5pm. Take a look at our dedicated pages on how to contact us or set up an RMA to return a product to us.
In the mood to upgrade?
If you are suddenly in the mood to upgrade your RAM – why not take a look at the huge variety of memory available at Overclockers UK. Faster memory can vastly improve your gaming PC’s responsiveness and larger memory capacity is useful for gaming, multitasking, video editing and so much more!
I’ve included two examples of incredible RAM kits that we have on offer. One of which is the latest DDR5 standard. If you want to find out more information about the differences between DDR4 and DDR5, check out our dedicated blog post.
TeamGroup Vulcan Z T-Force 32GB DDR4 Dual Channel RAM Kit
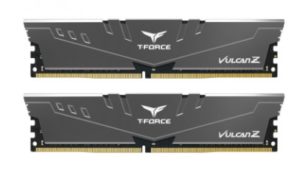
- 2 x 16GB RAM Modules
- Integrated aluminium heat spreader
- Intel XMP 2.0 support
- Hand selected IC chips
TeamGroup Delta RGB 32GB DDR5 Dual Channel RAM Kit
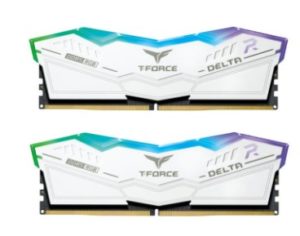
- 2 x 16GB RAM Modules
- Intel XMP 2.0 and 3.0 support
- Support for on-die ECC
- Hand selected IC chips
- Integrated smart RGB IC controller – compatible with ASUS Aura Sync and many more
The Overclockers UK Academy
Dedicated to helping you troubleshoot simple PC issues, check out our range of OcUK Academy articles and videos for more!
Building your own gaming PC can be a daunting task. That’s why we’ve put together the Overclockers UK Ultimate PC Building Guide.
- 8 min read
Ruth Rowley
Author
Ruth has been with Overclockers UK for over a year and has gone on to write about everything ranging from in-depth hardware guides to monthly game releases.
Outside of writing blog posts, she can be found wrapped in a blanket with her black cat, engrossed in a book or playing life-simulation games such as The Sims, Stardew Valley, and Animal Crossing.
Read More >>