When your PC won’t post or you are suffering from instability issues and can’t access the BIOS – a way to troubleshoot this issue is resetting your BIOS by removing the CMOS battery. Thankfully, it sounds far more complicated and stressful than it actually is!

Our OcUK Academy’s helpful guide and video tutorial detail exactly what you need to do to reset your BIOS and remove the CMOS battery on your motherboard. Our aim here is to save you time and money by reducing the need for a hardware replacement or submitting an RMA with us. You’ll become an expert DIY PC builder in no time!
Before you start it’s important to make sure you turn off your PC and unplug the power.
Watch How to Reset Your BIOS:
Our Step-by-Step Guide:
How to identify the CMOS battery:
- Begin by turning off your PC and unplugging the power. Next you will want to remove the side panel and identify your motherboard. This is the large flat component everything is connected to.
- Then you need to identify the CMOS battery. Normally located in the bottom half of the motherboard and appears similar to a giant watch battery. It could be located underneath your GPU. In this case, you will want to take a look at our dedicated article on how to reseat your GPU if you need help accessing the battery. If you unable to find it, your motherboard manual will detail its exact location.
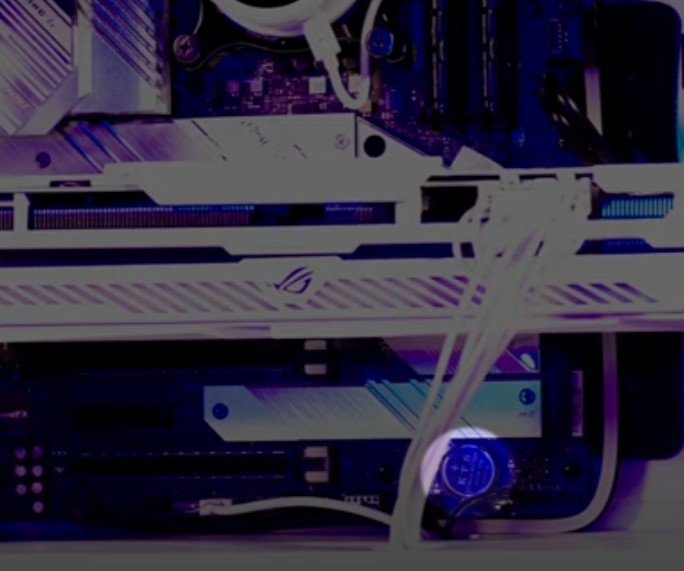
The CMOS battery provides a consistent power supply so your motherboard can save BIOS settings, even when your PC is turned off. When this is removed, your BIOS will automatically reset and all your custom profiles and settings will be wiped.
How to remove the CMOS battery:
- Next, you will want to remove the battery via the clips attached to the motherboard. Gently hold the clip down and remove the CMOS.

2. Once you’ve removed the CMOS battery, you need to wait several minutes before reinstalling.
3. Once the battery is inserted, you can plug your PC back in and turn it back on. You now need to go into the BIOS and reload your saved profile or create a new one by entering all the relevant settings, including XMP. Remember to also select the correct boot drive. After which, save them all as a new profile.
If you’ve had the same motherboard for over 5 years, you may want to consider replacing it with a new battery, instead of reinserting the old one. The CMOS battery may need replacing if you are experiencing issues with your overclock setting being lost or clocks not keeping time.
More Ways to Reset Your BIOS:
Load Setup Defaults:
If you can access the BIOS, one way to reset it is by using the ‘Load Defaults’ option.
- To begin with, you need to enter the BIOS and find the ‘Setup Defaults’ option. The location of which varies between different BIOS settings but typically it will be called ‘Reset to Default’/’Factory Default’/’Setup Defaults’.
- Select the ‘Setup Default’ option and your BIOS will usually begin to reset immediately.
- Once this is done – you will to need your changes. To do so, you may need to exit the BIOS and your PC will automatically reboot. If you need to change the BIOS once it has been reset, you may need to reboot your PC once more and enter the BIOS again to change this.
CMOS Jumper:
In some cases, your motherboard will have a clear CMOS jumper. This can be used to reset your BIOS.
- Similar to remove your CMOS battery, you need to shut down your PC and unplug it from the power. It is also best to ground yourself to get rid of any static electricity.
- Then you will want to open up the side panel and identify your motherboard and CMOS jumper.
- The CMOS jumper is a three-pin jumper on the motherboard that controls the BIOS. Usually, it can be found near the CMOS battery itself. The jumper will be covering two out of the three pins. It may be labelled CLEAR/CLR/CLEAR CMOS/PSSWRD, or a variety of other labels. If you are unsure – check your motherboards manual as this will detail where to find the CMOS jumper.
- Next, you will need to move the jumper to the other two pins. If the CMOS jumper is covering the first and second pins for example, you need to move it so that it is covering the second and third pins. Be careful when removing the jumper – you will want to pull it straight up so you don’t bend any of the pins.
- Now press the power button on your PC. Press and hold the power button for around 10-15 seconds to eliminate any remaining power which will make the BIOS reset.
- Return the CMOS jumper back to its default position. Put the jumper back on the pins that it was originally on.
- Now, you can plug your PC back in and turn it on. You will have to enter the BIOS to configure and save your desired profiles once more.
As you’ve been studying how to reset your bios, you might have heard the words UEFI or Legacy BIOS thrown about. Want to know the differences between the two types of BIOS? Read our blog post for more.

The Overclockers UK Academy
Dedicated to helping you troubleshoot simple PC issues, check out our range of OcUK Academy articles and videos for more!
- 6 min read
Ruth Rowley
Author
Ruth has been with Overclockers UK for over a year and has gone on to write about everything ranging from in-depth hardware guides to monthly game releases.
Outside of writing blog posts, she can be found wrapped in a blanket with her black cat, engrossed in a book or playing life-simulation games such as The Sims, Stardew Valley, and Animal Crossing.
Read More >>