
Performing simple troubleshooting in both Windows 10 and 11 can help save you from stress and the cost of sending your PC off for unnecessary repairs. Basic diagnostics can help to detect and fix a huge list of pesky problems with your PC, allowing you to get back to your thrilling adventures across your favourite gaming worlds.
That’s why we’ve put together this helpful guide, detailing why you should troubleshoot issues and how you can do this in both Windows 10 and 11.
Why Do I Need to Troubleshoot Windows 10 and 11?
Performing easy-to-do Windows 10 and 11 troubleshooting allows you to quickly spot and resolve a variety of problems and errors on your PC. The most common errors and issues you can fix include:
- Slow PC performance
- Unresponsive applications
- Blue screen errors
- Audio not working correctly
- Networking issues
- Windows Updates not downloading correctly
Built-in Windows Troubleshooting Tools:
Both variants of the operating system come equipped with their own suite of dedicated troubleshooting tools, including:
- Bluetooth – Designed to help fix any issues with Bluetooth, including being unable to connect your devices.
- Hardware – Can help to fix any hardware related issues.
- Windows Update – Designed to fix your PC not updating properly.
- Network Adapter – Fix any issues related to your Wi-Fi connectivity or Ethernet.
- Program Compatibility – Designed to help troubleshoot any problem caused by an application/program not running correctly.
- Playing Audio – Resolve any audio issues whilst listening to music, watching movies, and more.
In addition to this, both Windows 10 and 11 feature a troubleshooting history, which details a complete history of all the troubleshooting fixes you’ve performed in the past. This is especially helpful if you are sending your PC off for repairs, as you can give the repair service a full background of all the tools you’ve previously tried.
How Do I Troubleshoot My Operating System?
Windows 10:
In Windows 10, you can access all the built-in troubleshooting tools by going into Start > Settings > Update & Security > Troubleshoot. On the troubleshooting page, you’ll see multiple different options that are split into two sections – ‘Get Up and Running’ and ‘Find and Fix Other Problems’.
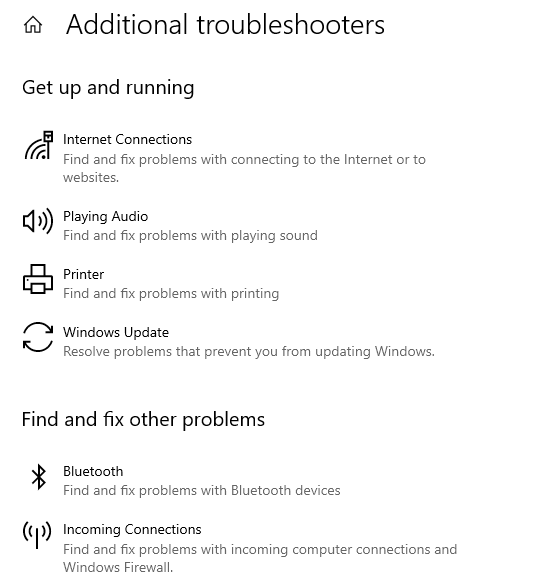
In the ‘Get Up and Running’ section, you’ll find troubleshooting options for playing audio, external devices such as a printer, Windows updates, and internet connectivity fixes. On the other hand, in ‘Find and Fix Other Problems’, you’ll find troubleshooting options for Bluetooth and Direct Access.
Windows 11:
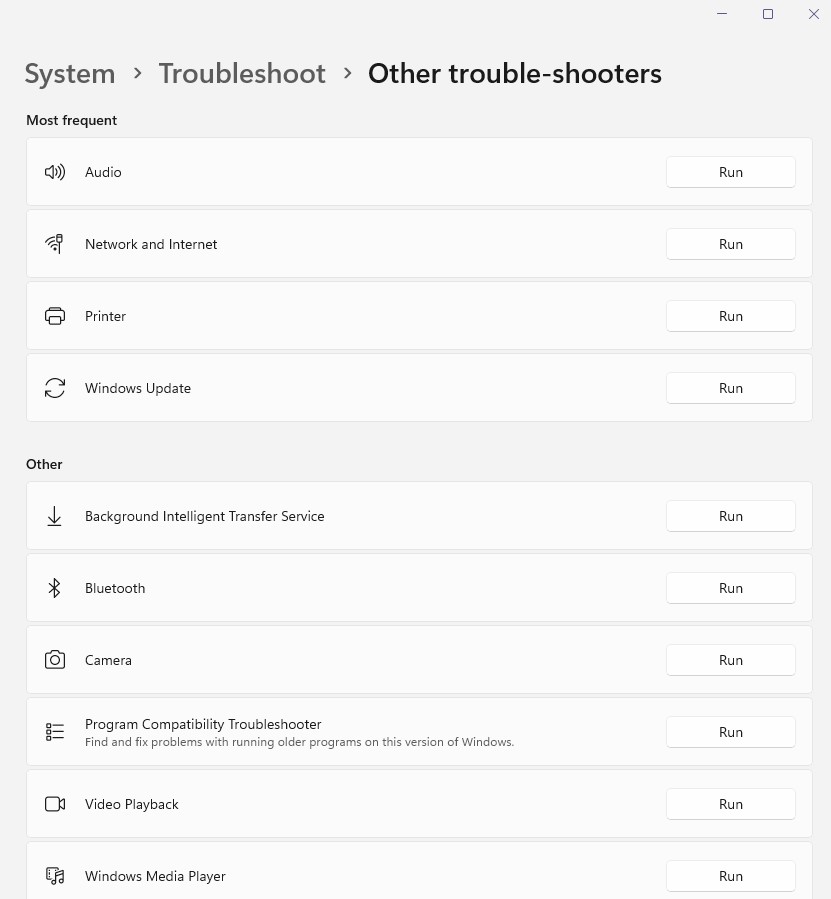
Alternatively, in Windows 11, press Start > Settings > System > Troubleshoot > Other Troubleshooters. Here, you’ll see a drop-down menu of all the built-in troubleshooting tools included with Windows 11, such as Windows Update or Network and Internet.
In addition to these troubleshooting tools, in Windows 11, your PC can also perform a critical troubleshoot. This will detect and fix any serious errors, such as corrupt settings, to ensure your PC remains up and running. Critical troubleshooting happens automatically and is a setting that can’t be turned off.
Touch Up Your Operating System Knowledge!
Did you like this article?

- 3 min read
Ruth Rowley
Author
Ruth has been with Overclockers UK for over a year and has gone on to write about everything ranging from in-depth hardware guides to monthly game releases.
Outside of writing blog posts, she can be found wrapped in a blanket with her black cat, engrossed in a book or playing life-simulation games such as The Sims, Stardew Valley, and Animal Crossing.
Read More >>